


Green Screen Tutorial: Improve the Branding of Your Online Courses
 Platform Review
Learn everything that you need to know in practice to use a green screen in your online courses, and make them look way more professional.
A very common question that I get from online course creators is how to use a green screen for online teaching.
If you are a bit familiar with green screens, you know that it's a recording setup that allows you to project yourself into the recording of your course lessons.
This might sound like it's something technically complicated that only a video professional could do, but that is actually not the case.
I'm going to cover here how you can easily do green screen recordings for your online courses, and use this simple technique to make your courses look even better and more professional.
This post is meant to help you improve the branding of your courses, check out these other posts here at the Course Creator Academy that are also related to course branding:
Personal Branding For Course Creators (Ultimate Guide)
Create a Powerful Brand for Your Online Courses (In 5 Steps)
And now without further ado, let's dive straight into the green screen tutorial.
Table of contents
What is a green screen, and why do I need it?
A green screen is a piece of recording equipment that you can use as a background for your course recordings.
Here is an example of a recording I made using a green screen. This is just the raw, unedited recording, and we can clearly see the green screen in the background:
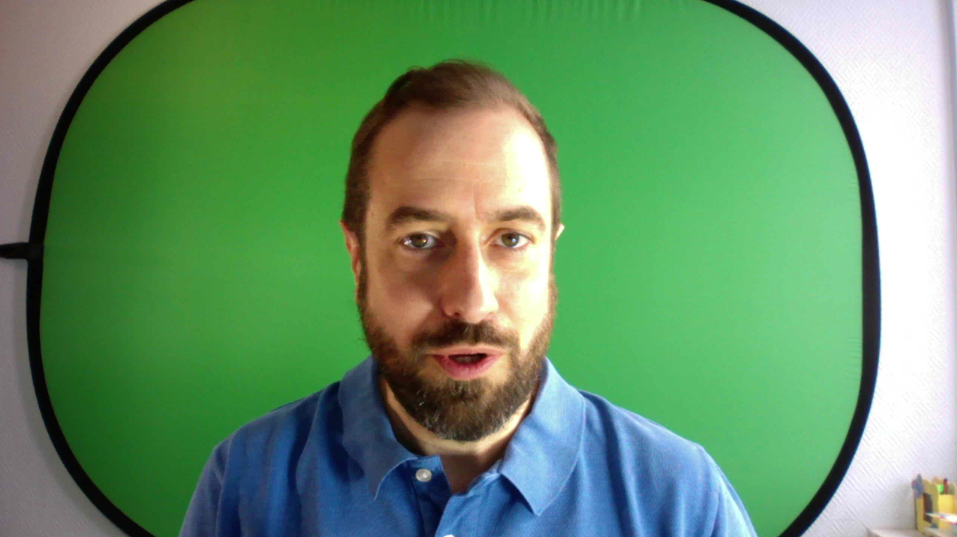
I was talking during the lesson, that’s why I look silly 🤣
As you can see, the green screen is just a bit of tissue, usually of green color, that you hang behind you while you record.
It doesn’t even have to be a foldable screen, you can also paint the wall in that same color, and it will also work perfectly, but you have to have the correct green tone, know as the chroma key color.
Using the green screen, you can then edit the video using any video processing software of your choice, and apply what is known as a chroma key filter.
Please don’t worry, it’s very simple to do. Once you edit the video, you can obtain a final result that looks something like this:

As you can see, this looks quite cool 😎 ! In this example, I have removed the green background from my recording.
Then I have used as a new background an image with the thumbnail of one of my courses.
As you can see, the end results look great!
Why use a green screen during the production of online courses?
First of all, I don’t think you absolutely have to, this is all completely optional.
The most important thing about your courses, and what is going to make them or break them from the point of view of your students, is the helpfulness of your voice explanation, and not any particular recording technique, no matter how great it looks.
I cover this in detail in this other post, in case you want to learn how to create the course that your students are looking for - The Secret To Creating a Successful Online Course (with High Reviews)
So why use a green screen at all? First of all, if you decide to show up on camera in some of your lessons, the green screen is going to make the course look just a little bit more professional.
If you don’t have a nice-looking studio, using the green screen allows you to still show up on screen and produce a nice video that looks a bit better for the student and creates a better initial impression, especially in promotional videos.
Although I consider using a green screen optional, I think it adds a great touch to my courses. So I use it only for the introduction and conclusion lessons of my courses, and for some of the promotional videos that I record.
This technique is very simple to pull off, you don’t need to be a video recording professional or anything. So how do you do it?
Step 1 - Get Yourself a Green Screen
There are different types of green screens. I have listed a couple of different options for you in this guide Affordable Online Course Equipment - Complete Practical Guide, with (non-sponsored) links to the products.
Here is my green screen that I have been using for years:
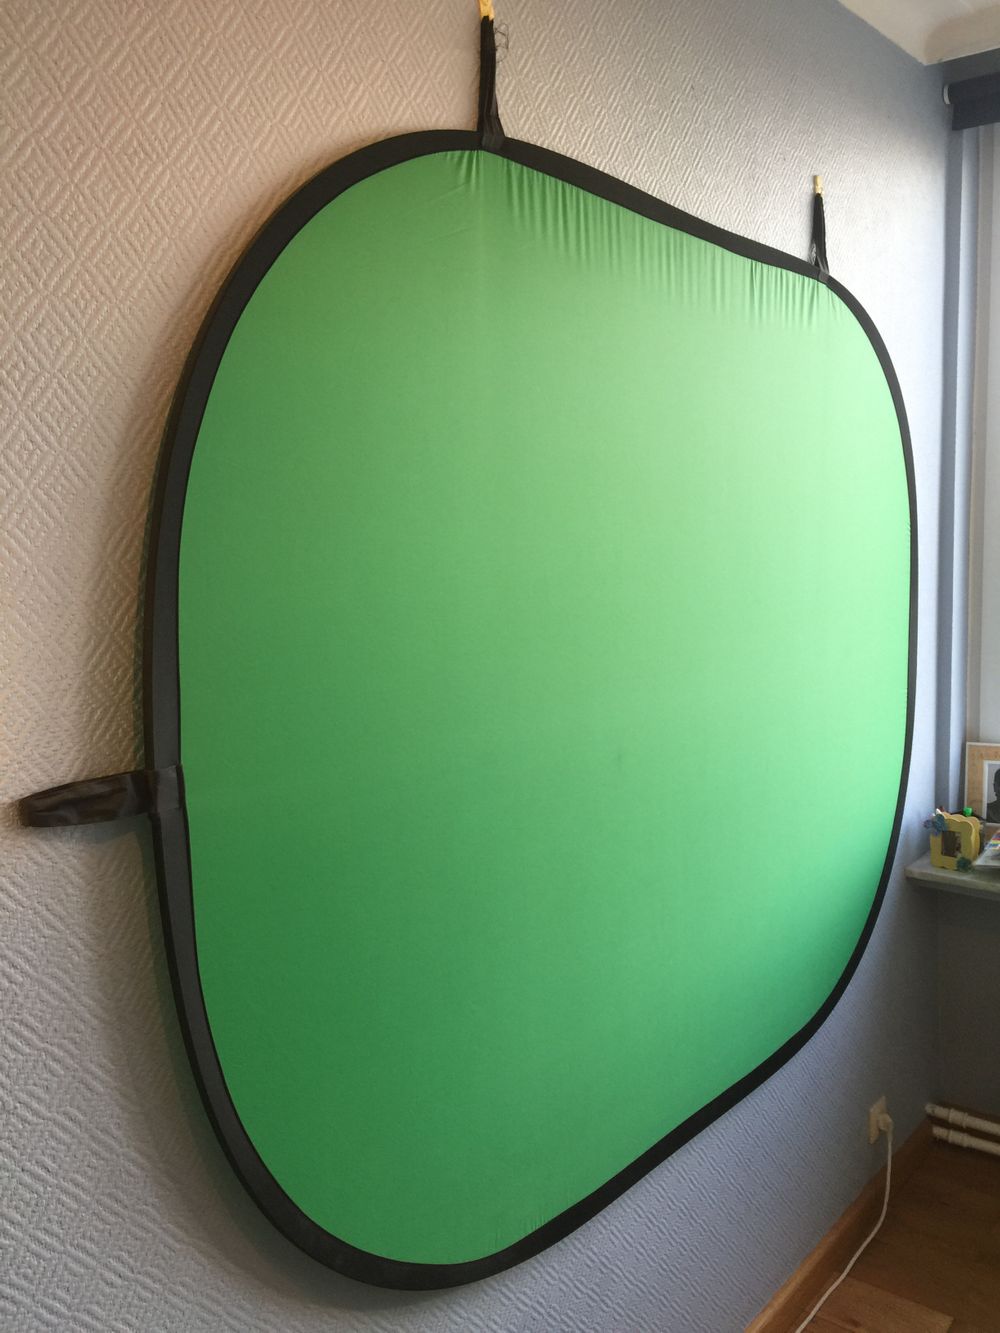
This green screen cost me around $30 several years ago. I just leave it in permanence hanging on the wall behind me, as I don’t want to go through the hassle of folding it and unfolding it every time, but it does fold to about one-third of it’s expanded size if needed.
As you can see, it’s a very simple and affordable piece of equipment
After purchasing your green screen and installing it, the question is now: how does all the magic happen?
Step 2 - Light correctly your recording
Once you install the green screen, you will usually also need some lighting. If you are next to a window in the middle of the day, you might not need extra lighting, but this is unlikely.
You can give it a try though, and try to apply the green screen technique without extra lighting, to see if it works.
As I stand right next to a window, I manage sometimes to do this without any extra light, so it might work for you too.
But in general, you want to make sure that you light the green screen background correctly, in order to make the green color the most bright and uniform possible.
What you are trying to do is to ensure that the green tone is about the same through all the surface of the green screen. This uniformity of color is going to help you later during the editing process.
I personally use a pair of these lights, one on each side of the green screen:
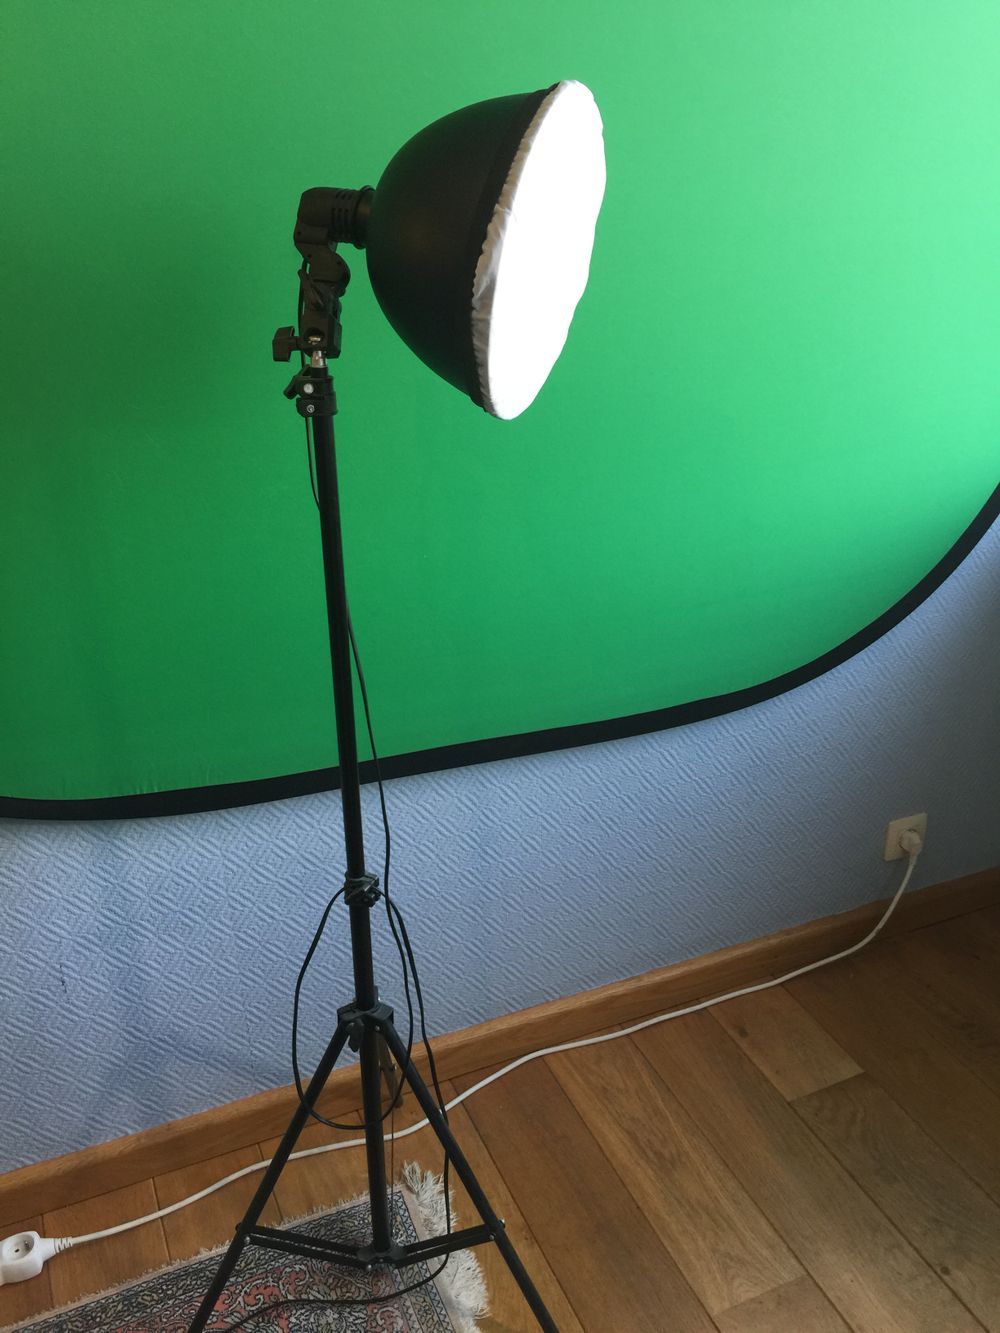
Again, these lights are linked from my equipment guide post, together with all the equipment.
But don’t worry about getting these exact lamps, any full white spectrum lamp will do the trick, just make sure that the light is diffused well.
For example, we can see that this lamp has a white cover, which will make the light spread out through the green screen, instead of concentrating on a single spot. This is going to help you obtain that uniform green color that you are looking for.
Once you have the lighting in place, you can start a test recording, to see if everything is working properly.
Step 3 - Remove the green background using a Chroma Key Filter
Once you make your test recording using the proper lighting, it’s time to import the video into your video editing software. I use Screenflow for Mac, but you can do something equivalent in any other video editing software that you choose.
You can then import the raw footage, and resize it to the size that you want:
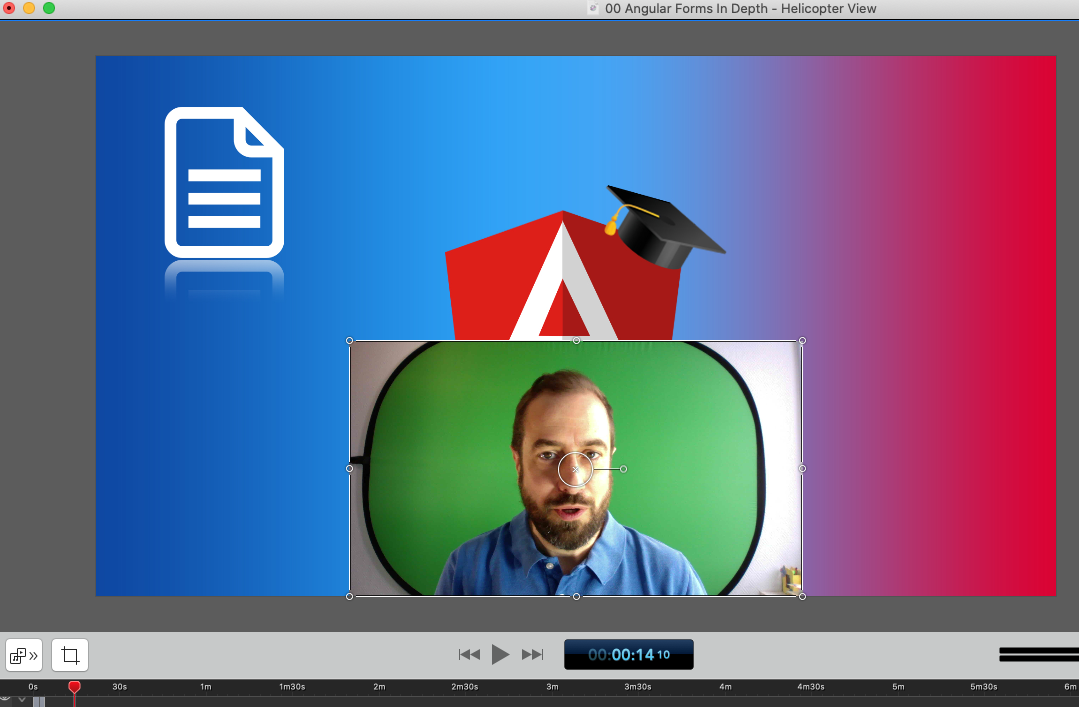
You can also already add the background that you want, in my case, I like to use the course thumbnail for some extra branding.
Then you will have to crop the green screen recording, remove all the edges, and leave only the green background.
Here is the same video, with the round edges of the green screen removed, and leaving only the green background.
This was done using the cropping settings in Screenflow, which you can see to the right of the screenshot:
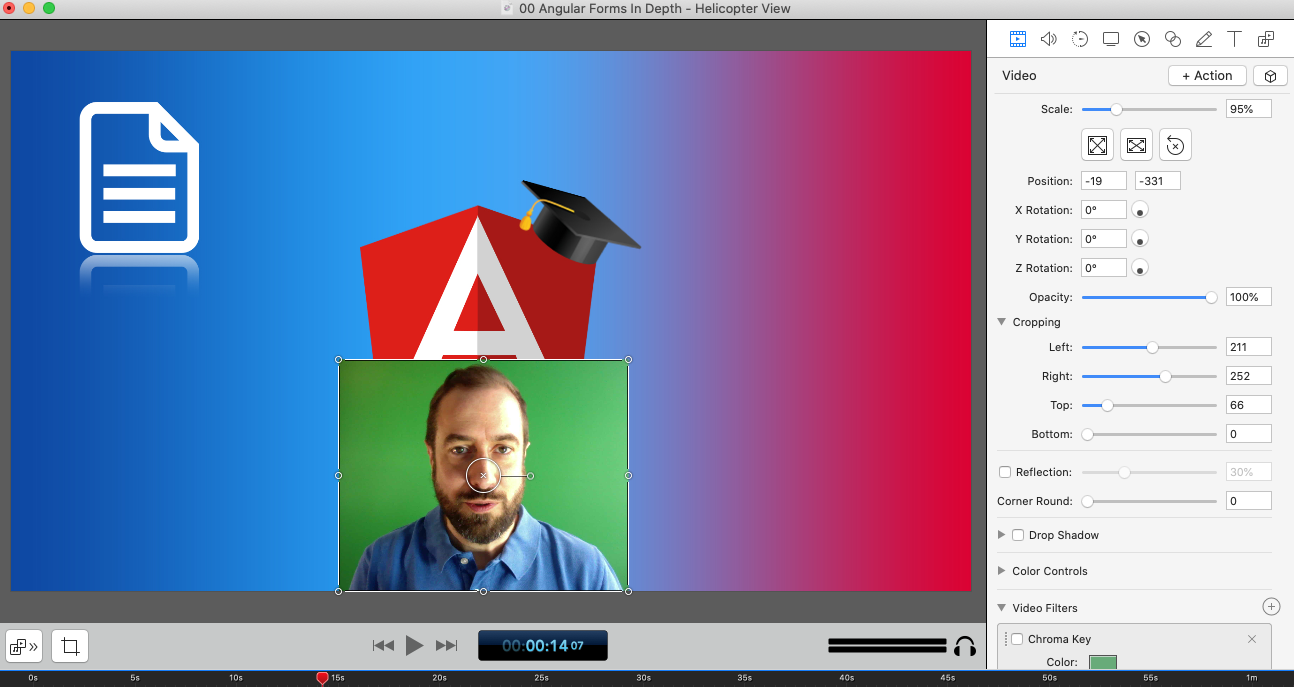
As you can see, the background has a nice bright green due to the lighting, and the green tone is relatively uniform.
This creates the ideal conditions to apply what is known as a chroma key filter. This is a software filter that we are going to apply to the video, that simply removes a set of colors from the picture altogether.
The areas in the recording with the green color will become transparent, and the image behind it will show up instead.
So we are essentially applying a color removal filter, it’s that simple! The color that will be removed is the green screen color (also known as the chroma key color), which is chosen because it’s just the color farthest away from all human skin tones.
This makes it very easy to remove the chroma key color from the recording, without affecting the rest of the recording.
Notice that if you are wearing a green t-shirt, that will disappear from the screen as well, so don’t do it 😀.
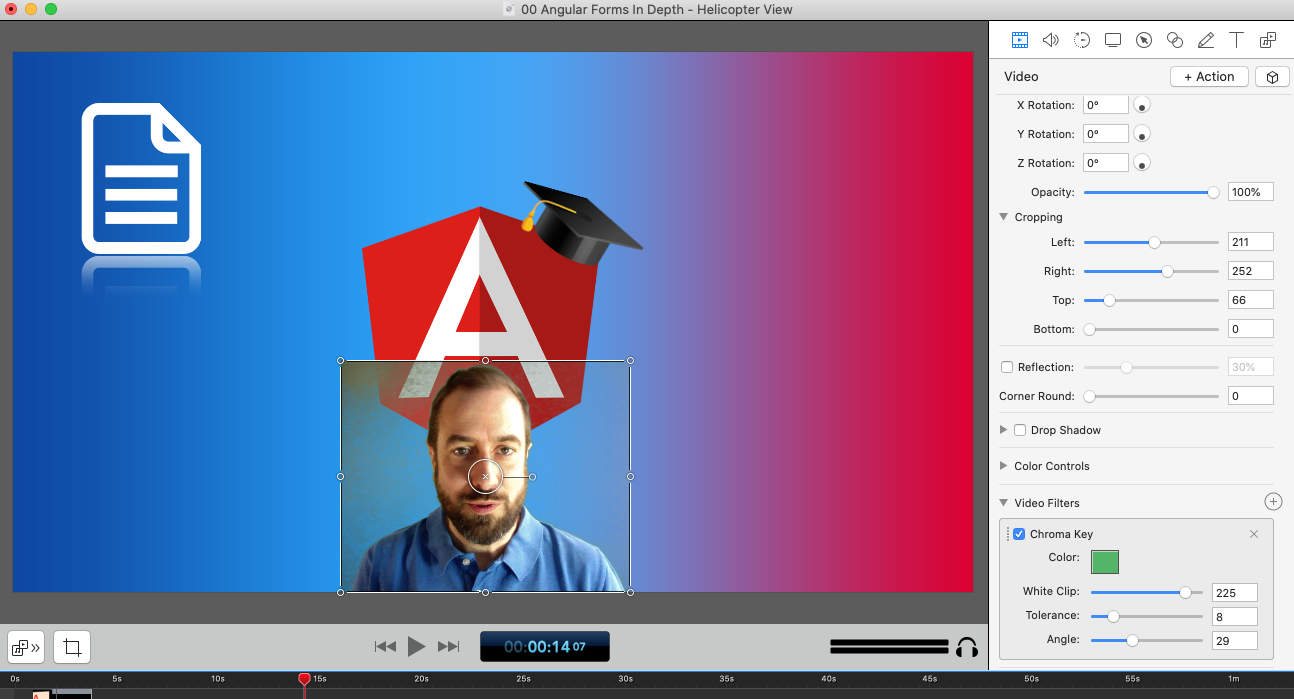
Now that we have cropped the picture, all we have to do is to apply the Chroma Key Filter, using the settings highlighted in the red box:

Here we have started by selecting the wrong color, and so we have removed a lot of the wrong colors from the image.
Notice that the green screen background wasn’t removed and that the color that we selected in the filter was close to red.
But now notice what happens if you choose to remove the color of the green screen background:

As you can see, now I have removed the green color, and so the background was deleted. This means that whatever I chose to place behind me is going to show up as the background of my recording.
To better understand what just happened, here is what happens if I remove the course logo as my background:
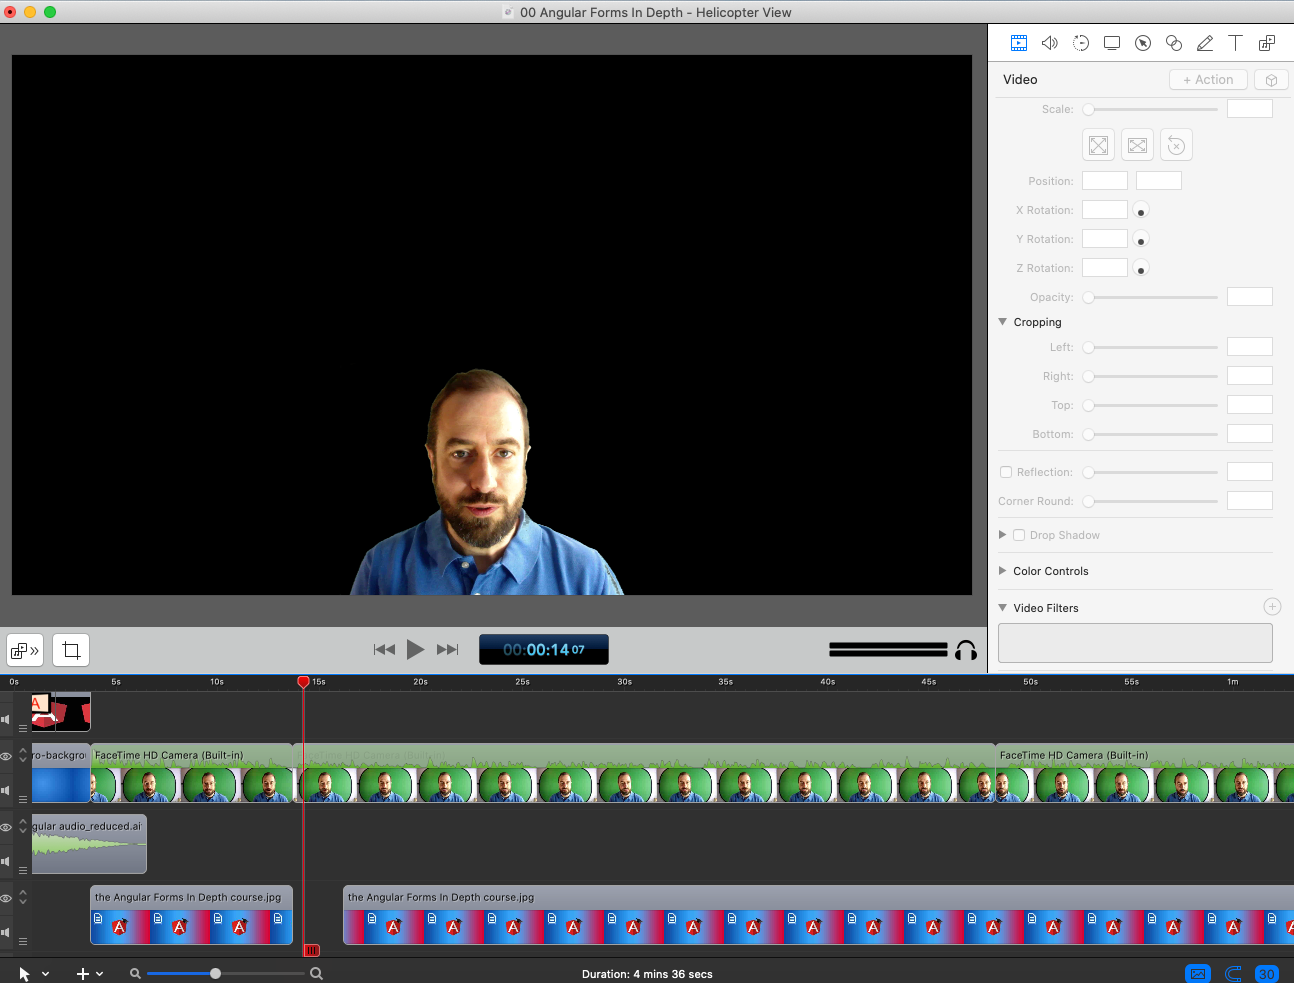
As you can see, without the background, all the space around me is transparent, and we only see the default black background of the Screenflow editor.
What are those special Chroma Key Settings next to the filter?
You might have noticed these special settings next to the panel to choose the color that you want to remove:
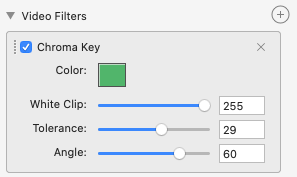
Long story short, if you light your green screen correctly, you almost won’t have to touch these settings. But in practice, I always end up needing to tweak them a bit.
If you don’t adjust these settings, this is what your recording might look like:
As you can see, we do notice the background. But if you play a bit around with the tolerance and the angle, with minor adjustments this will be fixed.
Start by slowly increasing the tolerance, and then slowly adjust the angle. If your screen is well-lit, you should get a perfect green screen effect in no time.
Conclusions
As you can see, it’s extremely easy to do a professional-looking green screen recording, and project yourself into your courses, to better highlight a point when there is not much going on in the recording.
This is also great for branding your courses and for creating a personal connection with your students, especially at the beginning and at the end of your courses.
This technique works great and is very simple to pull off, with just a little bit of trial and error.
Even though it's a simple technique, I wouldn’t abuse it and start using it in every single video.
This would greatly complicate your production process, and in certain situations having you projected into the recording all the time might even be distracting to the student, so it could end up being detrimental.
I hope that this helped you use a green screen in your online courses, as you can see it's super easy and it makes your courses that much more professional.
If you have any questions about online course creation, please post them on our Course Creator Facebook Group, you have a guaranteed reply there from either myself or one of our online course experts.
And if you are looking for a platform to host your online courses, create an account at OnlineCourseHost.com and start creating your courses using our Free Plan.
You can also use the comments below if you prefer. To get notified when I write new posts, you can subscribe to my weekly newsletter:
OK so that’s all I've got for today, I hope this helped and until next time I wish you Happy Teaching 😃!
Vasco Cavalheiro
OnlineCourseHost.com Founder & Online Course Creator
LinkedIn Facebook Page Facebook Group Twitter
You are welcome to ask me any questions in the comments below: 👇👇👇👇

 Start Here
 Course Creation Journey Step by Step
  Course Creation Software Reviews
 Online Course Marketing
 Course Creation Tips & Tricks
 Course Equipment
 Online Course Marketplaces
 Revenue Reports
 Best Practices
 Frequently Asked Questions
 Platform Reviews