


How to Create an Online Course (with an Intuitive Course Builder)
 Platform Review
Learn how to create an online course effortlessly with the intuitive OnlineCourseHost.com course builder. This guide covers everything from different types of courses and different lesson types: video, audio, rich text, quizzes, assignments, digital downloads, and more.
Creating an online course might seem daunting, but the right tools make it easier than you think.
That's why a user-friendly course builder provides all the tools you need to transform your expertise into engaging courses, without requiring technical skills.
In this guide, I'll walk you through how to create an online course effortlessly, using OnlineCourseHost.com, a powerful yet user-friendly course builder that simplifies the process of creating and selling online courses.
To get started, you'll need to sign up for an account at OnlineCourseHost.com. Once registered, you'll have access to their intuitive course builder, which we'll explore together in depth.
Let's dive in.
Table of contents
Getting Started with The Course Builder: Choosing Your Course Type

When learning how to create an online course on OnlineCourseHost.com, it's essential to understand the various course types available.
Understanding these options will help you choose the best fit for your content and target audience.
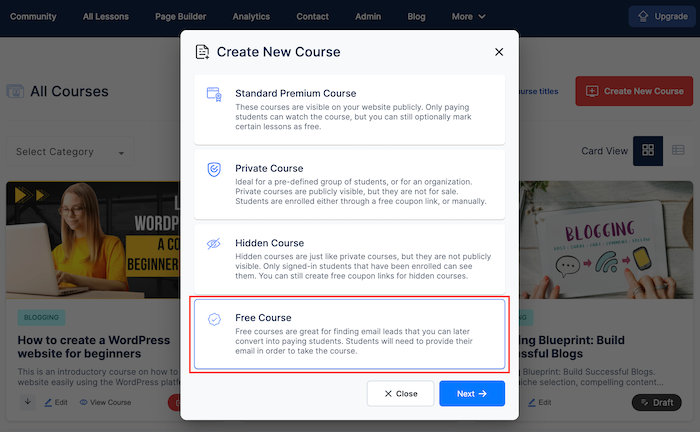
Now that you've signed up with OnlineCourseHost.com, let's look at the different types of courses you can create.
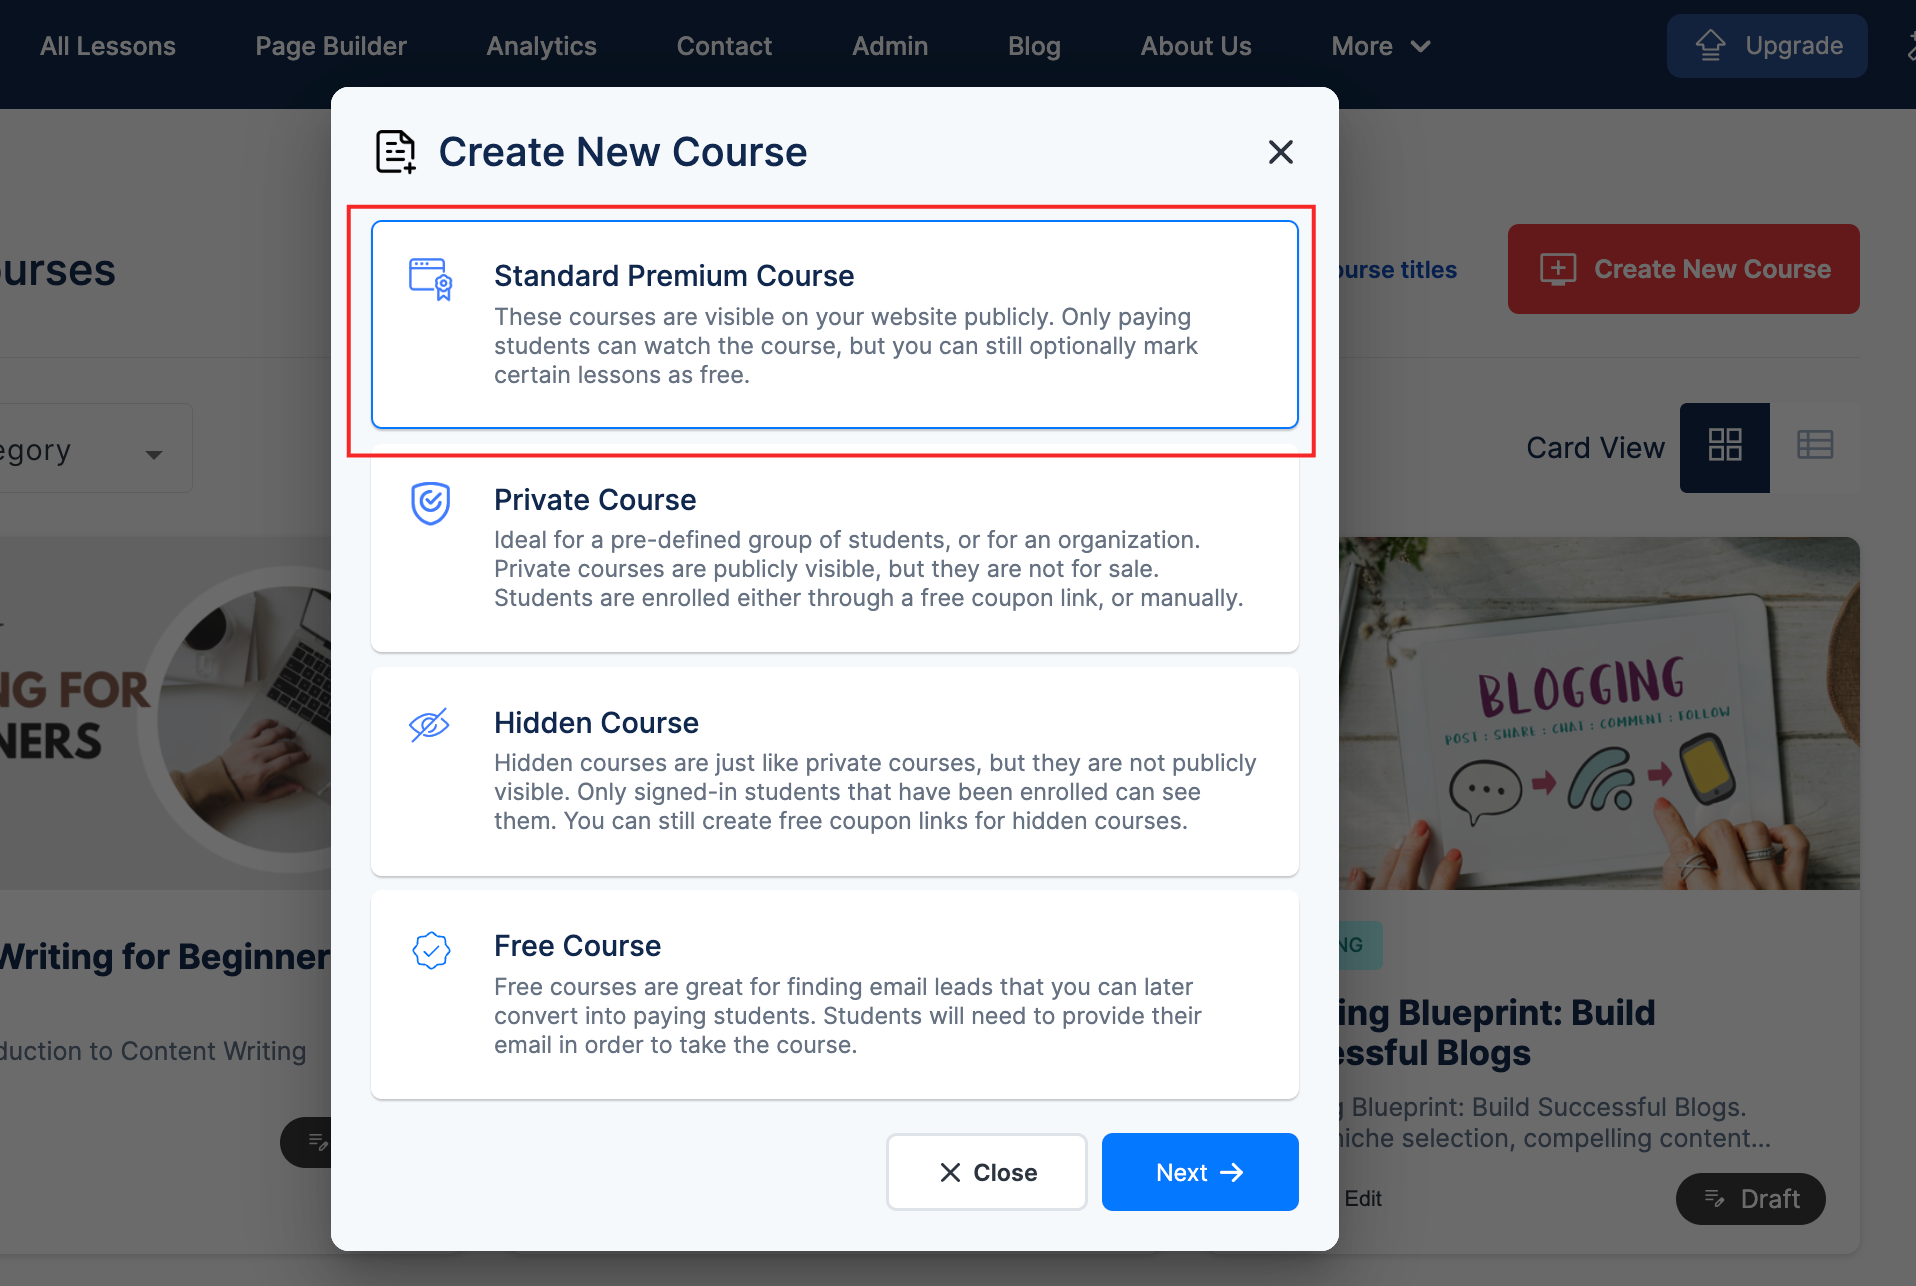
1. Standard Premium Courses: These courses are publicly visible and available for anyone to buy. You can:
- Set your own price.
- Offer some lessons for free as a preview.
- Reach a wide audience of potential students.
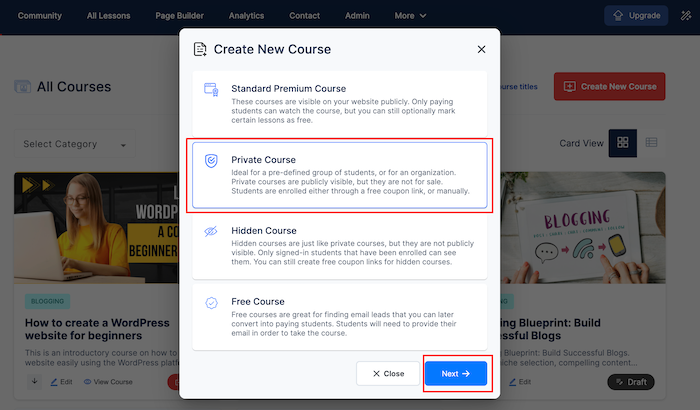
2. Private Courses Think of these as VIP courses. They're visible on your website, but you control who gets in. This is perfect for:
- Corporate training programs.
- Exclusive content for a specific group.
- Courses you want to limit to a certain number of students. You'll need to manually enroll students or give them a special link to join.
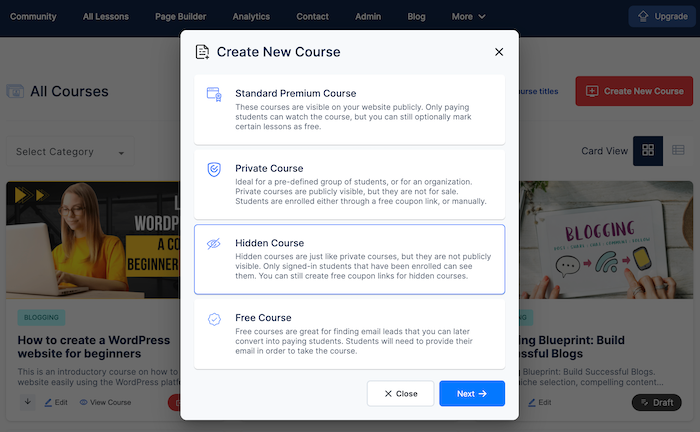
3. Hidden Courses These are your secret courses—they don't show up on your public course list at all. Only students you've personally invited can see and access them. This is great for:
- Beta testing new course material.
- Super exclusive content.
- Courses that are part of a larger program or package.
4. Free Courses: Act like free samples to attract potential paying customers. They help you:
- Build an email list of interested people.
- Showcase your teaching style.
- Introduce topics that lead to paid courses.
- People need to sign up, allowing future connections.
Each course type has its strengths, and you can combine them to fit your teaching goals. Also, you can always change the course type later if needed.
Are you wondering how to create each type of course? Don't worry, I will explain each below.
Creating a Standard Premium Course
Remember those course types we talked about earlier? Now's the time to pick one:
To choose, think about your goals. Want to build an audience? Try a free course.
Ready to start earning? Go for a premium course.
Need to keep things exclusive? Private or hidden courses are your best bet.
Now, let's start with how to use the course builder to create the standard premium course.
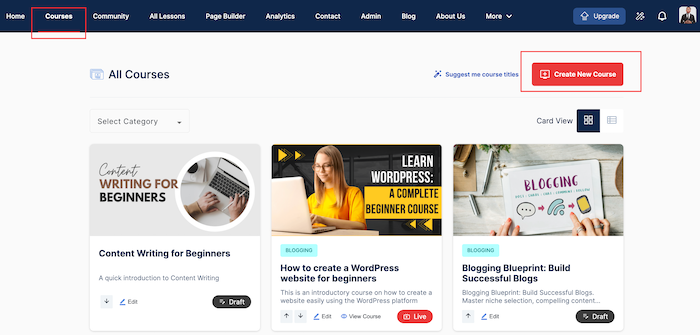
- Once you log in, click on courses, then click on "Create New Course".
- Then choose "Standard Premium Course", and click next.
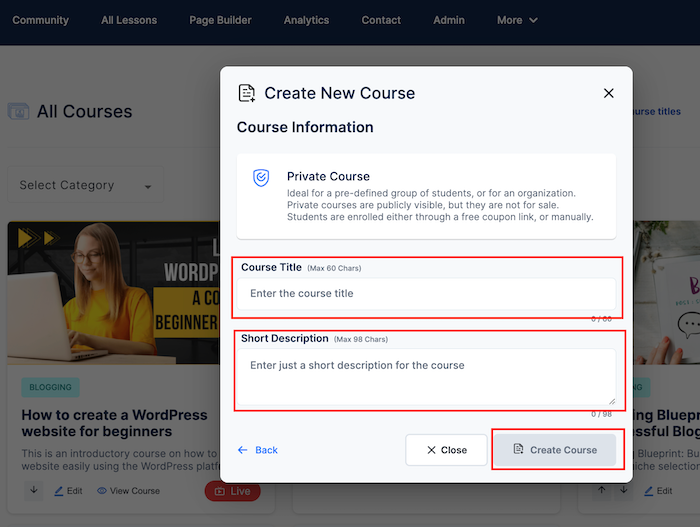
Enter the title and short description of your course and click "Create Course".

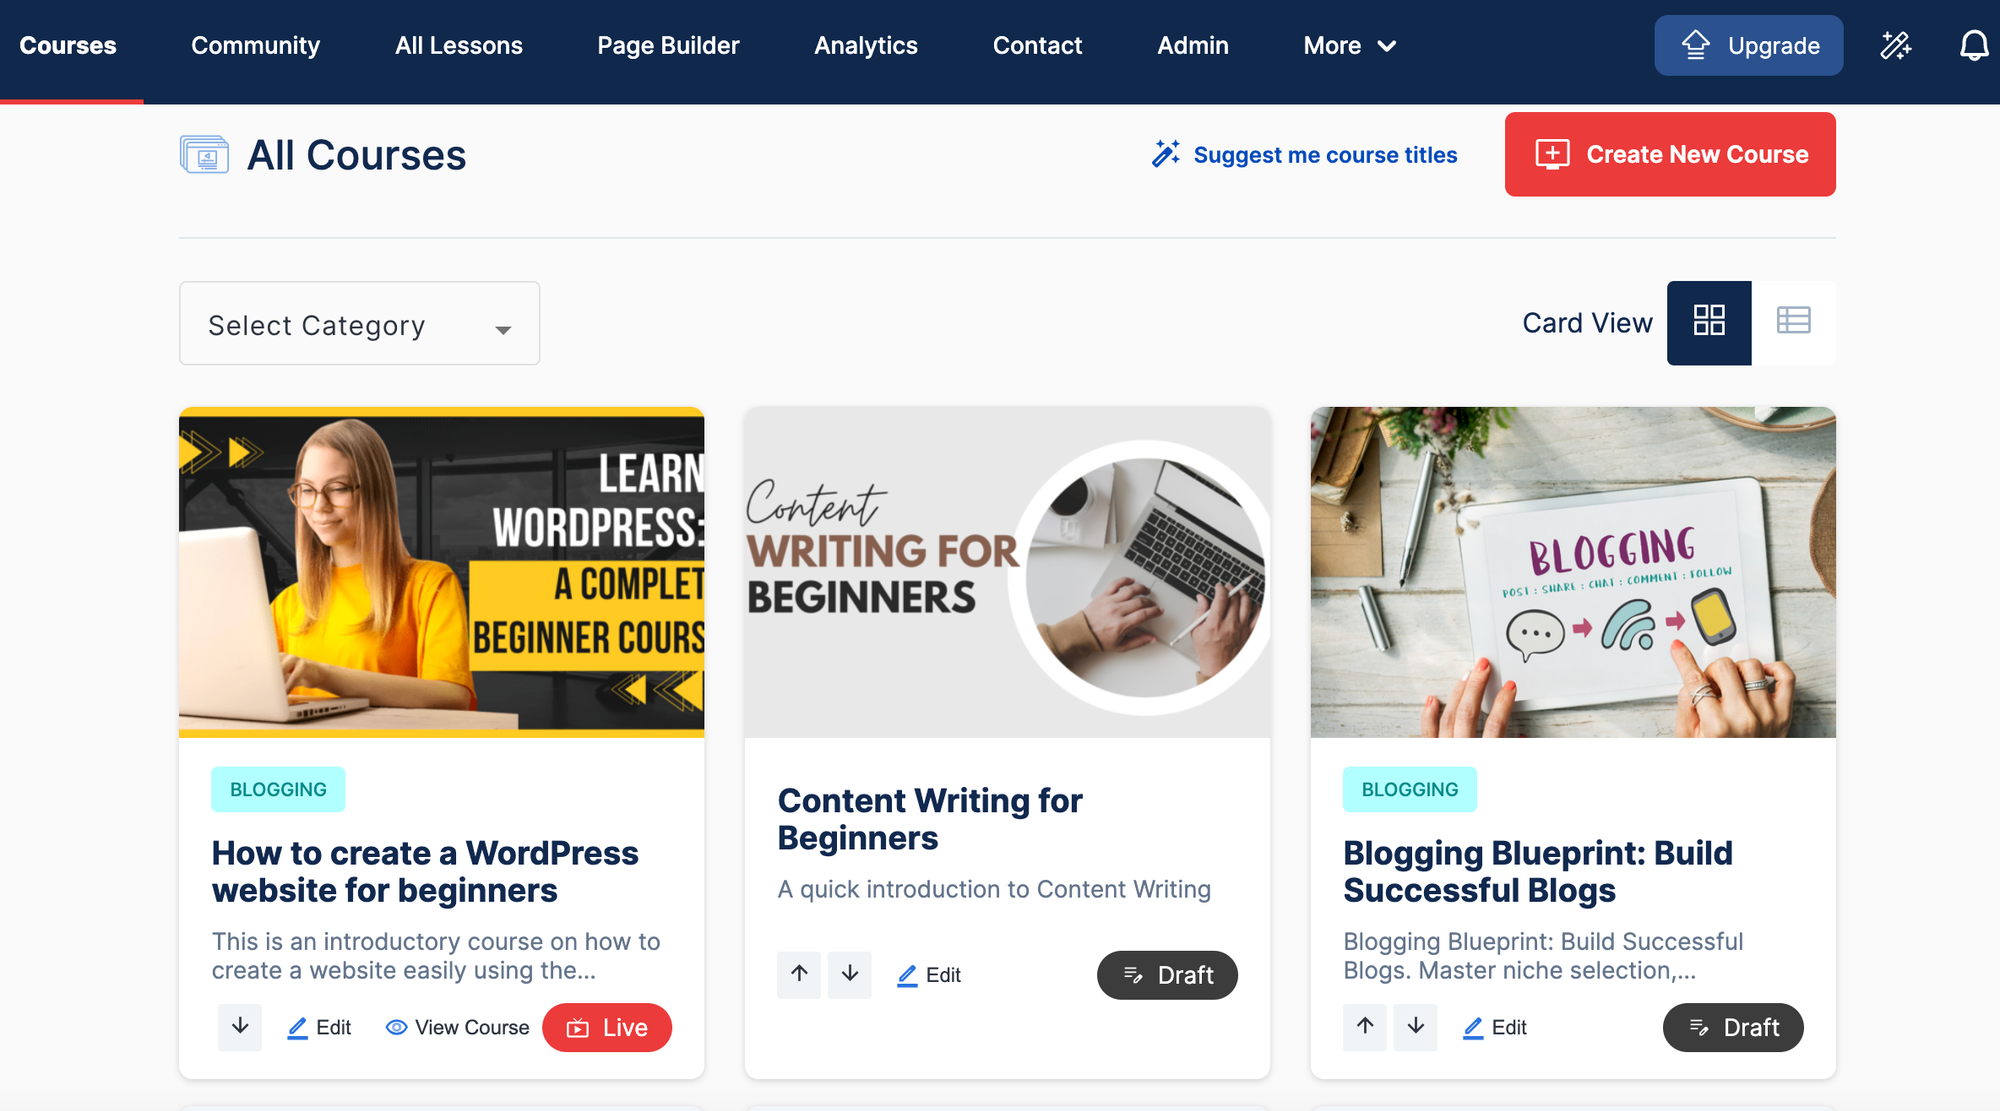
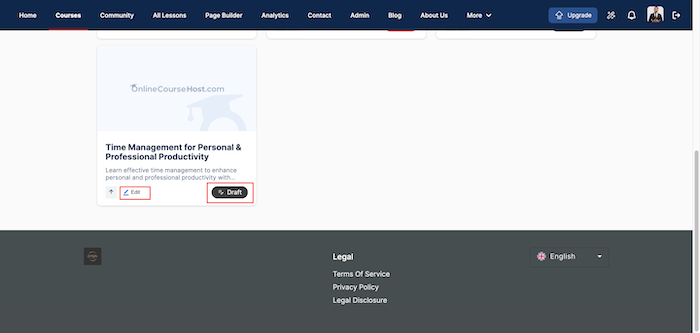
You'll notice your course is in draft mode. Click on "Edit" to start creating content for your course.

This takes you straight to the editing screen.
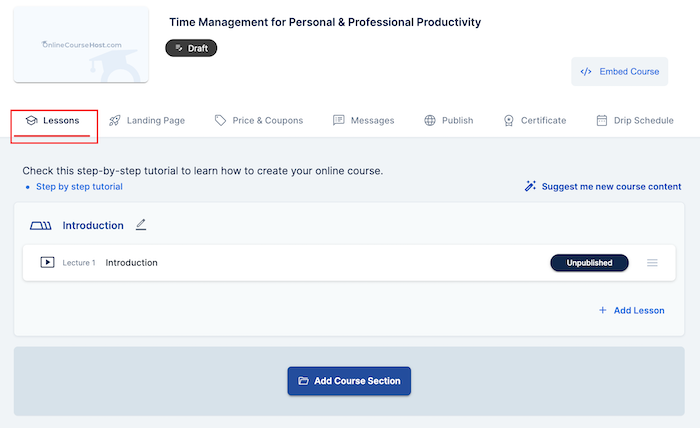
Let's start with the "Lessons" tab.
How to Use the Course Builder to Create Course Sections and Lessons
Note that you can always go to the Courses Page and click "Edit" on the course you want to modify to reach the Edit Course screen.

Click on "Introduction" to edit your course introduction title section if you want to.
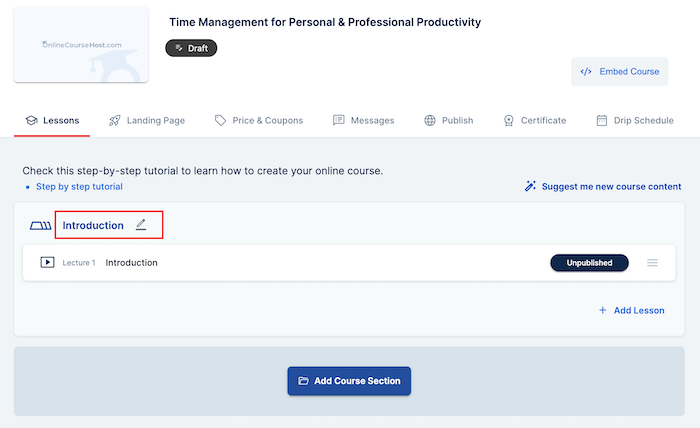

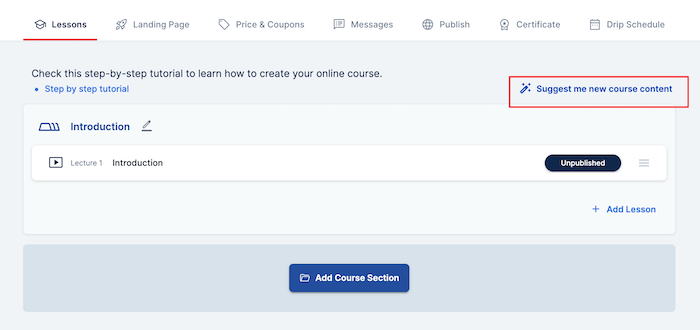
If you're struggling with content for your course, you can use the AI assistant to assist you. To do this, click on "Suggest me new course content."
The AI will then suggest new course sections and lessons based on your online course title, which you can edit to your taste.
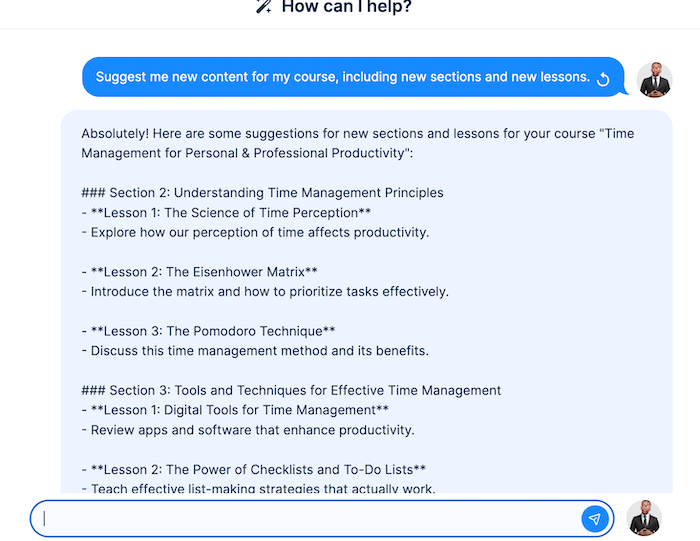
Let's take an example: I am creating an online course on "Time Management for Personal and Professional Productivity", which is divided into the following sections or modules:
- Section 1: Introduction
- Section 2: Foundations of Time Management
- Section 3: Tools and Techniques
- Section 4: Overcoming Procrastination
- Section 5: Time Blocking and Scheduling
- Section 6: Work-Life Balance
- Section 7: Advanced Time Management Strategies
- Section 8: Real-Life Applications
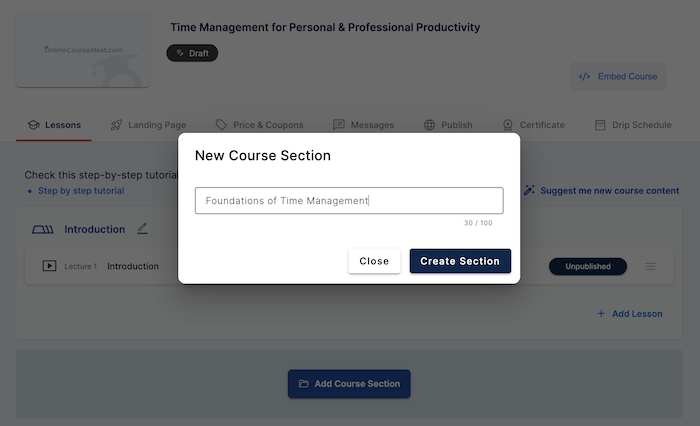
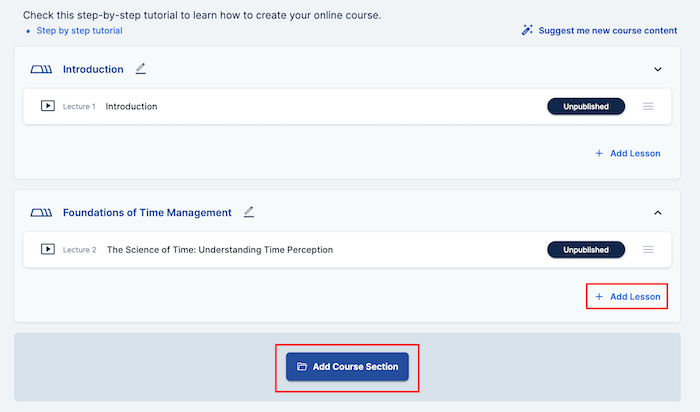
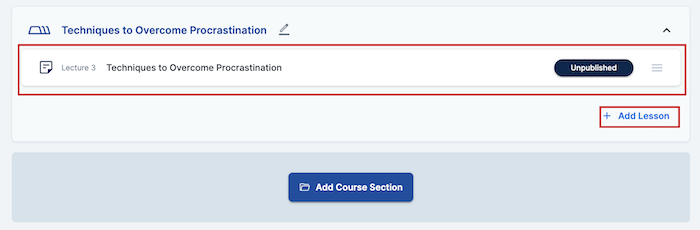
To add these sections, click on "Add Course Section," and type in the title of your next course section. Click on "Create Section"
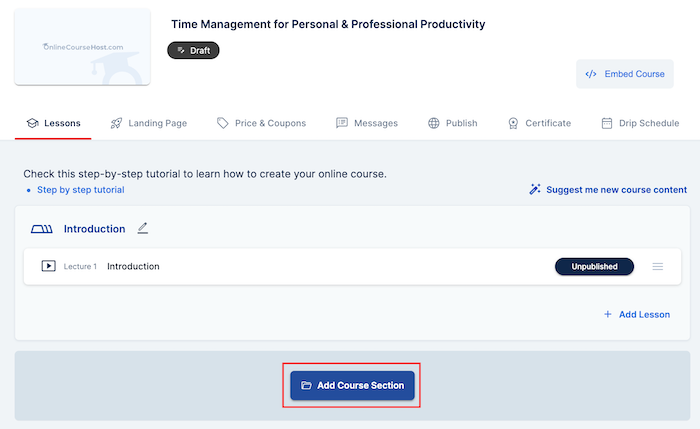
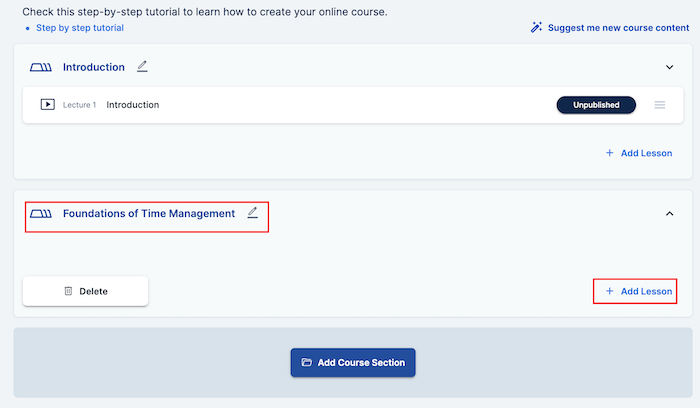
You'll see the new course section as shown in the image below. Next, you'll need to add lessons to the new section. Click on "Add Lesson".
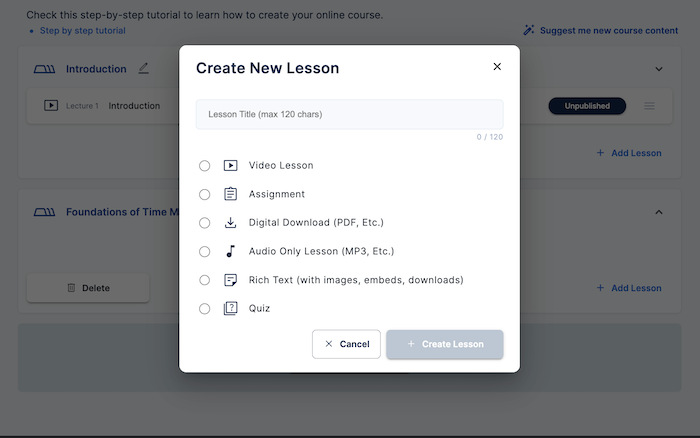
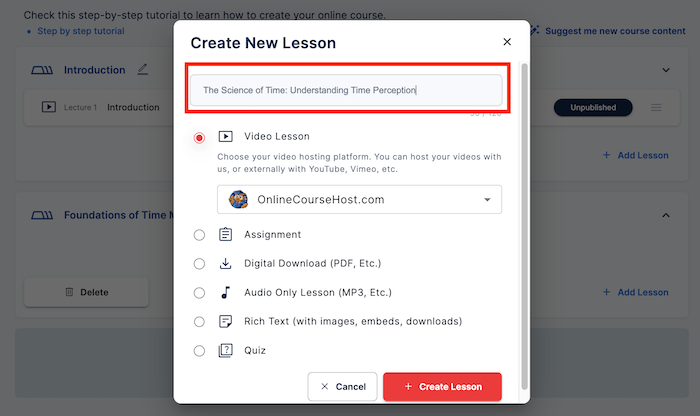
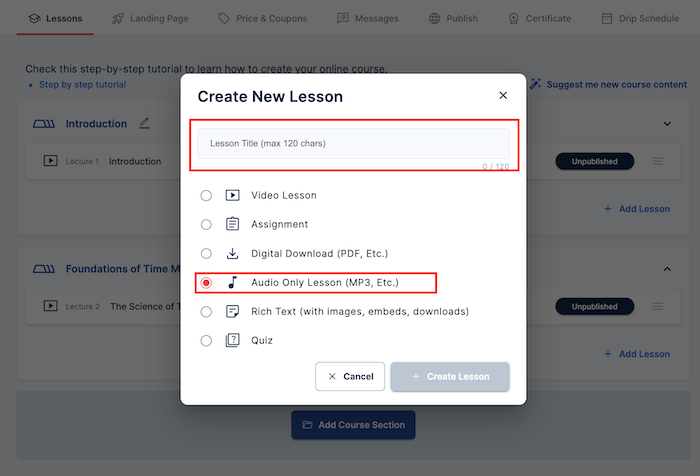
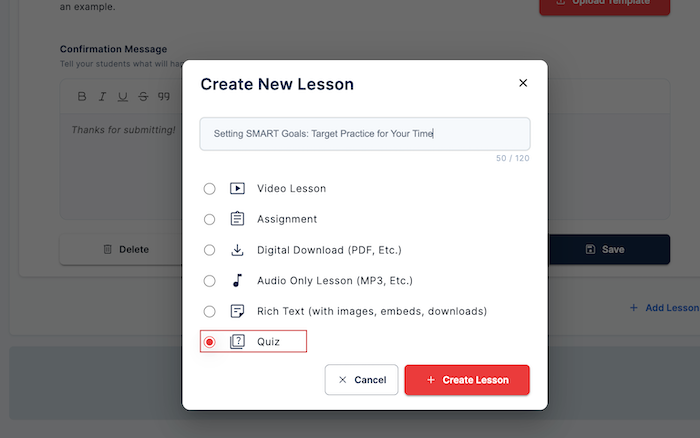
As seen in the image below, you can add different types of lessons depending on your choice. Lessons types like:
- Video
- Assignment
- Digital Download (PDF, Etc)
- Audio Only Lesson (MP3, Etc)
- Rich Text (With images, embeds, downloads)
- Quiz
Creating and Uploading A Video Lesson
Here are guides that will show you how to create an online course video lesson and answer some questions you might have about creating the videos. You should read them too:
- How To Record and Edit Your Online Course For Free (With Loom)
- How to Record and Edit Your First Online Course
- What Is The Best Camera For Online Courses?
- Should You Show Up on Camera as an Online Course Creator?
- Green Screen Tutorial: Improve the Branding of Your Online Courses
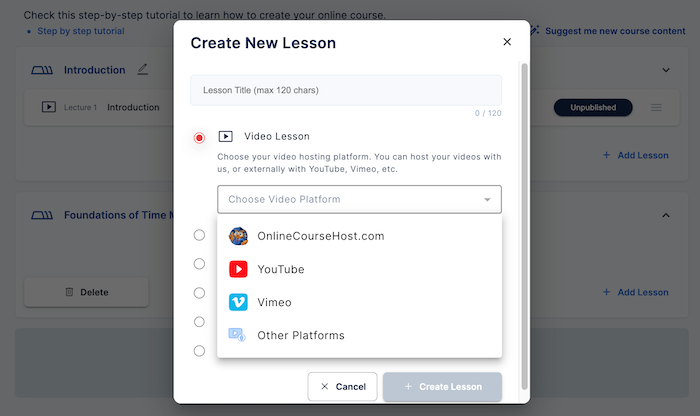
After creating your video lesson, choose where to upload it by selecting the video platform.
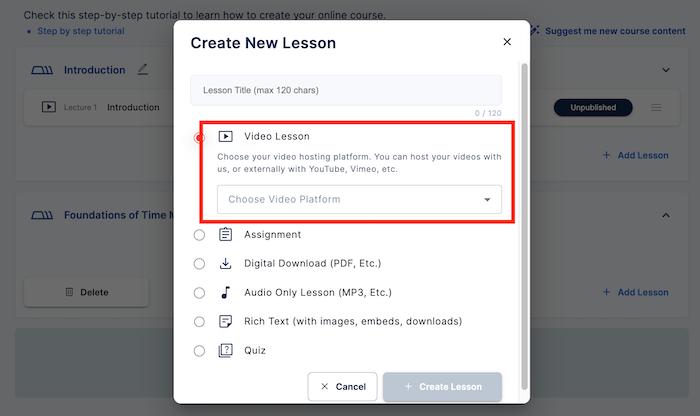
You can choose among OnlineCourseHost (The same platform I am using the course builder), YouTube, Vimeo, or Other platforms.
For this guide, I choose OnlineCourseHost.com.
Type in your video lesson title and click on "Create Lesson".
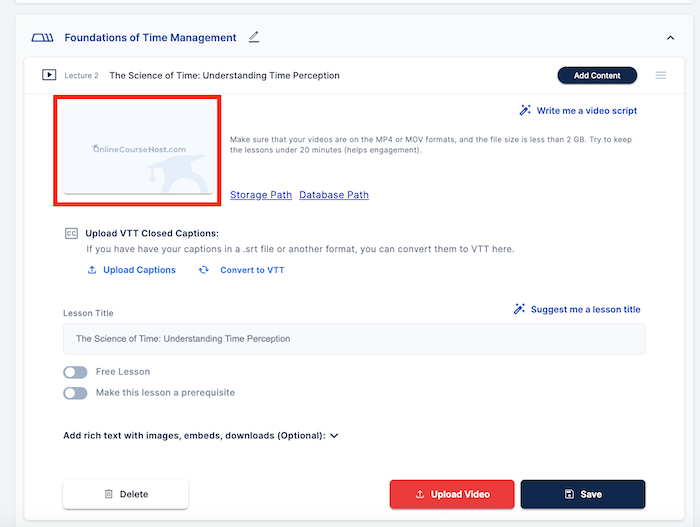
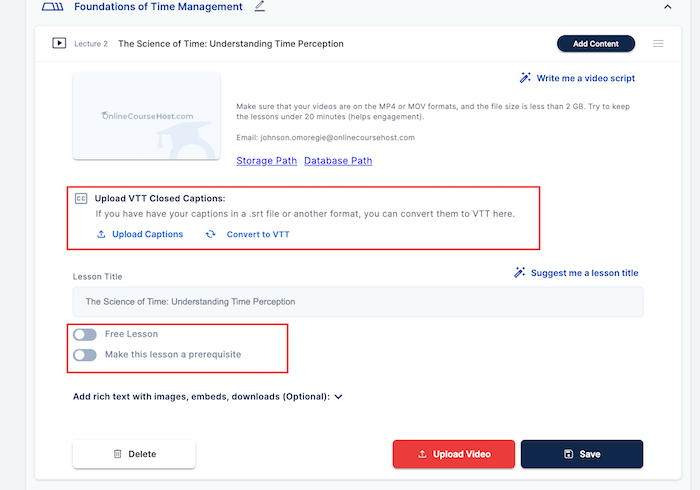
Next, you'll need to upload the video by clicking on the pics as shown in the image below:
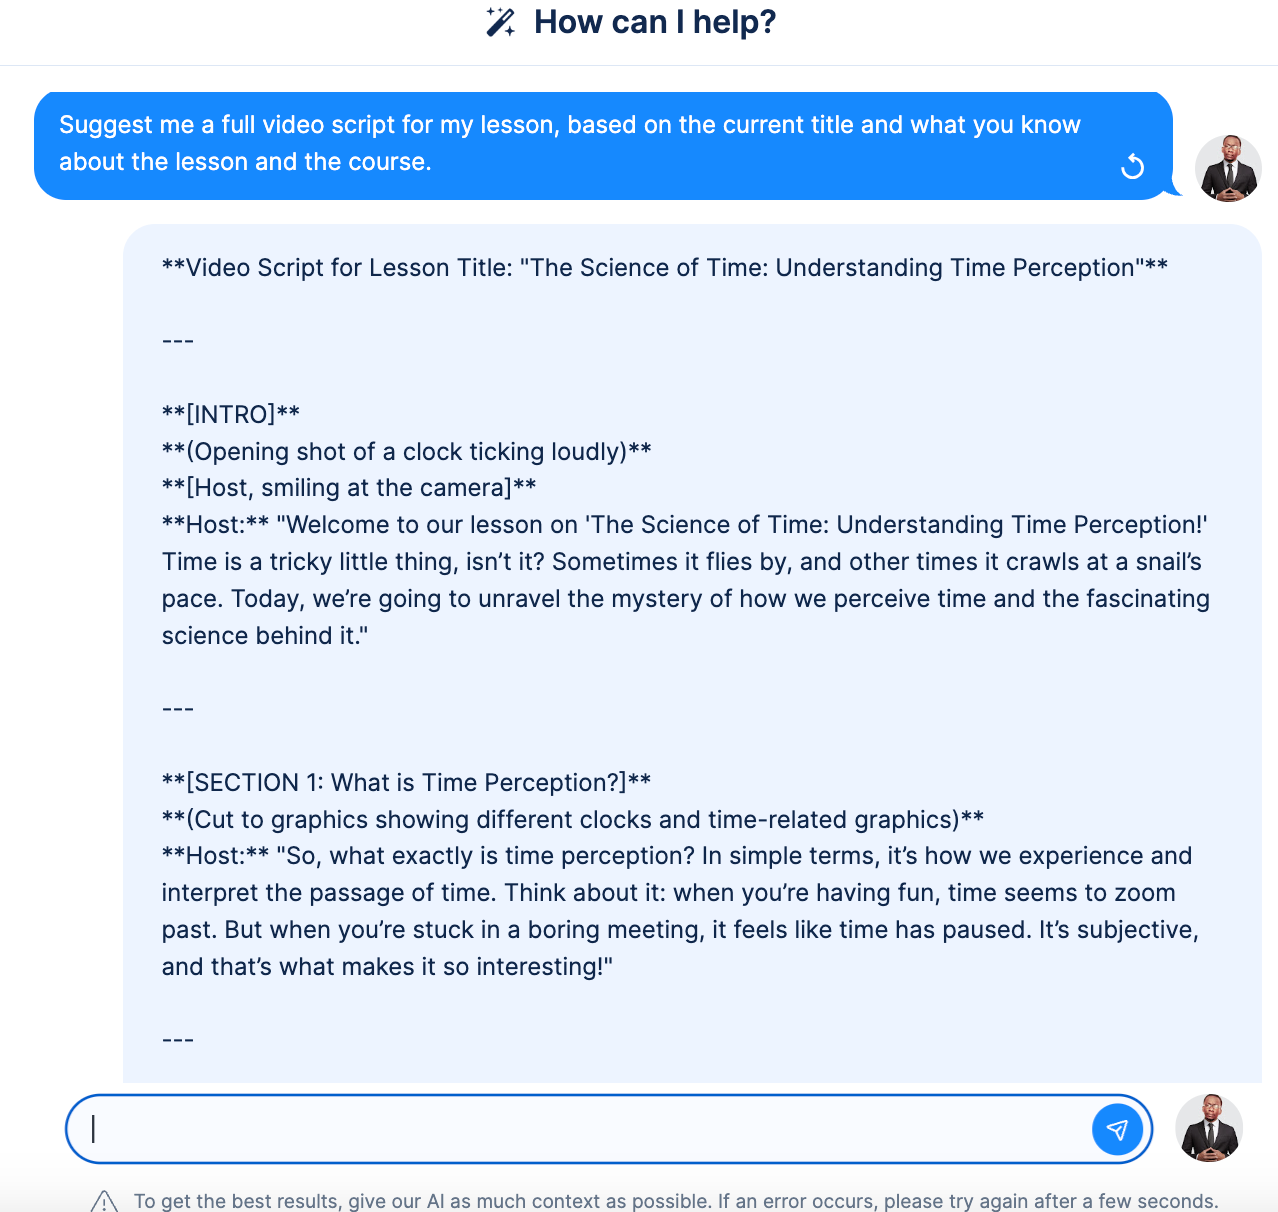
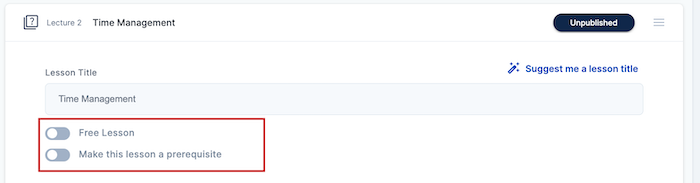
Note that you can use the "Write me a video script" AI assistant to help you write your video lesson script.
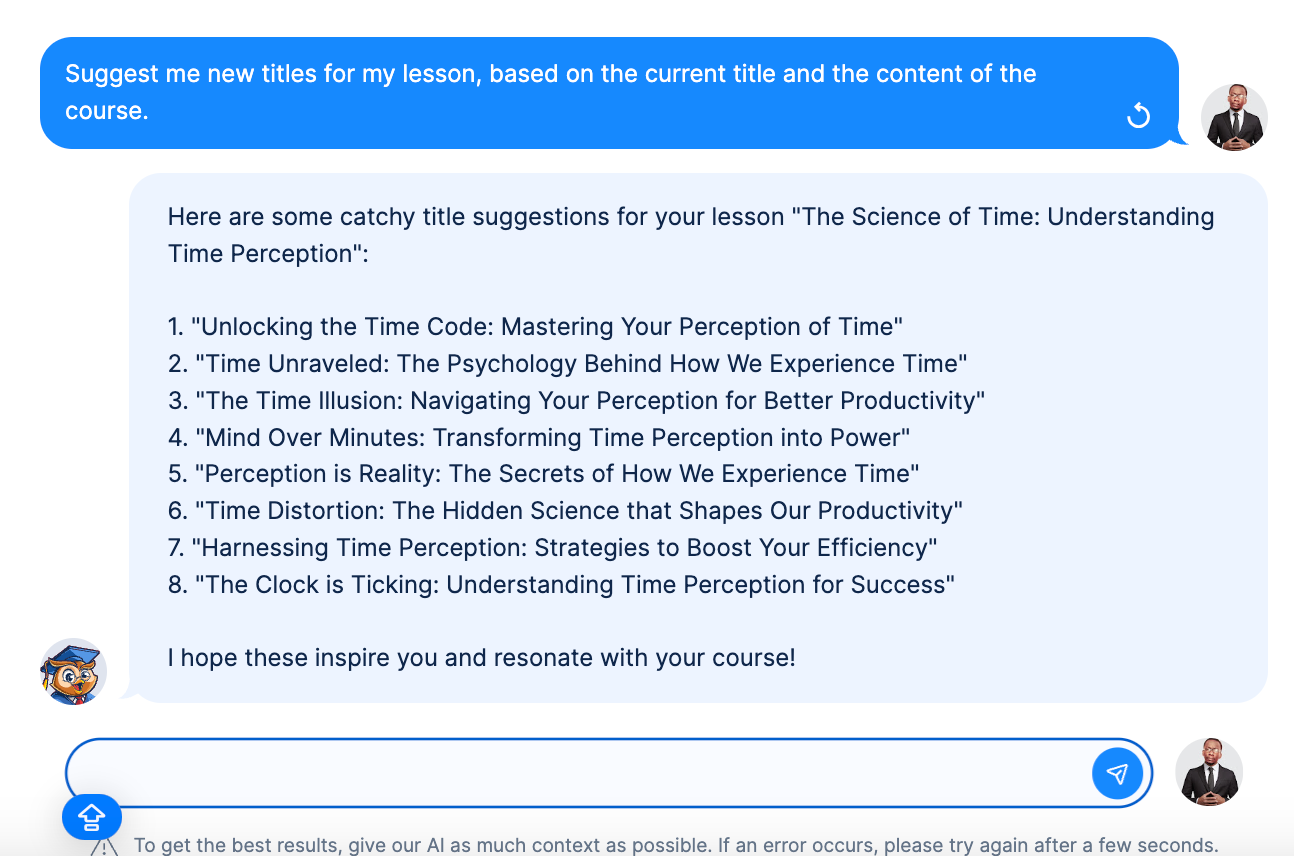
Also, the"Suggest me a lesson title" AI assistant, can help you to suggest a convincing title for your lesson.
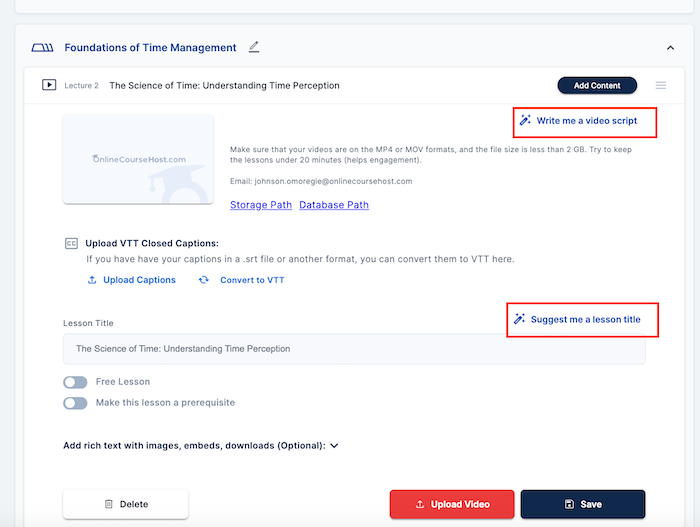
The "Write me a video script" AI Assistant:
The "Suggest me a lesson title AI assistant":
If you already have your captions in a .srt file or another format, you can convert them to VTT.
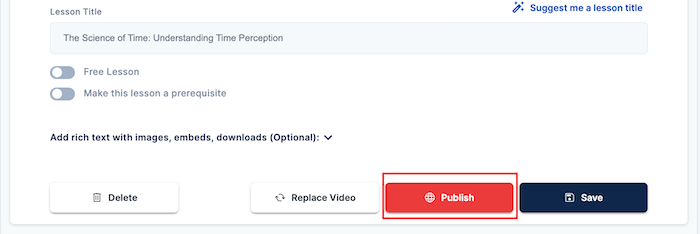
You can also make your video a free lesson or a prerequisite by toggling the buttons.
Once done, click "Publish" to make your lesson live.
Click on "+ Add Lesson" each time you want to add a new lesson.
Click on"Add Course Section" to add a new section.
Creating and Uploading an Audio Lesson (MP3, etc.)
As I mentioned earlier, you can also upload an audio lesson as a lesson.
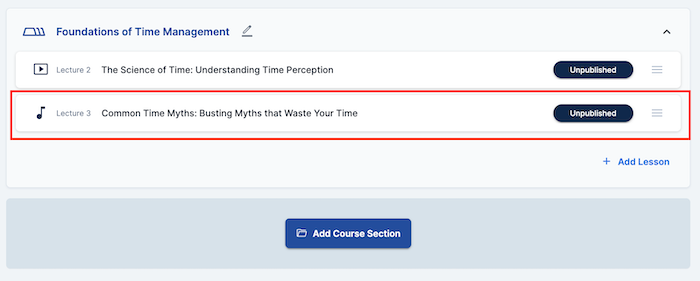
To do this, click on + Add Lesson and choose "Audio Only Lesson (MPS, Etc.)". Don't forget to add the lesson title with a maximum of 120 characters.
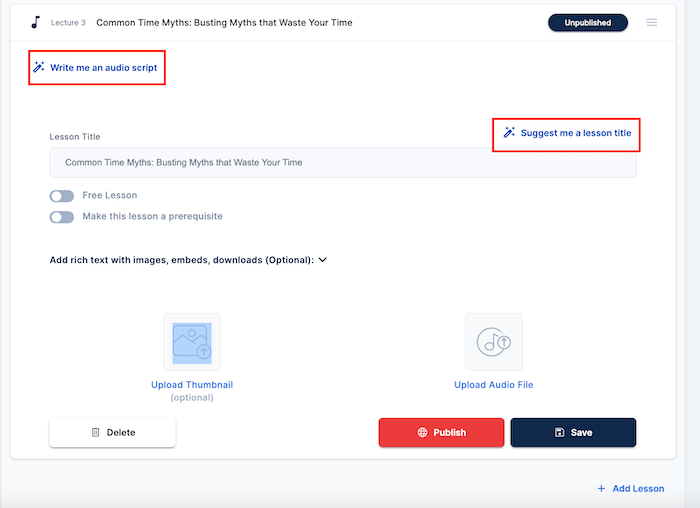
You'll need to click on the audio lesson title to upload your audio lesson, which you would have already created.
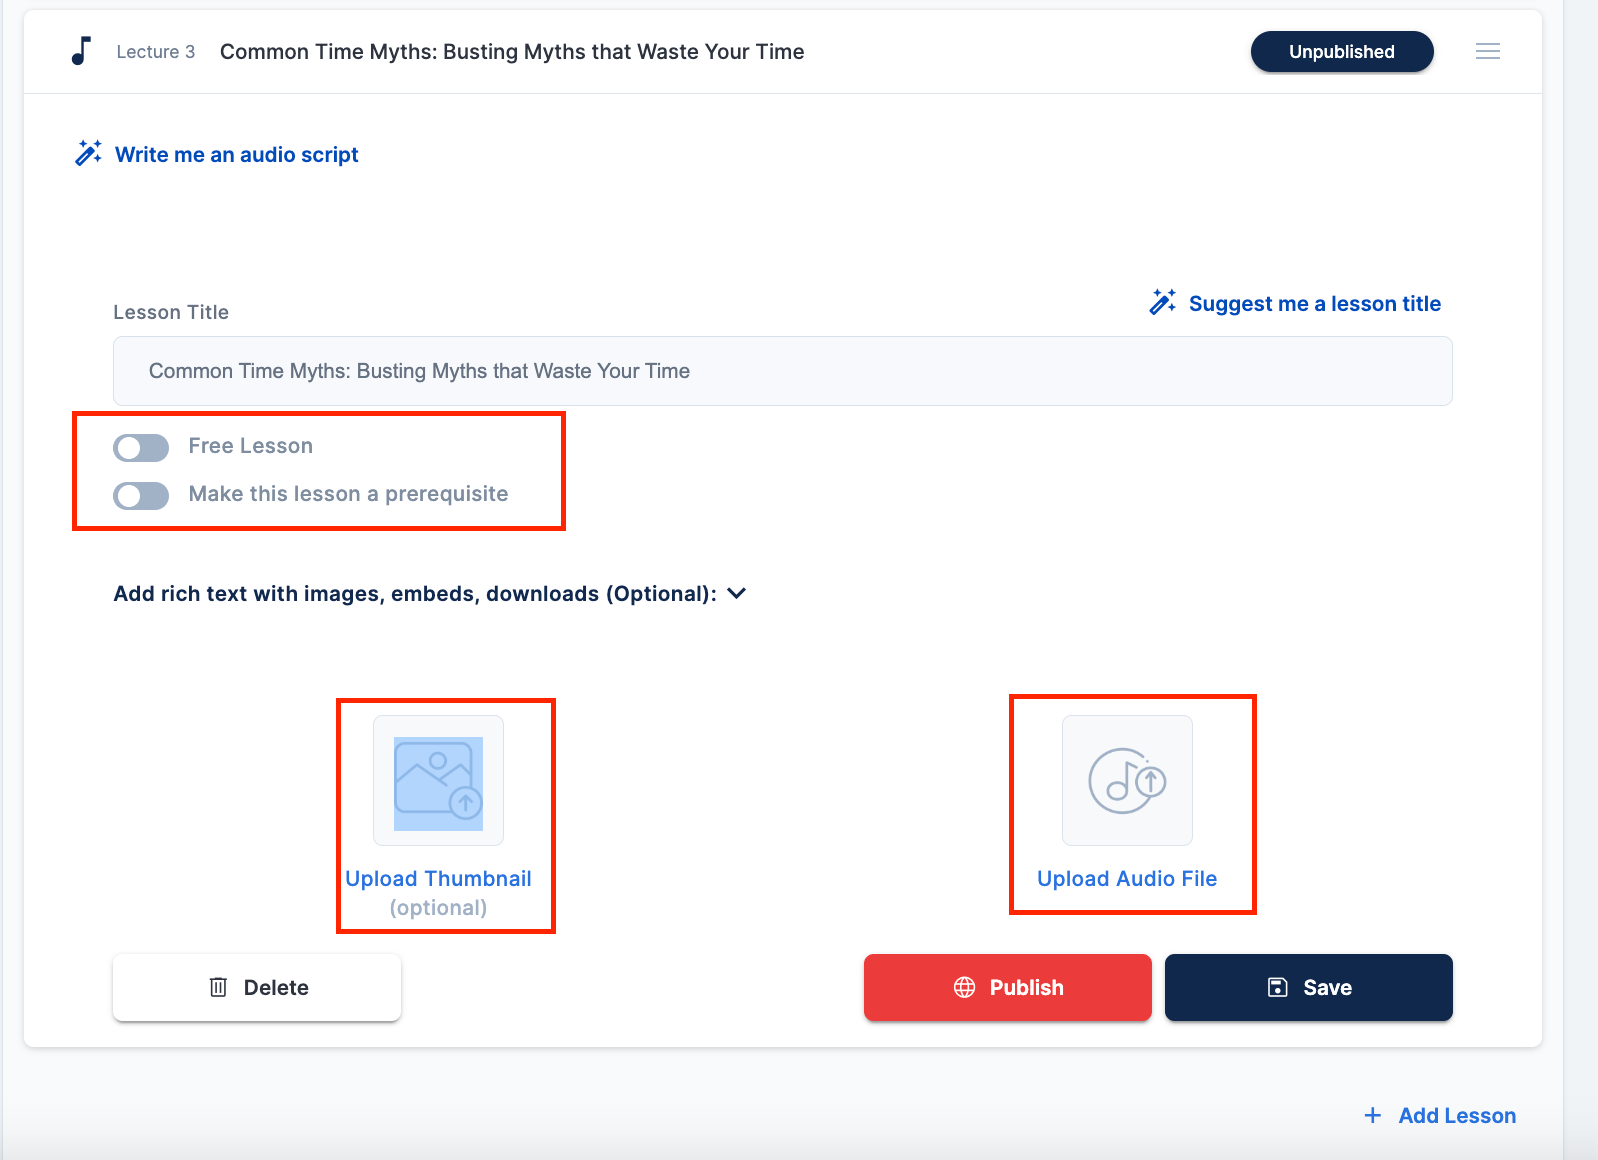
Click on "Upload Audio File" to upload your audio lesson. Though optional, you can also upload a thumbnail for your audio file.
To do this, click on "Upload Thumbnail."
Like the video lesson, the course builder also allows you to set your audio lesson as a "Free Lesson" and a "Prerequisite". Depending on your choice, toggle the options as shown in the image below.
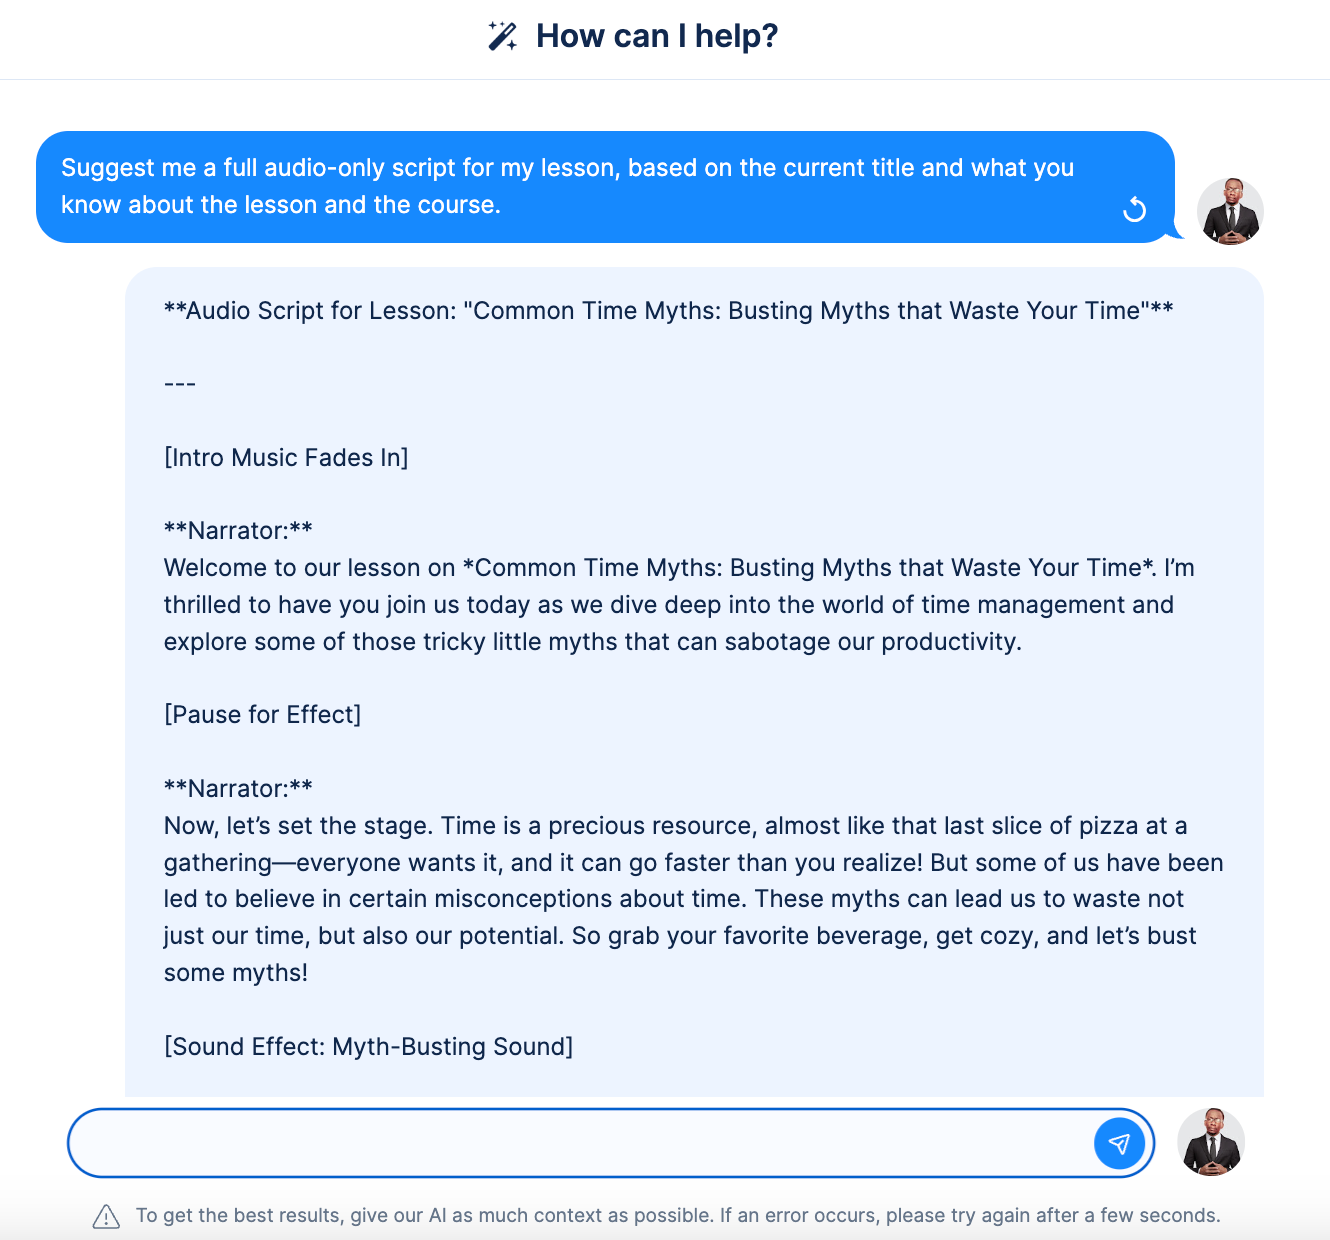
The Course builder also provides AI assistance if you need help writing your audio script or lesson title.
Here's what a generated audio script looks like. You can copy and edit it to your taste.
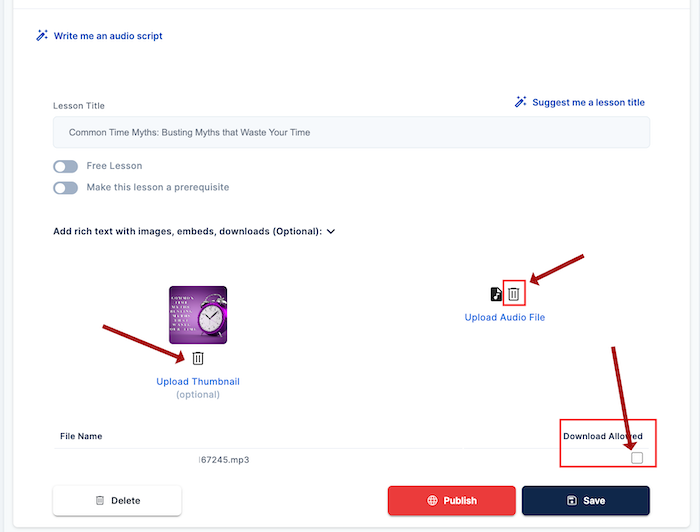
The course builder also provides options to delete uploaded audio and images if you need to change them. You can allow your students to download your audio lesson by checking "Download Allowed".
Once you're done, click "Publish" to make your audio lesson live.
Creating Course Assignments with the Course Builder
Assignments are another type of lesson you can use the OnlineCourseHost.com Course Builder to create.
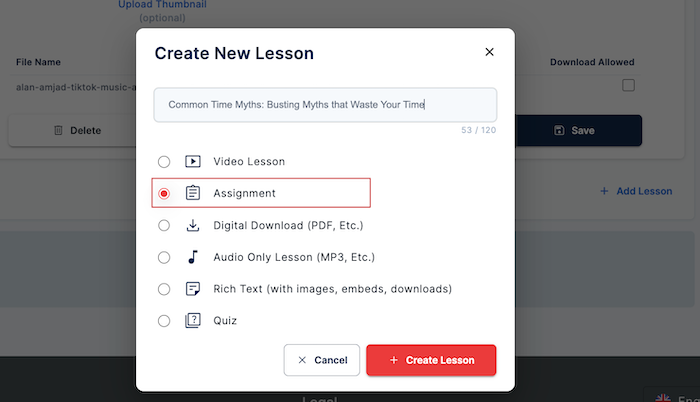
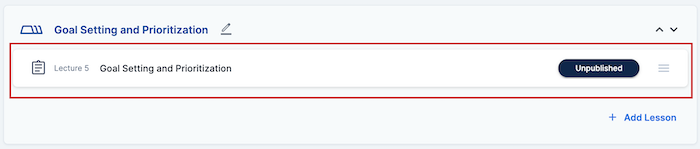
To do this, click on + Add Lesson and choose "Assignment". Don't forget to add the Assignment title with a maximum of 120 characters. Then, click on "+Create Lesson".
Now, click on the assignment title to start typing in your content.
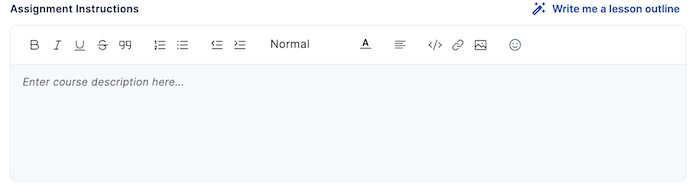
Type in the instructions for your course assignment.
You can also upload a template that your students can follow along with as an example.
Also, you can set the confirmation message your students will receive once they are done with their assignment and submit it.

There is an option to enter rich test to format your assignment just how you want it.
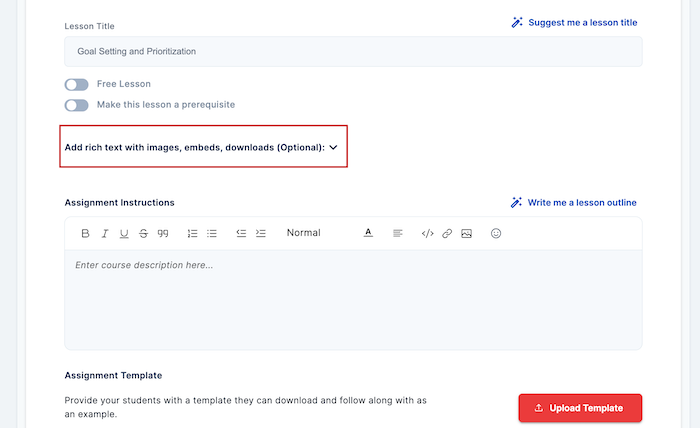
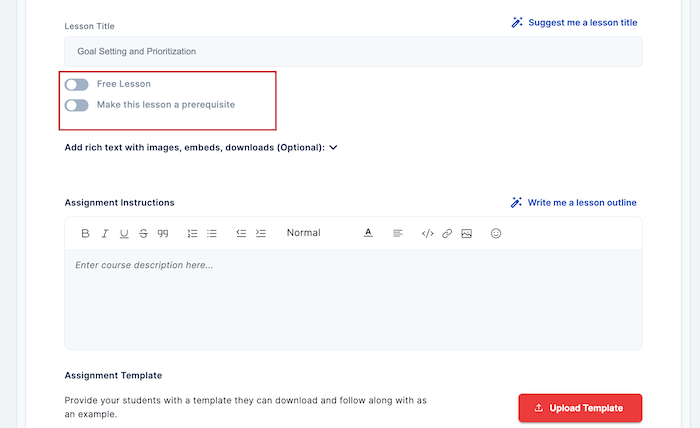
You can also set your assignment as a "Free Lesson" or as a "Prerequisite".
Creating Quizzes with the Course Builder
You can also create a quiz lesson using the OnlineCourseHost.com Course Builder.
To start, click on + Add Lesson and select "Quiz". Be sure to enter a title for the quiz, keeping it under 120 characters. Then, click "Create Lesson".
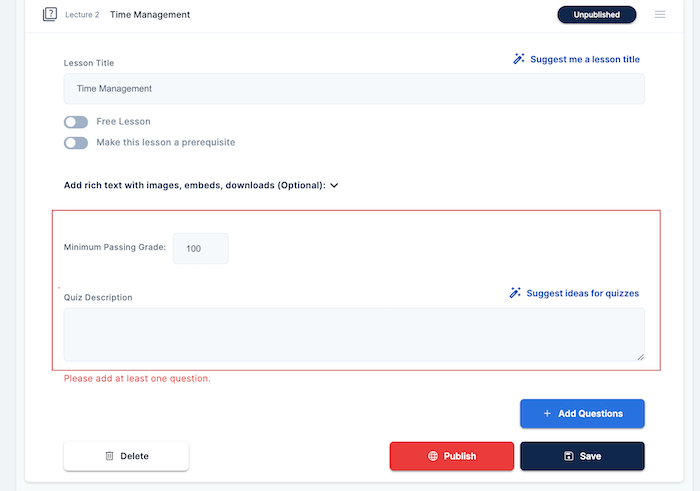
Click on the title of your quiz to start creating your quiz.

You can add a description and set the minimum passing grade for your quiz.
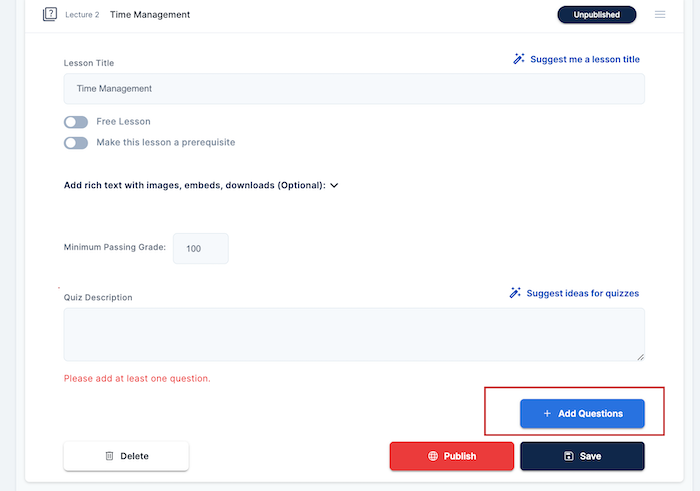
Click the + Add Questions" to start adding questions, and choose a related lesson.
Add more Questions:
- To add more questions, click "Add Questions" again. A new question section will appear.
- Write your question and choose a related lesson from the dropdown menu.
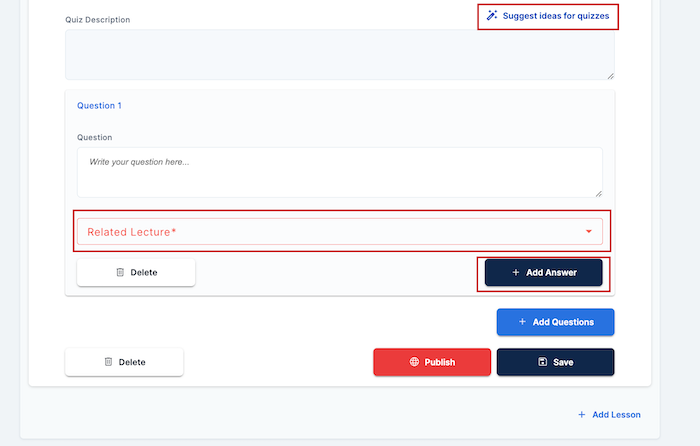
- Click "Add Answer" to create answer choices. You can add hints and mark the correct answer. You can also use the AI assistant to suggest new quiz ideas
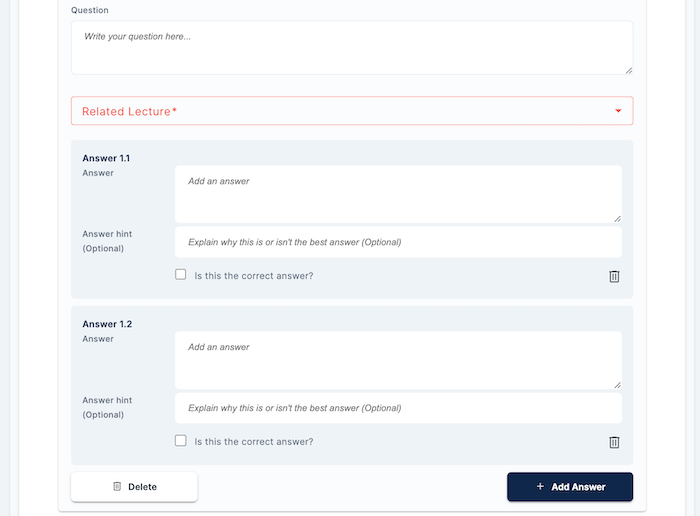
- Repeat "Add Answer" for more choices (minimum 2). Use the bin icon to delete unwanted answers.
- You can also set your quiz as a "Free Lesson" or as "Prerequisite".
- and click "Save" to save your quiz.
Creating and Uploading Rich Text (with images, embeds, and downloads)

A rich text lets you use text, images, and links to create engaging content.
The Online Course Builder also allows you to add Rich Text to your lesson. To do this, click + Add Lesson and choose "Rich Text (with images, embeds, downloads".
Don't forget to add the lesson title with a maximum of 120 characters.
Click on the title of your quiz to start adding your rich text.
Add your text, images, links, and videos using the options highlighted in the image below.

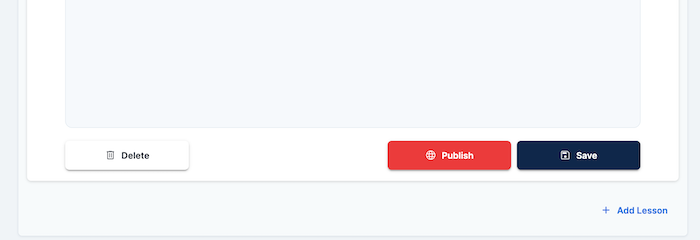
You can also make the lesson free or a prerequisite. Scroll down and click "Publish." to make it live.
Creating Digital Downloads with the Course Builder
A digital download lesson lets you share files with your students. This could be an ebook, spreadsheet, or any other digital file.
You can also set up a digital download for your online course using the OnlineCourseHost.com Course Builder.
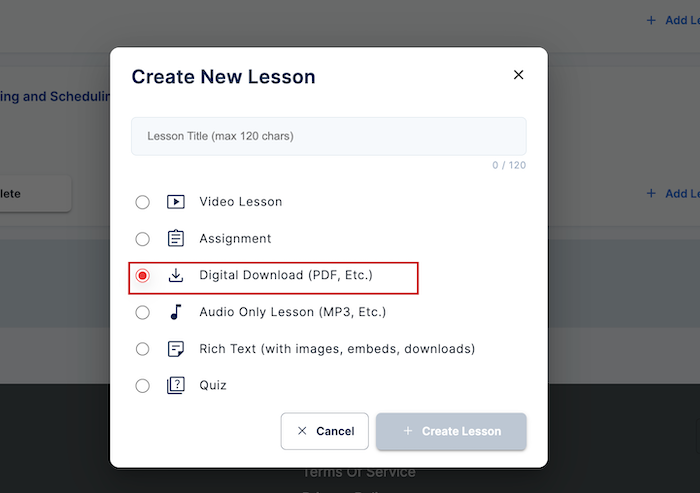
To start, click on + Add Lesson and select "Quiz". Ensure you enter a title for your digital download, keeping it under 120 characters. Then, click "Create Lesson".
- Click on "Upload File" to upload your digital download file from your device.
- Click on "Upload Thumbnail" to upload the image thumbnail for your digital download from your device too.
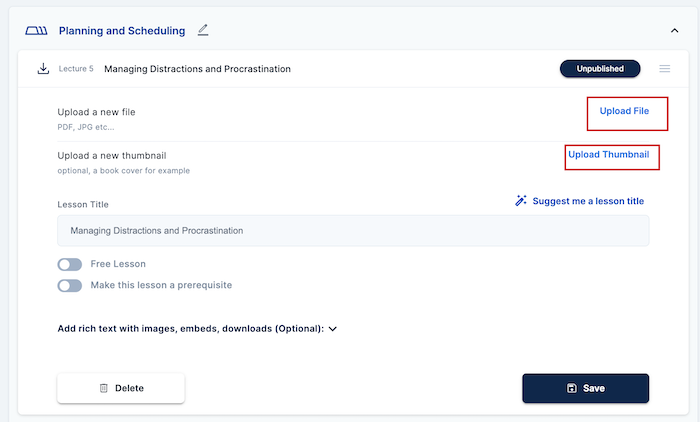
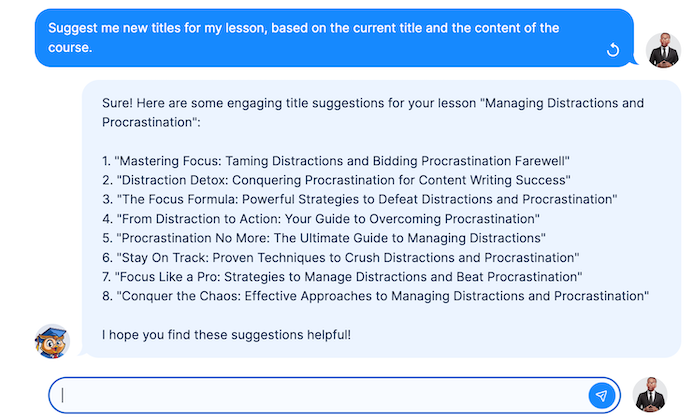
Don't forget to enter the title of the digital download lesson. Also, if you need help determining the title, use the "Suggest me a lesson title" AI assistant.
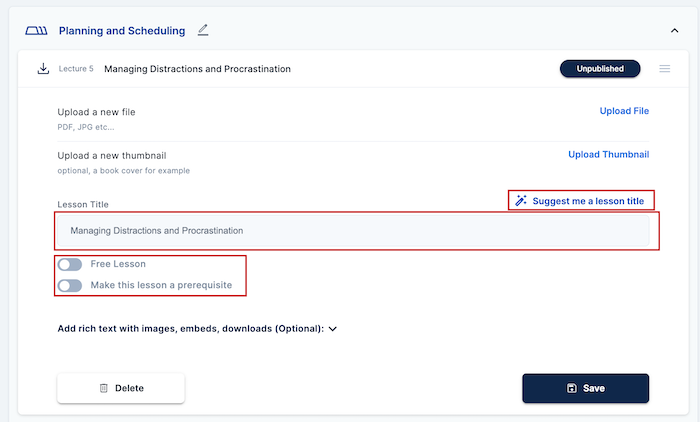
You can also make it a "Free Lesson" or a "Prerequisite".
Here are examples of titles suggested by the "Suggest me a title" AI assistant.
Once done, click on publish to make it available to your students.
Creating a Private Course Using the Course Builder
To create a private course, you have to follow the same steps as creating a "Premium Course". Click on "Courses" then "Create New Course"

The difference is that you have to choose "Private Course", then click on "Next".
Type in your course title, and a short description, and click "Create Course".
Click on "Edit" to start using the course builder to input and edit your course builder
For your course content, follow the same steps as I showed you in the "Standard Premium Course".
Creating a Hidden Course Using the Course Builder
They don't show up on your public course list. Only students you've personally invited can see and access them
To create a Hidden Course, click on the "Courses" menu then "Create New Course". Choose "Hidden Course".
Type in your course title, and a short description, and click "Create Course".
For your course content, follow the same steps as I showed you in the "Standard Premium Course".
Creating a Free Course Using the Course Builder
A free course is usually a free sample to attract potential paying customers.
To create a Hidden Course, click on the "Courses" menu then "Create New Course". Choose "Free Course".
Type in your course title, and a short description, and click "Create Course".
For your course content, follow the same steps as I showed you in the "Standard Premium Course".
Conclusion
Congratulations on taking your first steps in learning how to create an online course! Let's recap what we've covered:
- We explored the different types of courses you can create: free, premium, private, and hidden.
- You learned how to set up your first course, from choosing a type to crafting an engaging title and description.
- We walked through the process of creating various lesson types: video, audio, rich text, quizzes, assignments, and digital downloads.
- You discovered how to use the AI assistant to help with content creation and lesson titles.
Remember, creating an online course is a journey. Don't be afraid to experiment with different lesson types and course structures.
The beauty of OnlineCourseHost.com's course builder is its flexibility – you can always go back and make changes as you learn what works best for you and your students. Now, it's time to put what you've learned into action.
Start building your course, one lesson at a time using the OnlineCourseHost.com course builder. Before you know it, you'll have a complete, professional online course ready to share with the world.
If you are looking to ask any questions on online course creation, you can reach me here on my Facebook group:
Join the Course Creator Academy Facebook Group
Ready to learn how to launch your first coaching program or course on OnlineCourseHost.com? Here are the helpful guides for you to check out:
- Best Online Course Platforms (Ultimate Guide)
- How To Choose An Online Course Topic That Sells
- How To Record And Edit Your First Online Course
- Affordable Online Course Equipment - Complete Practical Guide
- How To Hire An Online Course Team
- The Ultimate Online Course Launch Checklist
- How To Create The Perfect Online Course Sales Page
- Create A Powerful Brand For Your Online Courses (In 5 Steps)
- How To Sell Online Courses? The Ultimate Guide
- How To Promote Your Online Course - Complete Guide
Let me know in the comments below what other topics you would like me to cover or any questions that you have.
Thanks for reading… and enjoy the course creation process! 😉
Course Creators Academy, a community by OnlineCourseHost.com
Founded by Vasco Cavalheiro
Online Course Creator

 Start Here
 Course Creation Journey Step by Step
  Course Creation Software Reviews
 Online Course Marketing
 Course Creation Tips & Tricks
 Course Equipment
 Online Course Marketplaces
 Revenue Reports
 Best Practices
 Frequently Asked Questions
 Platform Reviews