


The Advantages of an Online Course Community (Free vs Paid)
 Platform Review

Learn how to set up from scratch a community for your online courses. You can choose free, paid or invite-only. Give your community multiple different levels, like paid rooms inside a free community.
One of the things that can really help to differentiate your online courses and make them become way more engaging is to link them with a multi-level community.
So why do your students almost expect you to have a community included as part of your courses?
Well, imagine trying to learn a new skill all by yourself, with no one to share your struggles or celebrate your progress. It can be lonely and frustrating...
But what if you were learning it with a group of people who are on the same journey as you? You can ask questions, share insights, and encourage each other.
This sense of community can completely transform the learning experience!
And that's what we are going to teach you how to build in this post.
So what exactly is an online course community?
An online course community is a virtual space where learners can connect, share ideas, and collaborate on projects. It's a place where they can ask questions, seek feedback, and celebrate their successes together, and make the learning experience much more enjoyable.
In short, a vibrant community is like the glue that holds an online course together, making it more effective and rewarding for everyone involved.
In this post you are going to learn exactly how to build a community linked to your courses, in 3 different flavors:
- Free: anyone can join
- Paid: only for paying members
- Invite-only: only people you invite can join
Multi-level community
In this post, we will also show you how to build a multi-level community. This is essentially a community with different access tiers per topic. Imagine for example a free community with a 15-day challenge paid space inside it.
Table of contents
You can also check out all the free guides available at the Course Creator Academy by clicking on the Academy link on the top menu.
How to Setup an Online Course Community
The first step involves creating an account on OnlineCourseHost.com. Once you have created an account, navigate to the community menu, and toggle on your community to enable it.

Then, select the type of community you wish to set up. You can choose from three types of communities:
- free
- paid
- invite-only
Free Community Access
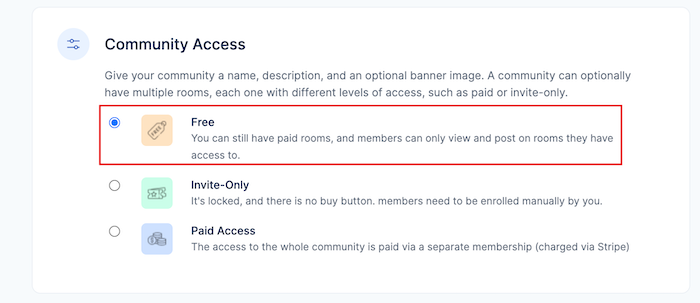
This option allows anyone to join your community without any cost.
It’s a great way to build a large, inclusive community where everyone can participate and share their experiences.
To create a free community, navigate to the "Community" tab, click on "Settings," select "Community Access," and choose the "Free" option. Don't forget to save your changes.
Paid Community Access
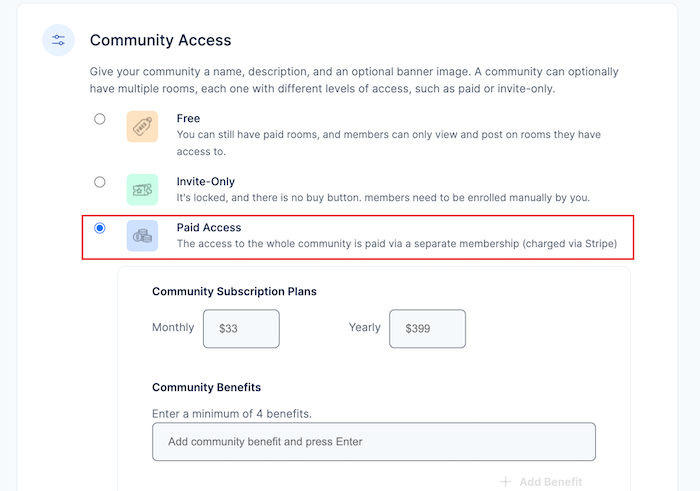
For a more exclusive setup, you can charge a membership fee. This model works well if you offer premium content or special features that justify the cost.
Members pay a subscription fee, which can be set up through payment platforms like Stripe.
To set it up, go to "Community menu," then "Settings," and select "Community Access." Choose the "Paid" option and set up your subscription fee details.
And, ensure you provide clear value propositions to justify the cost, such as exclusive tutorials, live Q&A sessions, or premium resources.
Invite-Only Community Access
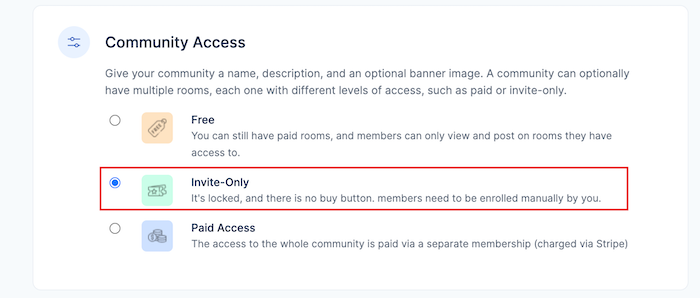
This type is for those who prefer to keep their community exclusive. Only individuals who receive an invitation can join, creating a VIP-like environment.
This is ideal for fostering a tight-knit, highly engaged community.
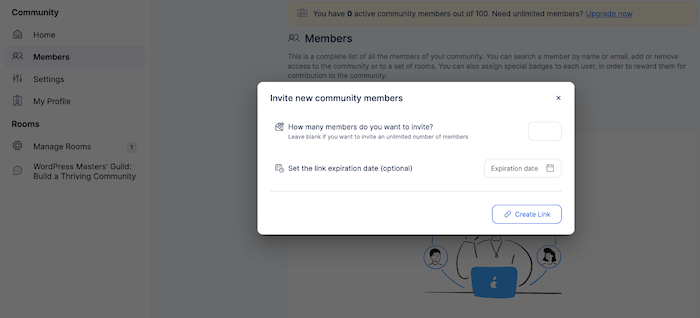
To set up an invite-only community, follow similar steps but select "Invite-Only" in the "Community Access" settings. This means that only those invited with a link can participate in this community type.
So, manage invitations carefully to maintain an engaged and cohesive group.
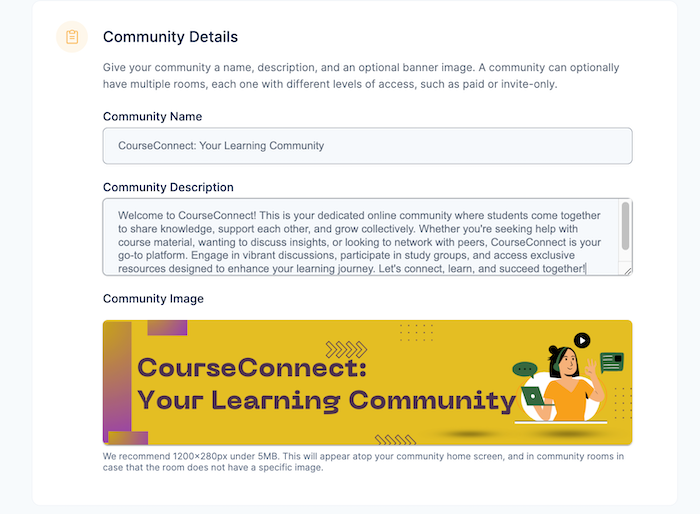
And, don't forget to include your community details: This is your chance to give your community a personality!
Add a descriptive title and upload a banner image (ideally sized 1200x280 pixels and under 5MB) to create a welcoming first impression. This image will be displayed on your community homepage and in individual rooms.
Community Rooms
Within your online course community, you can create various sub-sections known as community rooms.
What is a community room?
A community room is a dedicated space within your community for specific topics or purposes.
Think of it as a forum within the larger community where members can discuss particular subjects, share resources, or participate in activities. Examples include "Announcements," "Welcome," or "a 15-day challenge paid space inside it."
The access type of the room can be:
- free
- paid
- invite-only
So the options are exactly the same as the top-level community.
Community and Rooms Access Levels
The key point with rooms is that the access level of the room can be different than the access level of the community.
For example, you can have:
- Free Room in a Free Community: All members of a free community can access and participate in the room without any restrictions or additional costs, and are added automatically once they sign up as your students.
- Paid Room in a Free Community: Even in a free community, you can create rooms that require a separate fee to access. This is ideal for offering exclusive content or advanced learning materials that justify an additional cost.
- Invite-Only Room in Any Community: Rooms can also be restricted by invitation only, regardless of the community type. This ensures that only selected members can access and participate in the room, making it suitable for special projects or private discussions.
Creating and Managing Rooms
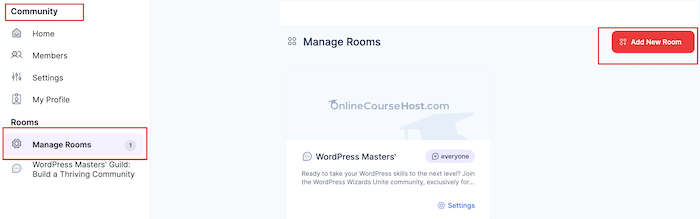
To add a room, log in to your website, navigate to the "Community" tab, select "Manage Rooms," and click "Add a New Room."
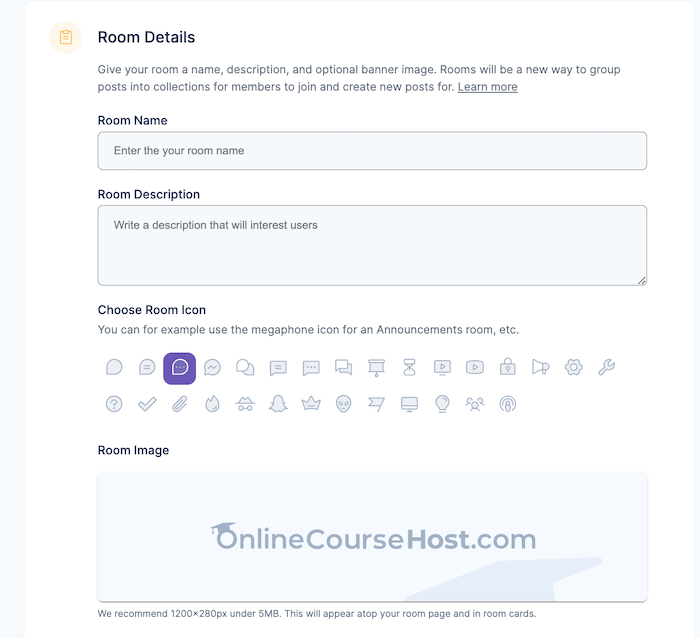
Customize the room by naming it, writing a short description, and adding an image. Also, you have to decide on the access level.

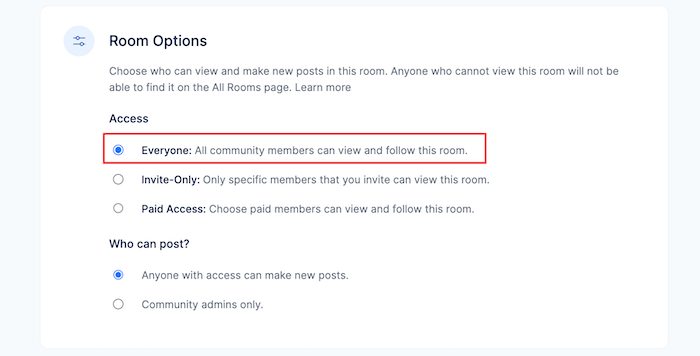
Free Room
Select "Everyone" for access. There are no membership fees, no paywalls, and no barriers to entry. It's like throwing open the doors to your clubhouse and inviting the whole neighborhood to come hang out!
Paid Room
Choose "Paid Access" and set the subscription details. The key to successful paid rooms is offering exclusive goodies learners can't get for free. This is your value proposition!
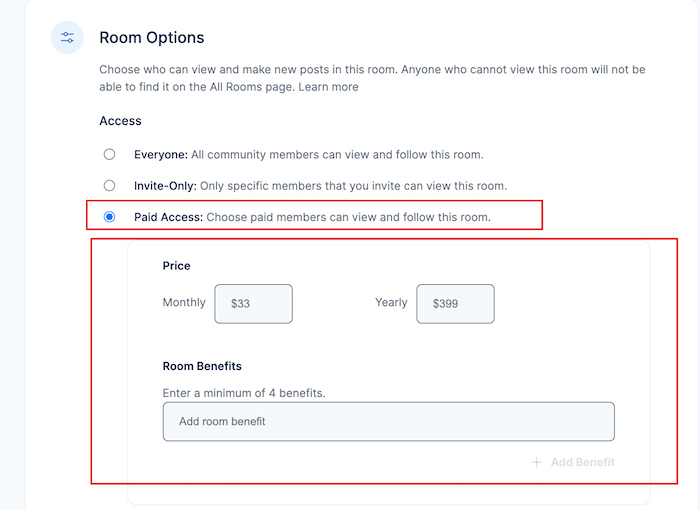
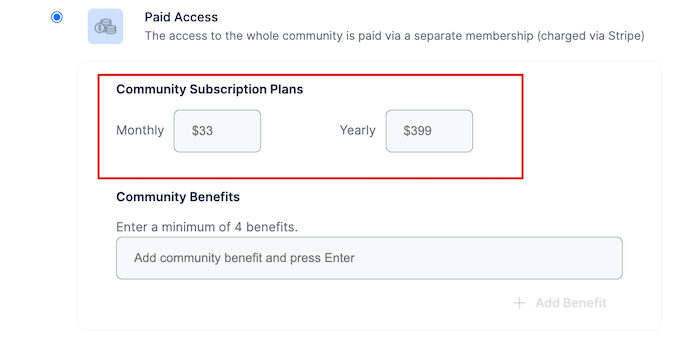
Ready to create a paid room? Decide on pricing!
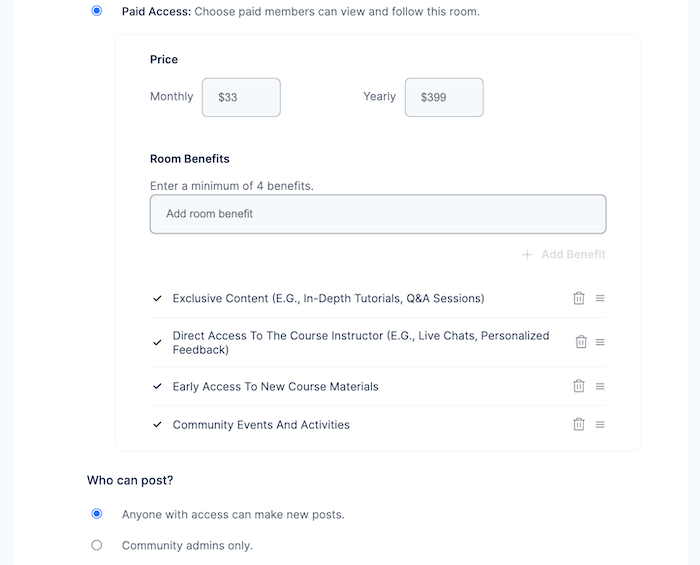
- Monthly or Yearly: Choose a price for access, with a discount for yearly subscriptions to keep members around longer.
- Highlight the Value: Before saving, list at least four benefits that make the paid room worth it compared to the free one. Think exclusive content, direct access to you, early access to materials, or special events.
Invite-Only Room
Select "Invite-Only" to restrict access to invited members. This means that only people who have been specifically invited to the room with a link will be able to see and participate in it.
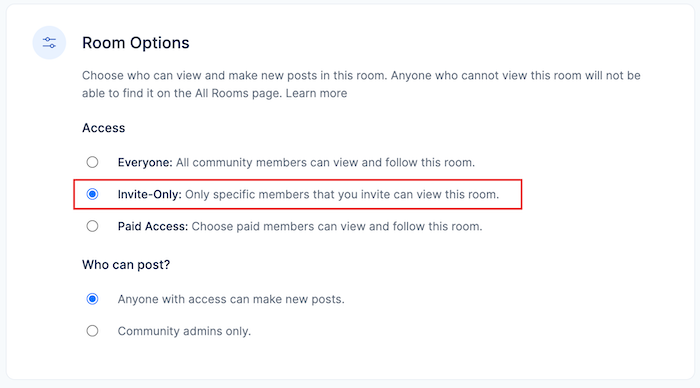
You can also choose who can write posts in the room. You can let everyone join the conversation, or keep it to admins only.
So, play around with these settings to build a fun and lively online community for your course! This way, you can fit the needs of everyone who joins.
Online Course Community User Management
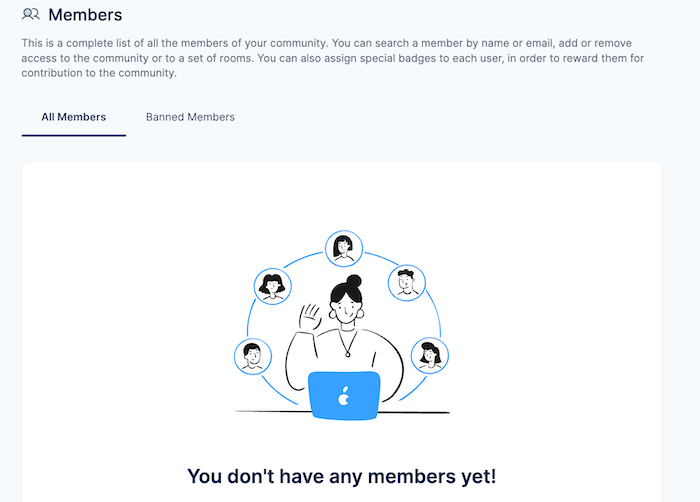
The user management interface provides a variety of tools to manage your members effectively and helps you keep things organized and running smoothly.
Such include:
- Adding and Removing Users from Rooms: Control access to specific rooms based on community type (Free, Invite-Only, or Paid).
- Badge Settings for Members: Recognize and motivate members with badges highlighting their contributions and achievements.
Adding and Removing Users from Rooms
In addition to managing room access, you can also use the user management screen to add or remove members from your entire community.
To manage users in your community:
- For free communities, members are automatically added upon login. Creators cannot remove users from free rooms.
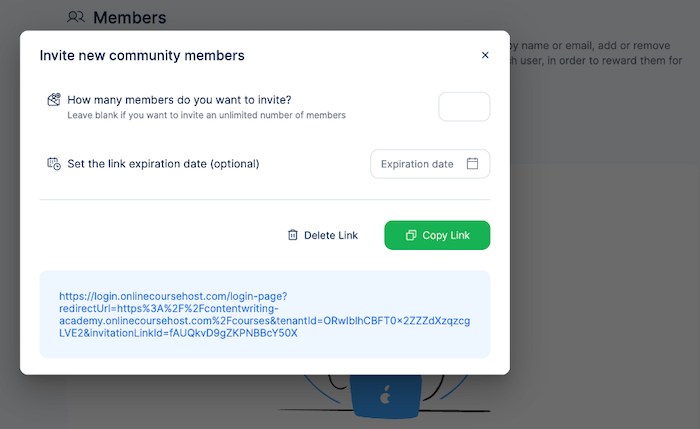
- For invite-only communities, you'll need to send invitation links.

- For paid-only communities, you'll need to set up a subscription.
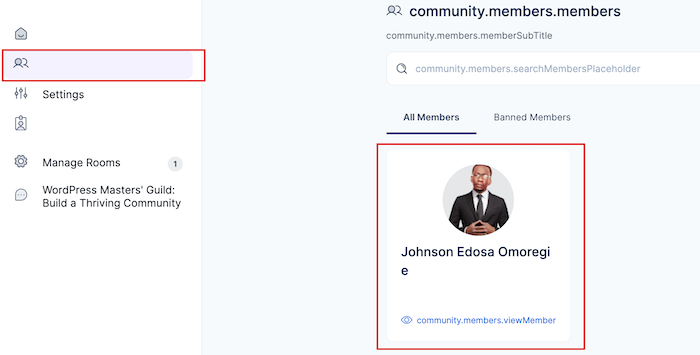
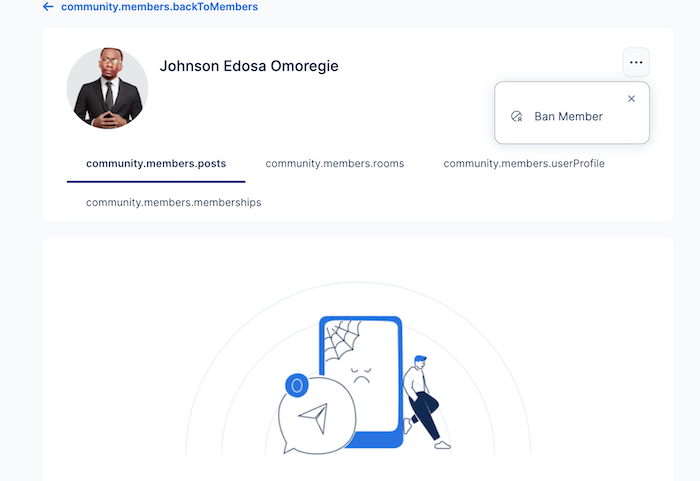
- If you need to remove a member, you can find them in the member list of their specific community or room. From there, you can easily select and remove them.
- Click on "Ban Member" to remove the person.
Both removing members and granting free access can be done through the "Members" screen, and members can also remove themselves from rooms they no longer want to be in.
Badge Settings for Members
Everyone loves a good badge, right? With the user management screen, you can assign special badges to your members to recognize their awesomeness and keep them motivated.
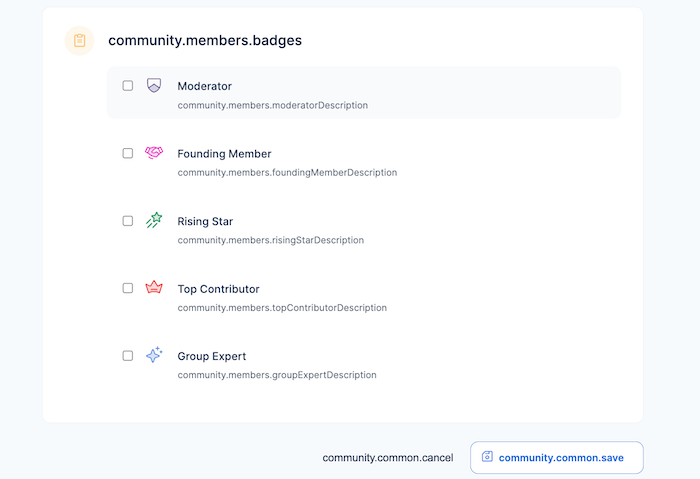
There are five different badge types to choose from:
- Moderator: They can keep things running smoothly by managing posts, removing members, and participating in all discussions. Award it to trusted people to help build a great community.
- Founding Member: This badge gives special recognition to members who have been with the community from the start.
- Rising Star: Reward members for their valuable content contributions by identifying them as Rising Stars.
- Top Contributor: Upgrade a Rising Star to a Top Contributor to further recognize their contributions and encourage continued engagement.
- Group Expert: Identify members who can answer almost any question within the community. Reserve this for your team members or the most knowledgeable community members.
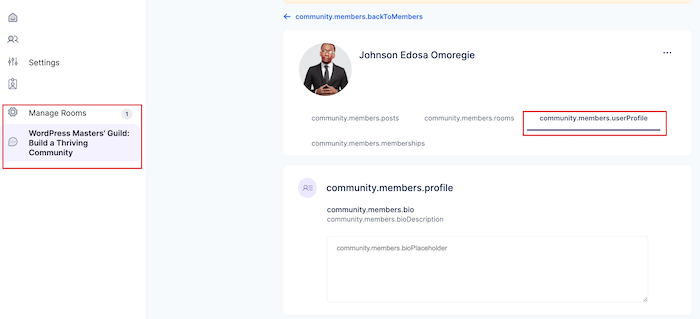
Giving a badge is easy, just find the member's profile in their room, scroll down to "Badges," and pick the one that fits them best. It's like giving out gold stars, but way cooler!
Conclusion
Building an online course community around your online course is key! It makes learning better, keeps students motivated, and helps them grow.
Ready to try it out? OnlineCourseHost.com lets you create free, invite-only, or paid communities for your students.
Plus, it's an all-in-one platform for online courses. Build, host, manage, and even get help from an AI assistant – all in one place!
Are you an online course creator? Check out OnlineCourseHost.com to build a thriving community and create a fantastic learning experience. (If you already use it, share your tips!)
I hope you find this post helpful, and to get notified when new content is available here at the Academy, you can subscribe here to our weekly newsletter:
If you are looking to ask any questions on online course creation, you can reach me here on my Facebook group:
Join the Course Creator Academy Facebook Group
Ready to learn how to launch your first coaching program or course on OnlineCourseHost.com? Here are the helpful guides for you to check out:
- Best Online Course Platforms (Ultimate Guide)
- How To Choose An Online Course Topic That Sells
- How To Record And Edit Your First Online Course
- Affordable Online Course Equipment - Complete Practical Guide
- How To Hire An Online Course Team
- The Ultimate Online Course Launch Checklist
- How To Create The Perfect Online Course Sales Page
- Create A Powerful Brand For Your Online Courses (In 5 Steps)
- How To Sell Online Courses? The Ultimate Guide
- How To Promote Your Online Course - Complete Guide
Let me know in the comments below what other topics you would like me to cover or any questions that you have.
Thanks for reading… and enjoy the course creation process! 😉
Course Creators Academy, a community by OnlineCourseHost.com
Founded by Vasco Cavalheiro
Online Course Creator

 Start Here
 Course Creation Journey Step by Step
  Course Creation Software Reviews
 Online Course Marketing
 Course Creation Tips & Tricks
 Course Equipment
 Online Course Marketplaces
 Revenue Reports
 Best Practices
 Frequently Asked Questions
 Platform Reviews