


How To Use Drip Campaigns To Market Your Online Course
 Platform Review
Transform your online course marketing with drip campaigns. Learn to craft engaging content schedules, customize email notifications, and keep your students coming back to your course website.
Drip campaigns are a way to share your course content with your students bit by bit over time, instead of all at once.
Drip campaigns are a very effective way to increase course engagement, because they keep your students coming back to your website.
In a drip campaign, you set up your course so that new lessons or sections become available to your students on a schedule. This could be based on when they sign up, when they start the course, or on specific dates you choose.
For example, you might release one new lesson every week, or unlock a whole new section of your course every month.
In this post, I'll show you how to use drip campaigns to market your online course. I'll cover:
- Why it's a great tool for selling and teaching online courses
- How to set one up step-by-step
- Tips to make your drip campaign super effective
Whether you're just starting out or you've been teaching online for a while, using a drip campaign can help you sell more courses and keep your students happy. It's a win-win!
So, are you ready to learn how to use drip campaigns to market your online course? Let's begin and discover how this simple technique can make a big difference in your online teaching business.
Table of contents
You can also check out all the free guides available at the Course Creator Academy by clicking on the Academy link on the top menu.
Setting Up Your Drip Campaign
Now that you understand why drip campaigns are so useful, let's talk about how to set one up.
Planning your content schedule
Before you start your drip campaign, you need a good plan. This involves two main steps:
- Breaking down course material into digestible lessons
Think of your course like a big meal. You wouldn't eat everything at once - you'll break it into smaller bites.
Here's how to do that with your course:
- Look at all your course content.
- Divide it into smaller chunks or "lessons" that make sense together.
- Each lesson should cover one main idea or skill.
- Make sure each lesson isn't too big - aim for something a student could comfortably work through in a week or less.
- Put your lessons in a logical order, so each one builds on the one before.
For example, if you're teaching a course on baking bread, your modules might be:
- Understanding ingredients
- Mixing and kneading dough
- Proofing and shaping
- Baking techniques
- Advanced bread recipes
- Determining a suitable release schedule
Now that you have your modules, decide when to release each one. Here are some tips:
- Think about how long each module might take to complete.
- Consider how often you want students to engage with your course (daily, weekly, bi-weekly, etc.).
- Remember to give students enough time to practice what they've learned.
- You might start with more frequent releases and then space them out more as the course goes on.
For our bread-baking course, a schedule might look like this:
- Week 1: Understanding ingredients
- Week 2: Mixing and kneading dough
- Week 3: Proofing and shaping
- Week 4: Baking techniques
- Week 6: Advanced bread recipes (giving an extra week for practice)
Activating the Drip Feature
Once you have your plan, it's time to set up the drip feature. I'll be using the OnlineCourseHost.com platform. This requires you to sign up with the platform if you don't have an account yet.
Follow these steps to activate the drip schedule on your course:
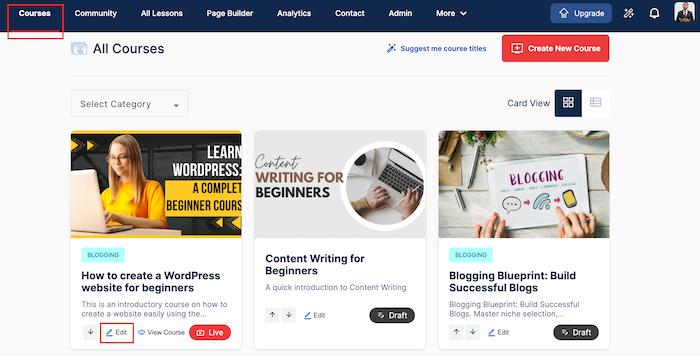
- Log into your account and go to your course. Click on "Edit" below the course you want to apply the drip schedule.
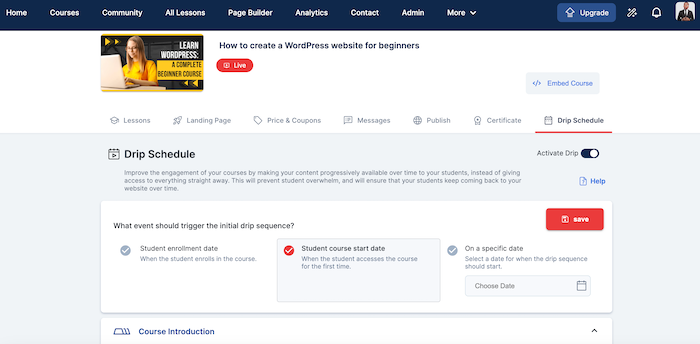
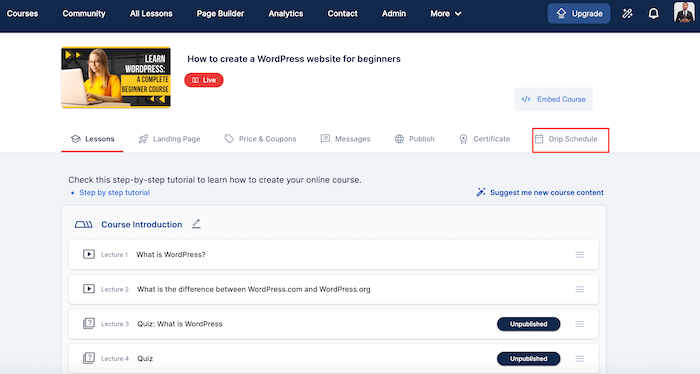
- Click on "Drip Schedule".
- Toggle the "Activate Drip" button to turn it on.
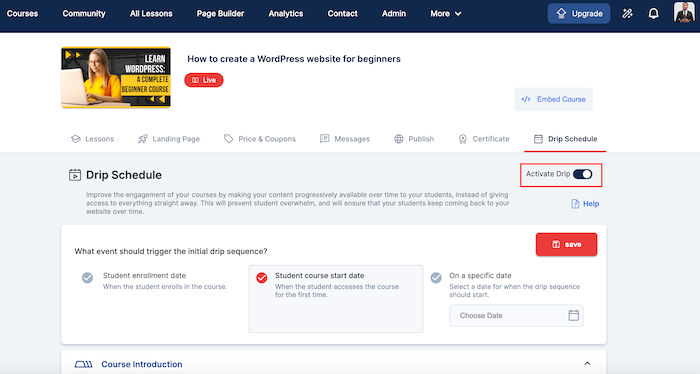
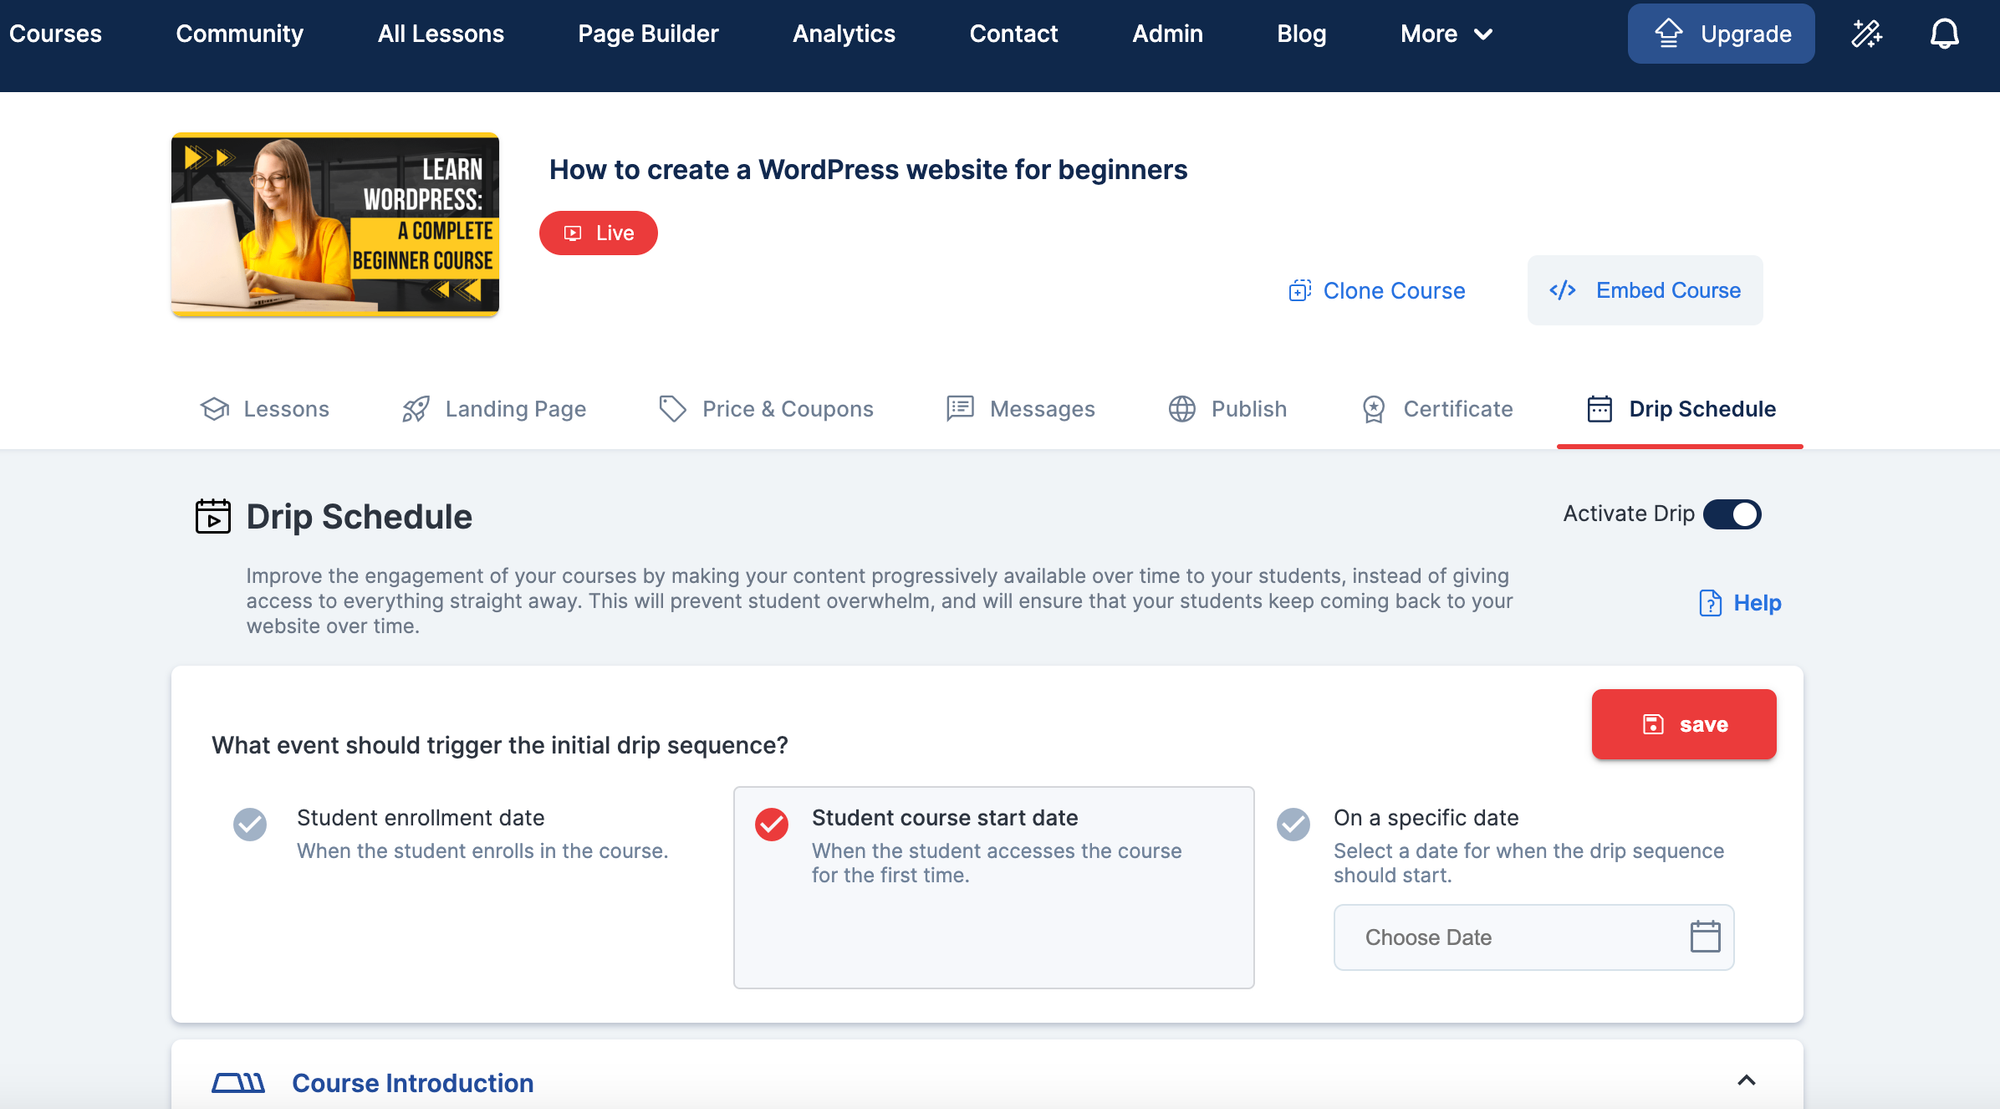
Choosing the initial trigger for the drip sequence
When you set up your drip campaign, you must choose what event will start the sequence for each student. OnlineCourseHost.com offers three options:
a. Student enrollment date
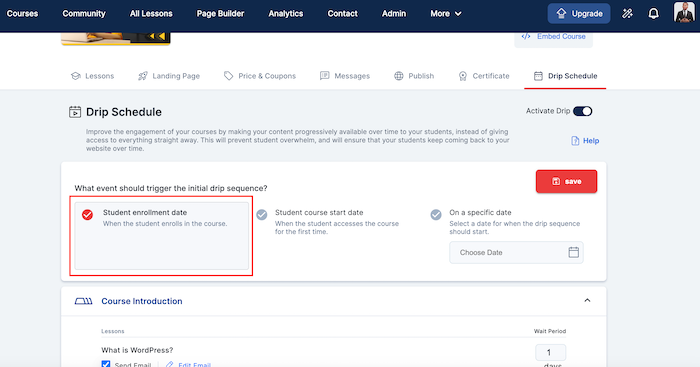
- The drip starts as soon as a student signs up for your course.
- Good if you want everyone to start right away.
- Example: Day 0 (enrollment day) - Lesson 1 available, Day 7 - Lesson 2 available, etc.
b. Student course start date
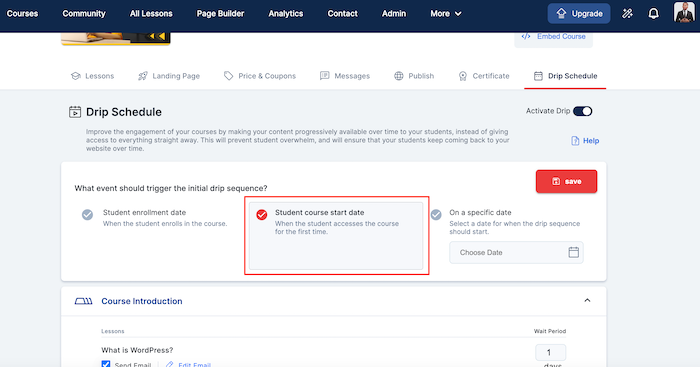
- The drip starts when a student first accesses the course content.
- Useful if students might enroll but not start right away.
c. On a specific date
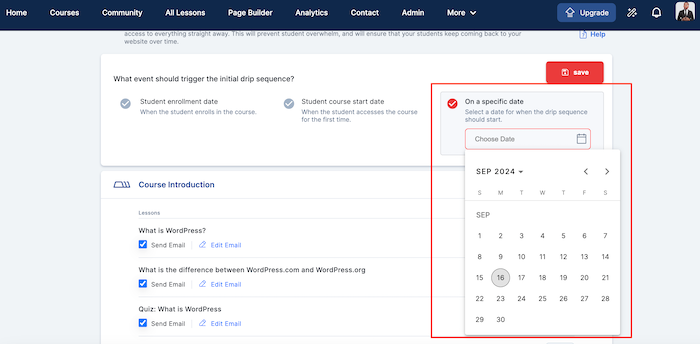
- All students get access to new content on the same calendar dates you set.
- Good for cohort-based courses where everyone moves through together.
- Example: Jan 1 - Lesson 1 available, Jan 8 - Lesson 2 available, etc.
Next,
- Scroll down, and you'll see the lessons for your chosen course.
- For each lesson, enter the number of days after the start date when you want it to be released.

- If you want to send an email when a lesson is released, check the "Send Email".
Enhancing Your Drip Campaign with Email Notifications
Let's talk about a powerful tool in your drip campaign toolkit: email notifications.
These little messages can make a big difference in keeping your students engaged and excited about your course.
Here's how to use them effectively:
Setting up email announcements for newly released content
Think of these emails as friendly reminders that say, "Hey, there's new stuff to learn!" Here's why they're great:
- They grab attention: Students might forget to check your course regularly. An email pops up in their inbox, reminding them to log in.
- They create excitement: A well-crafted email can get students pumped about new content.
- They help with time management: Students can plan their study time when they know new content is available.
Editing Drip Schedule Email
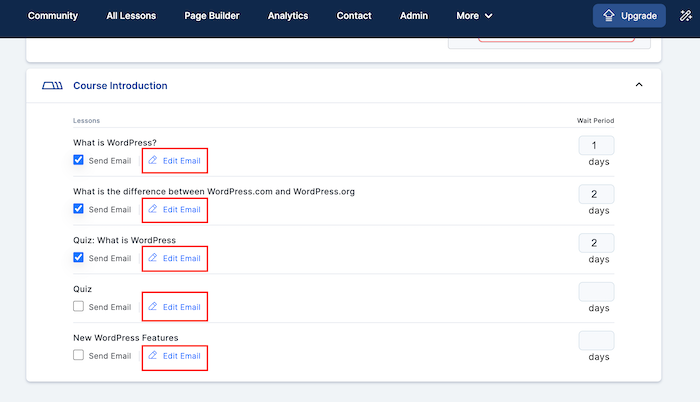
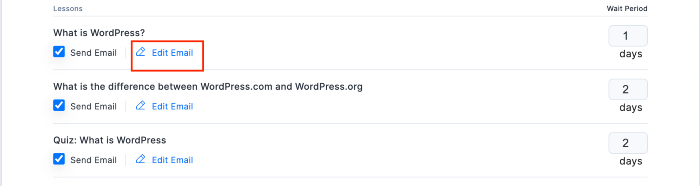
You can edit the email for each course lesson, which notifies students when the lesson is available.
To do this:
- Click on "Edit Email" under the lesson you want to edit
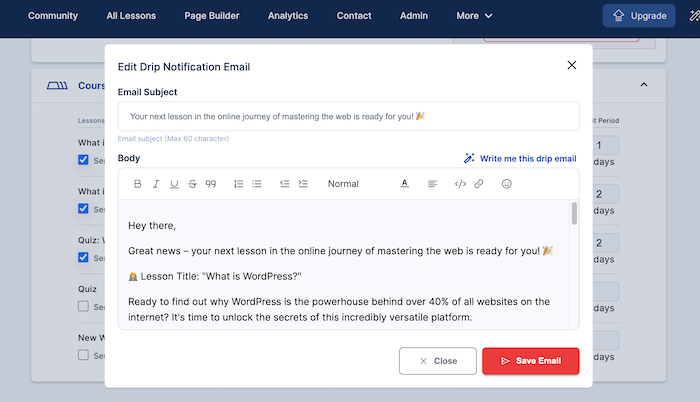
- Type in the email subject and body content of the email
- You can also use the AI assistant to help compose your email. Click on "Write me this drip email," to use it.
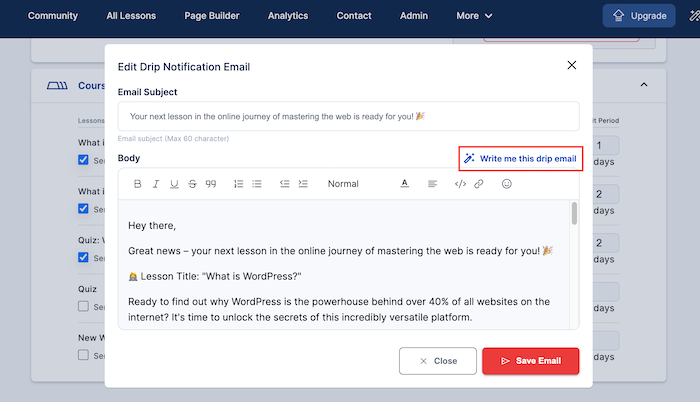
- Here is an example of what the AI assistant generated for me.
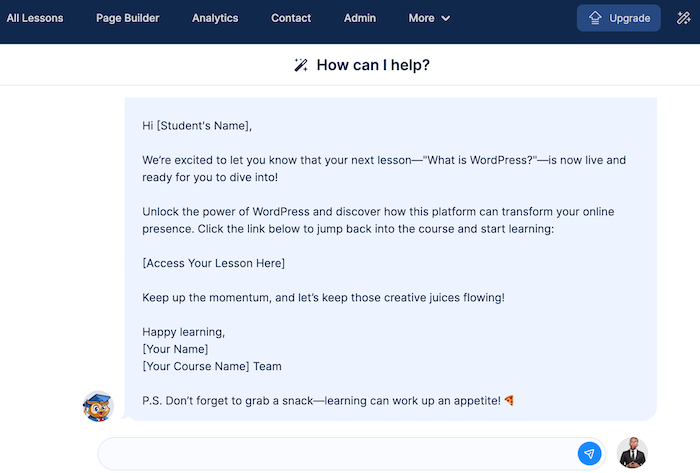
- Once done, click "Save."
Remember, don't overdo it. Too many emails can annoy students. Find a balance that keeps them informed without flooding their inbox.
Also, setting up your drip campaign takes some planning and a bit of technical setup, but it's not too hard. Once it's running, you'll be able to guide your students through your course in a way that helps them learn better and keeps them engaged.
Customizing email subjects and body content
Now, let's make those emails for your drip pop! A boring email might get ignored, but an interesting one will get opened and read.
Here's how to make your emails shine:
- Craft catchy subject lines:
- Use action words: "Unlock your next lesson now!"
- Create curiosity: "The secret to better photos is waiting for you..."
- Personalize it: "John, your next step to mastery is here!"
- Write engaging body content:
- Start with a warm greeting.
- Briefly recap what they've learned so far.
- Introduce the new content with enthusiasm.
- Give a teaser of what they'll learn.
- End with a clear call-to-action like "Click here to start your next lesson!"
- Add some personality:
- Use your own voice - write like you're talking to a friend.
- Maybe throw in a joke or a fun fact related to the lesson.
- Consider adding a motivational quote or a student success story.
Here's a quick example:
Subject: Ready to take your photos from "meh" to "wow"?
Body: Hi [Student Name],
Great job mastering the basics of composition in last week's lesson! 🎉
Your next exciting lesson on lighting techniques is now available. Get ready to learn:
Three simple tricks to flattering portrait lighting
How to create a mood with shadows (it's easier than you think!)
Ready to light up your photography skills? Click here to start your lesson!
Happy snapping, [Your Name]
Strategies for Effective Drip Campaigns
Now that you know how to set up your drip campaign, let's talk about how to make it really shine.
Here are some strategies to make your drip campaign more effective and keep your students coming back for more.
Mix It Up: variety in content delivery
Imagine eating the same meal every day - boring, right? The same goes for your course.
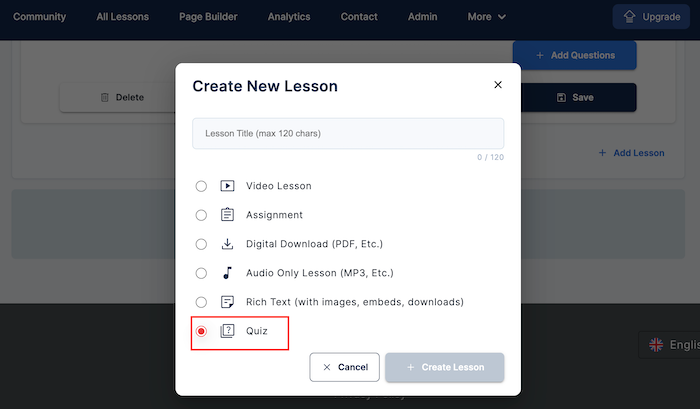
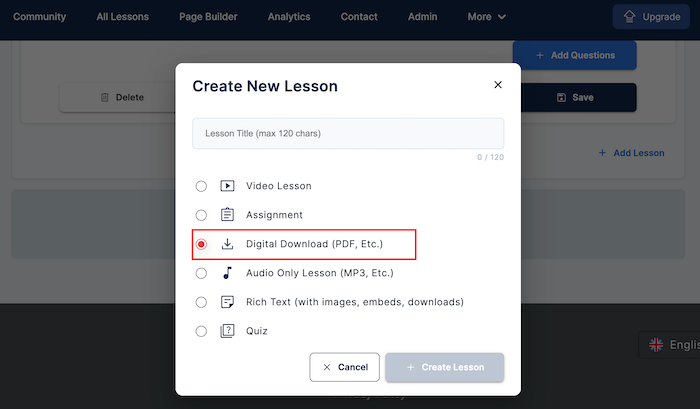
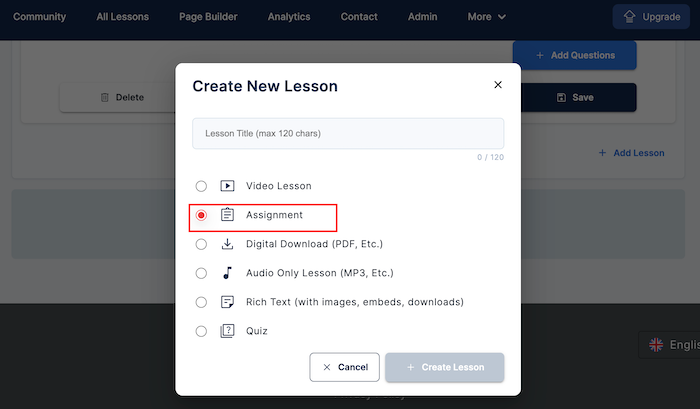
To keep things interesting, you may use different types of content in each drip. Here are some ideas:
- Video Lectures: Videos are great for explaining complex ideas or demonstrating techniques. They add a personal touch to your course. Keep them short (5-15 minutes) to hold attention. You don't need fancy equipment - a smartphone camera and good lighting can work wonders!
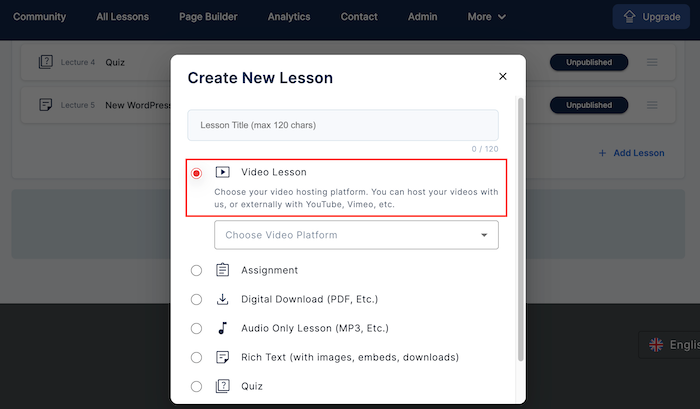
- Quizzes: Sprinkle in some quizzes to help students check their understanding. These can be fun and engaging, like a game show. Plus, they help students remember what they've learned.
- Downloadable Resources: Give your students something tangible with each drip. This could be a PDF checklist, a printable worksheet, or even a cool infographic. These resources add value and help students apply what they're learning.
- Assignments: Get your students doing, not just watching. Assignments could be writing tasks, practical exercises, or small projects. They help students put their new knowledge into practice. Remember to keep them doable - you want to challenge students, not overwhelm them.
To learn how to create video lectures, quizzes, downloadable resources, and assignments read our guide on "How to Create an Online Course (with an Intuitive Course Builder)".
Build Excitement: Creating Anticipation with Previews
Ever notice how movie trailers get you excited for the full film?
You can do the same with your course content. Here's how:
- Tease upcoming content: At the end of each module, give a sneak peek of what's coming next.
- Use email teasers: Send a short email hinting at what's in the next drip. Maybe share a fascinating fact or pose an intriguing question.
- Create a course roadmap: Show students the full journey ahead. This big-picture view can keep them motivated.
Customizing Your Drip Schedule

Now that we've covered the basics of setting up your drip campaign, let's look into how you can fine-tune it to fit your course perfectly.
Remember, there's no one-size-fits-all approach here.
The key is to create a schedule that works best for your content and your students. Let's look at two main ways to customize your drip schedule.
Setting Release Dates for Individual Lessons
Think of your drip schedule like a TV show. Just as each episode airs on a specific date, you can set exact release dates for each of your lessons. Here's why this is cool:
- Flexibility: You can time releases around holidays, weekends, or other important dates.
- Content complexity: Some lessons might need more time to digest. You can give these lessons a longer "airtime" before the next one drops.
- Student preferences: If you notice students typically engage more on certain days, you can schedule releases accordingly.
- Your schedule: You can align releases with when you're available to answer questions or host live sessions.
Here's how to do it:
- Look at your course outline and consider the complexity of each lesson.
- Check your calendar for any important dates or potential conflicts.
- Decide on a release date for each lesson.
- Input these dates into your course's drip settings.
For example, if you're running a 12-week course on digital marketing, your schedule might look like this:
- Week 1 (Jan 1): Introduction to Digital Marketing
- Week 2 (Jan 8): Understanding Your Target Audience
- Week 3 (Jan 15): Building a Strong Online Presence
- Week 4 (Jan 29): Search Engine Optimization Basics (note the two-week gap for this complex topic)
- Week 5 (Feb 5): Introduction to Pay-Per-Click Advertising ...and so on.
Adjusting the Number of Days Between Releases
Another way to customize your drip is by changing the number of days between releases. This method is more flexible and can adapt to your student's learning pace.
Here's why it's useful:
- Learning curve: As your course progresses, you might need to space out content more to allow for deeper learning.
- Practice time: Some skills need more practice. You can add more days between releases to give students time to practice.
- Feedback incorporation: If you're gathering feedback as you go, you can adjust the time between releases based on how students are doing.
- Balancing difficulty: You might release easier concepts more quickly while giving more time for tougher topics.
Here's how to approach this:
- Start with a basic timeline (like one release per week).
- Look at each lesson and ask: "How long might students need to really get this?"
- Adjust the days between releases accordingly.
- Be prepared to tweak this as you get feedback from students.
Using our digital marketing course example, it might look like this:
- Day 0: Introduction to Digital Marketing
- Day 7 (+7 days): Understanding Your Target Audience
- Day 14 (+7 days): Building a Strong Online Presence
- Day 28 (+14 days): Search Engine Optimization Basics (note the longer gap for this complex topic)
- Day 35 (+7 days): Introduction to Pay-Per-Click Advertising ...and so on.
Remember, the beauty of a drip campaign is its flexibility. Don't be afraid to adjust your schedule if you notice it's not working as well as you'd hoped.
Maybe you're releasing content too quickly and students feel overwhelmed. Or perhaps they're chomping at the bit for more, make sure to listen to your students and be ready to adapt.
Conclusion
Let's remember why drip campaigns are so great for marketing your online courses:
- They keep students interested by giving them new content regularly.
- Students learn better because they have time to practice each lesson.
- Courses feel more valuable when content is spread out over time.
- Students don't feel overwhelmed by too much information at once.
- It creates excitement for what's coming next.
- You can adjust the course as you go to make it better for students.
- Students can see their progress clearly, which motivates them.
Now, you might be thinking, "This sounds good, but also like a lot of work." You're right, it does take some effort. But it's worth it!
Here's why you should give it a try:
- It makes your hard work in creating the course pay off even more.
- You don't have to be perfect. Start small and learn as you go.
- Your students will appreciate the effort you're making to help them learn.
- It can make your course stand out from others.
So, why not give it a shot? Start with a simple weekly drip for your next course. See how it goes. You can always adjust things if needed.
Now, go ahead and start your drip campaign!
Join the Course Creator Academy Facebook Group
Ready to learn how to launch your first coaching program or course on OnlineCourseHost.com? Here are the helpful guides for you to check out:
- Best Online Course Platforms (Ultimate Guide)
- How To Choose An Online Course Topic That Sells
- How To Record And Edit Your First Online Course
- Affordable Online Course Equipment - Complete Practical Guide
- How To Hire An Online Course Team
- The Ultimate Online Course Launch Checklist
- How To Create The Perfect Online Course Sales Page
- Create A Powerful Brand For Your Online Courses (In 5 Steps)
- How To Sell Online Courses? The Ultimate Guide
- How To Promote Your Online Course - Complete Guide
Let me know in the comments below what other topics you would like me to cover or any questions that you have.
Thanks for reading… and enjoy the course creation process! 😉
Course Creators Academy, a community by OnlineCourseHost.com
Founded by Vasco Cavalheiro
Online Course Creator

 Start Here
 Course Creation Journey Step by Step
  Course Creation Software Reviews
 Online Course Marketing
 Course Creation Tips & Tricks
 Course Equipment
 Online Course Marketplaces
 Revenue Reports
 Best Practices
 Frequently Asked Questions
 Platform Reviews