


How to Create a Programming Course?
 Platform Review

Learn how to create a programming course from an experience course creator (specialised in that type of courses).
As a programming course instructor, I’m often asked, “Is it profitable to sell online programming courses?” or “Can programming courses be a good alternative source of income?”
The answer to both of these questions is, yes, selling programming courses is profitable because my courses have helped me earn more than 1.6 million dollars.
So, if you’re planning to launch programming courses - Great choice! I’m so happy with your decision.
But instead of these questions, you should ask, “How to create a programming course?” because creating an interactive programming course takes time and effort.
You can save both because I will teach you my process.
I’ll show you how I create programming courses sold thousands of times in seven simple steps.
So, how to create a programming course and sell it to many students?
Follow these exact steps to create a viable programming course:
- Choose your course topic
- Create an outline for your programming course
- Record your coding tutorials
- Host your course on a reliable hosting platform
- Price your programming course
- Publish your programming course
- Market your programming course
Below you’ll find detailed explanations of each step for launching a successful programming course.
Table of contents
You can also check out all the free guides available at the Course Creator Academy by clicking on the Academy link on the top menu.
This guide is specific to programming courses. But if you want to launch a course on any other topic, follow the steps mentioned in How to create an online course in 15 steps?
So without further ado, let's learn how to create an online programming course from scratch.
STEP 1: Choose your course topic
Let’s be real here. There are many types of languages, and even if you’re going to teach one of them, there’s still a lot of competition.
For example, see for the term “Javascript guide” Udemy shows more than 10,000 courses.
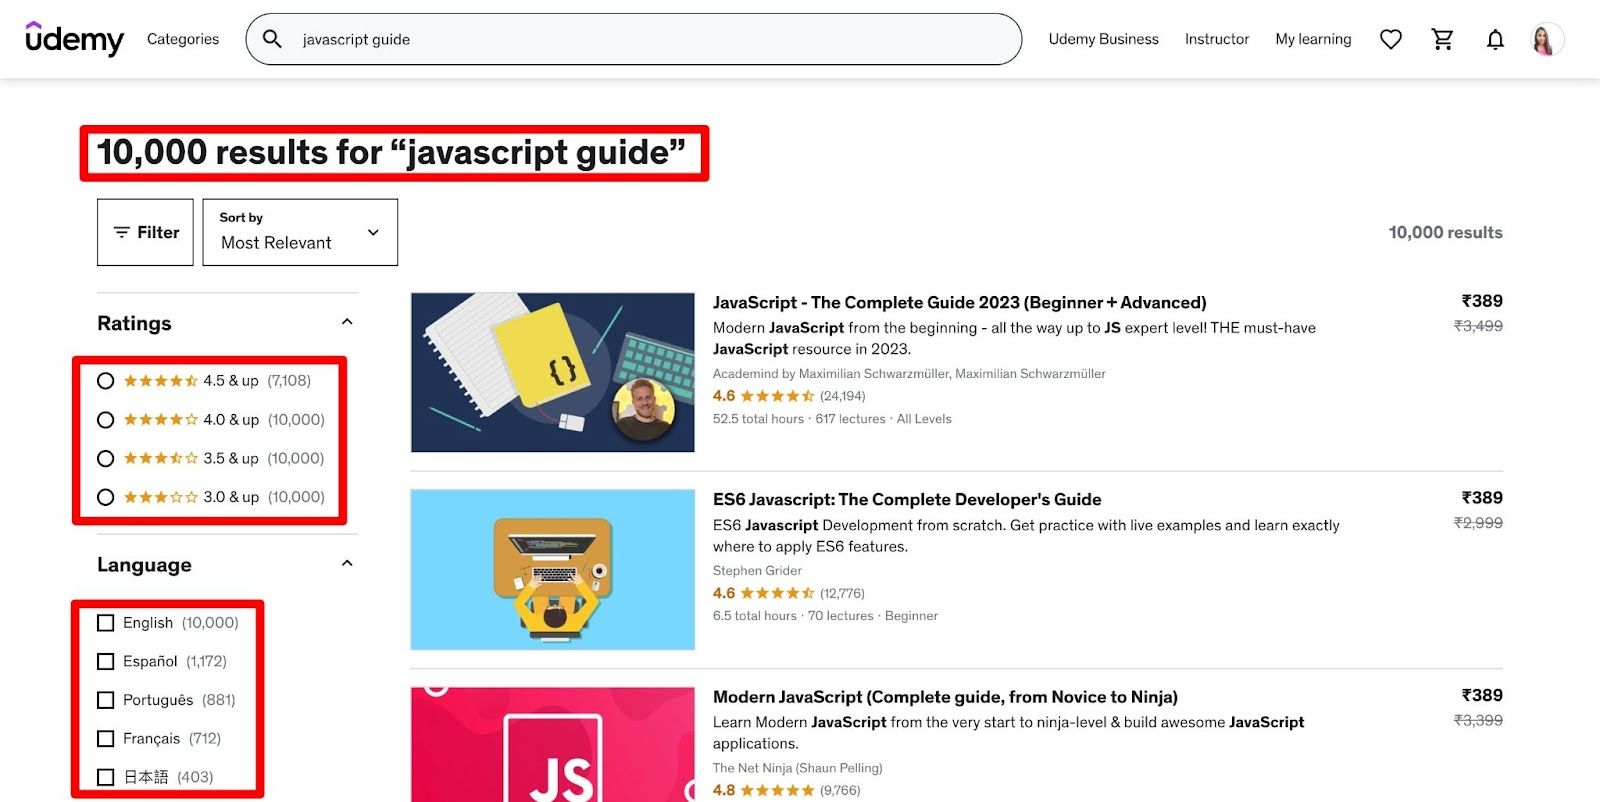
And then more are there if you set filters like choosing based on rankings or languages.
So, if you’re planning to start one more “Javascript for beginners” course, it’s better to stop now because it won’t sell well.
Why? Because there are already many instructors who have established themselves.
And even if you still launch the “Javascript for beginners” course, it’ll be lost among others that never got any students.
So instead of going in this route that is doomed to fail, take some time to find a topic that isn’t very competitive. That is a micro niche.
A micro niche is a niche inside a parent niche. For example, Cooking is the “parent niche,” and gluten-free cooking, vegan cooking, etc., are its micro niches.
This way, you still teach the topic you’re comfortable with but go deep on a particular topic - which is even better for getting serious students.
So, how to find a micro niche?
You can use Udemy’s popular marketplace insights platform, which is free for instructors.
You just put a term in the search bar, and it’ll show you a detailed report of that topic’s performance on the platform like this:
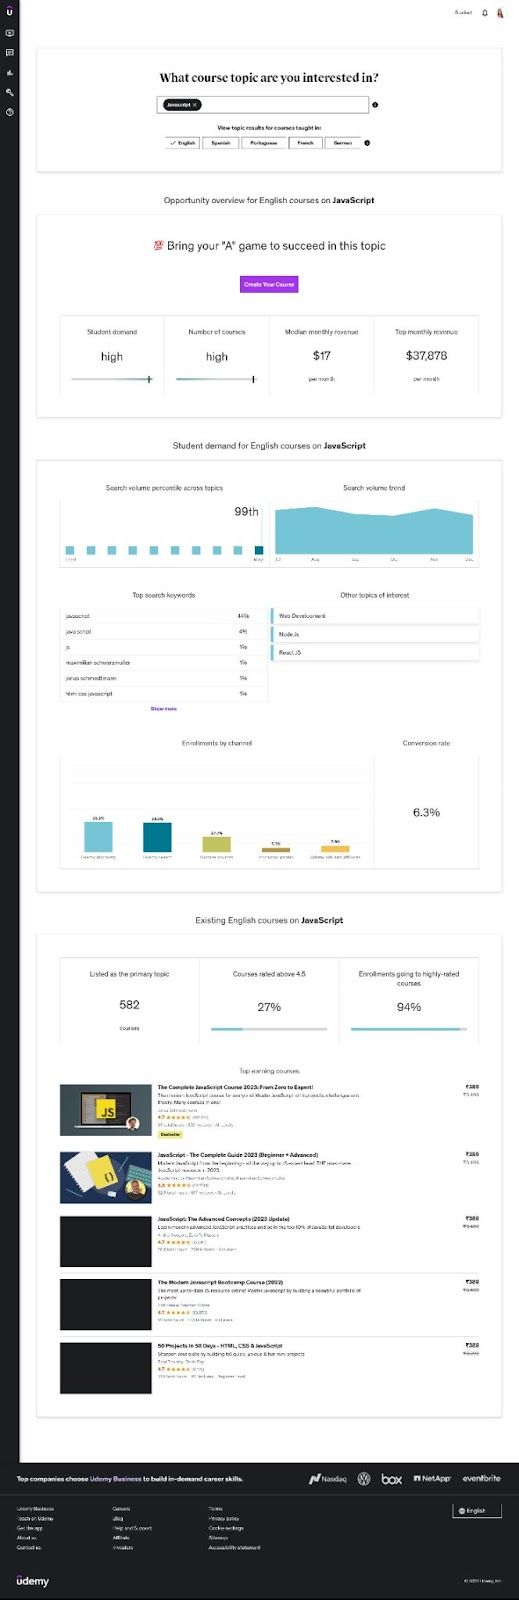
But can you trust this?
You can because Udemy has more than 44 million students, the most considerable sample size to gather insights.
You mainly have to look at the number of courses and students. For example, here’s the report for the term “Javascript.”
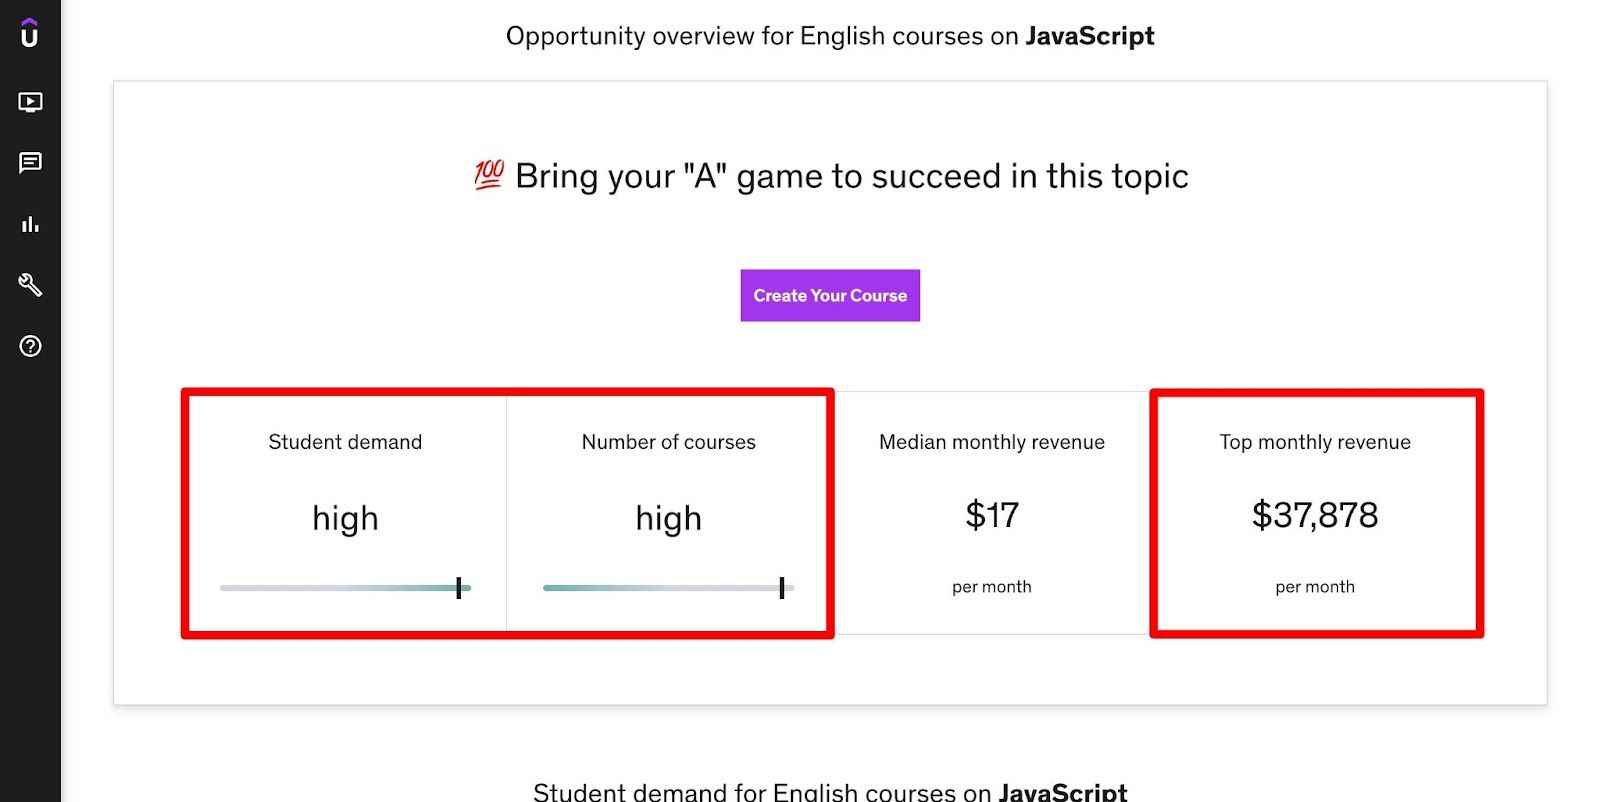
Both the number of students and courses are high, which means the competition is high.
You can also look at the “top monthly revenue” to estimate the top revenue you can make from one course.
Keep putting different terms to find your sweet spot. For example, this one:
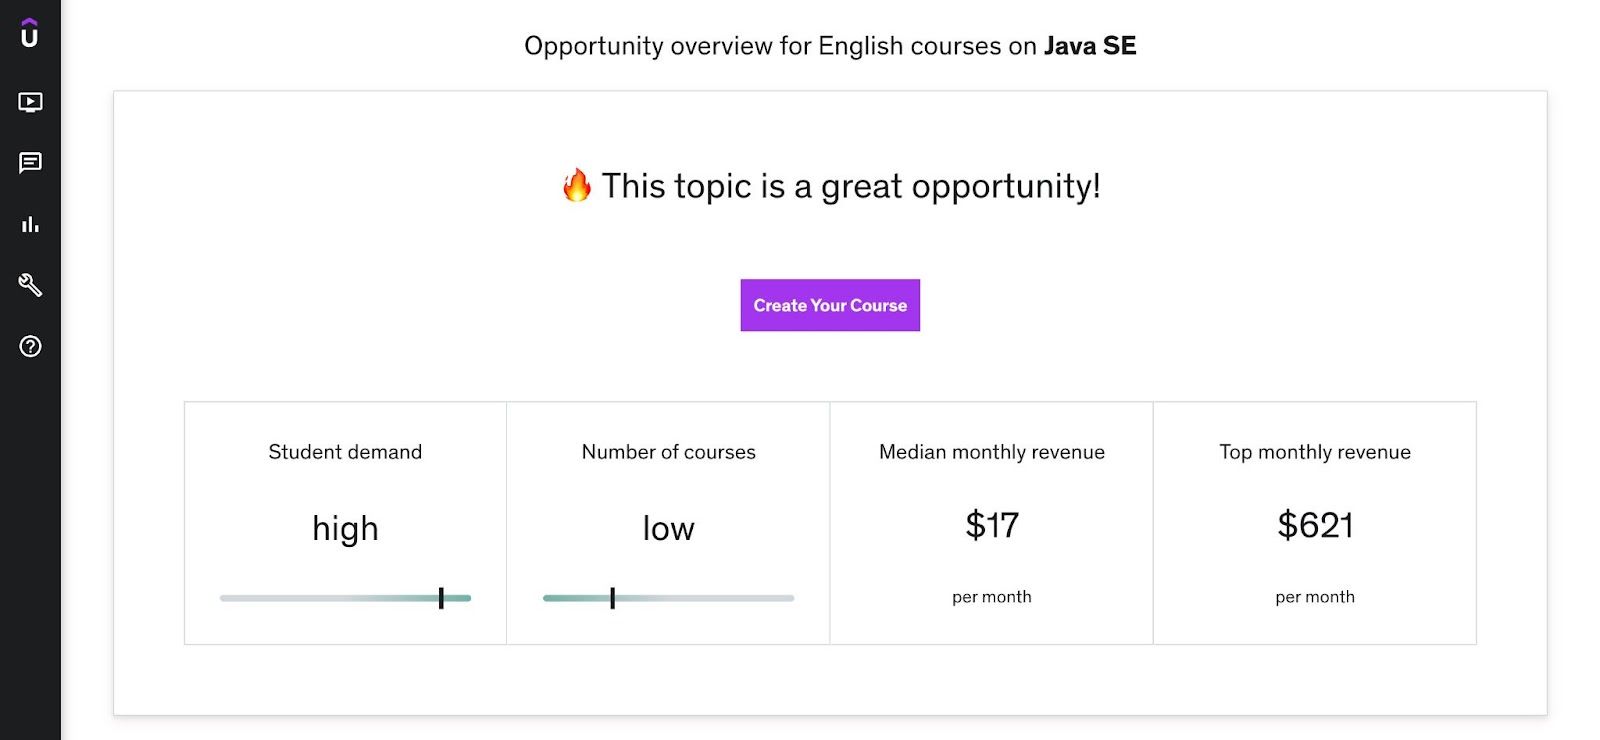
Student demand is high, and the number of courses is low - which means it’s an excellent micro niche.
Similarly, you can find a micro niche in the programming language on which you’re planning to create a course.
STEP 2: Create an outline for your programming course
Once you’ve identified a micro niche, it’s time to create a course outline better than others. You need to find a few courses on a similar topic.
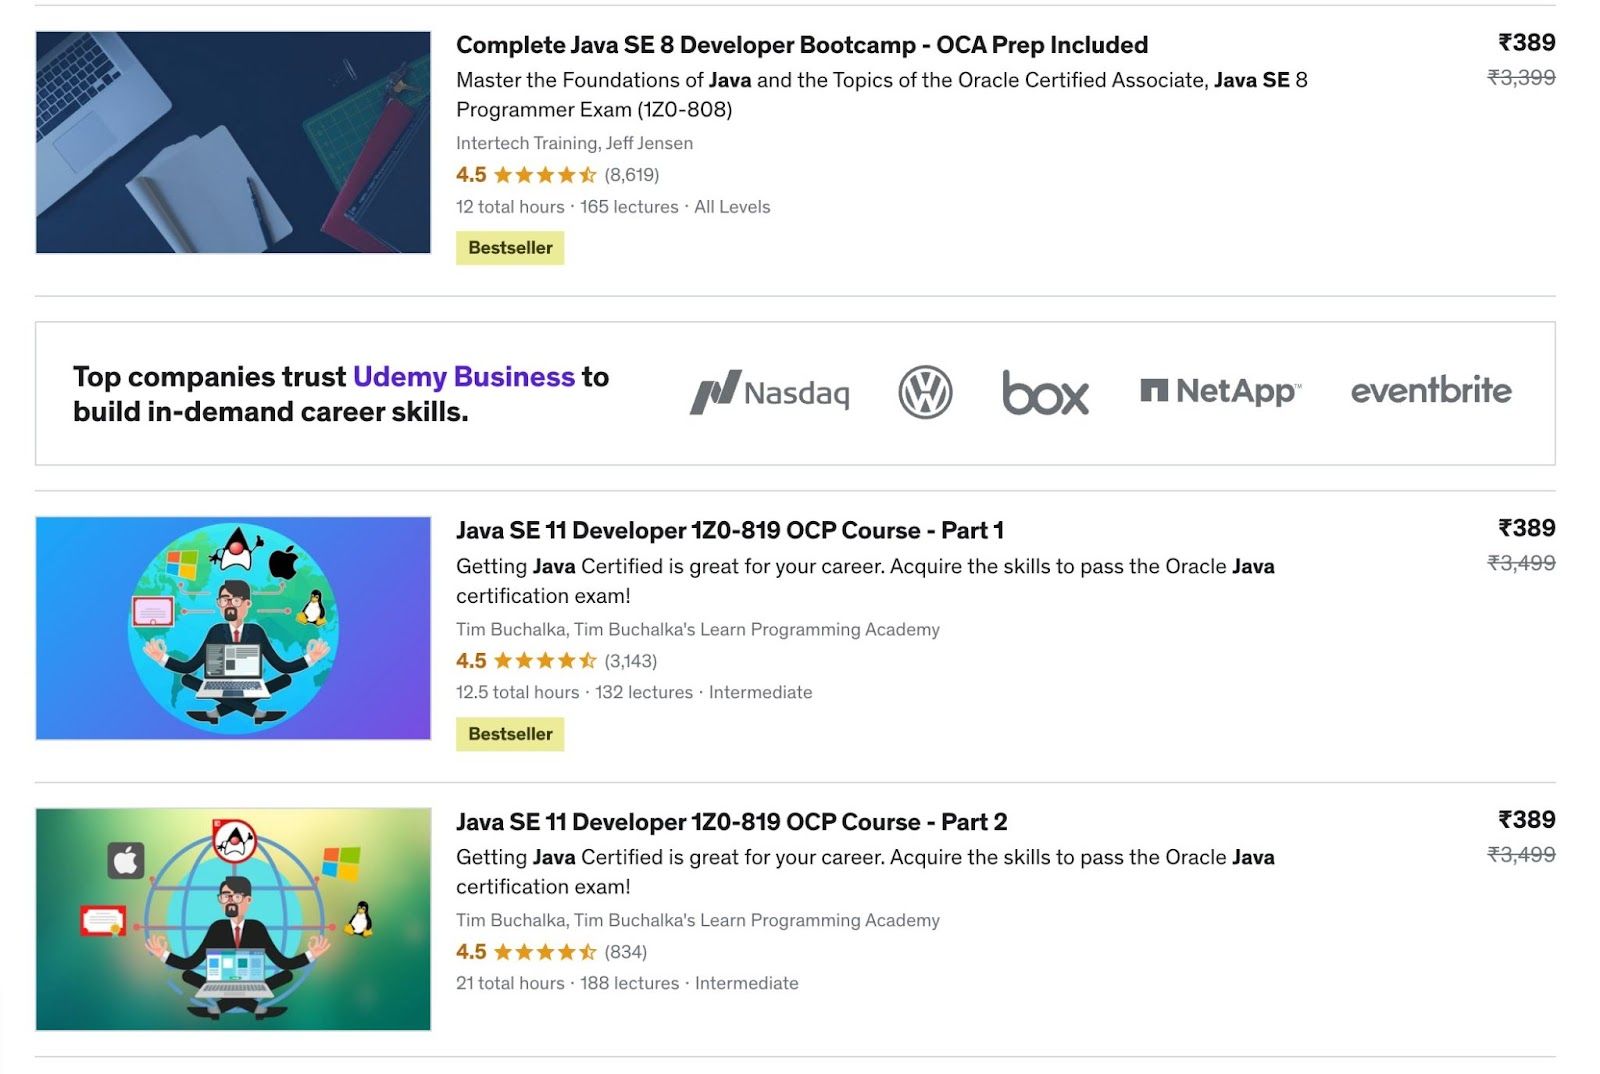
You can use the Udemy search feature to find these courses. For example, I found these courses on Java SE:
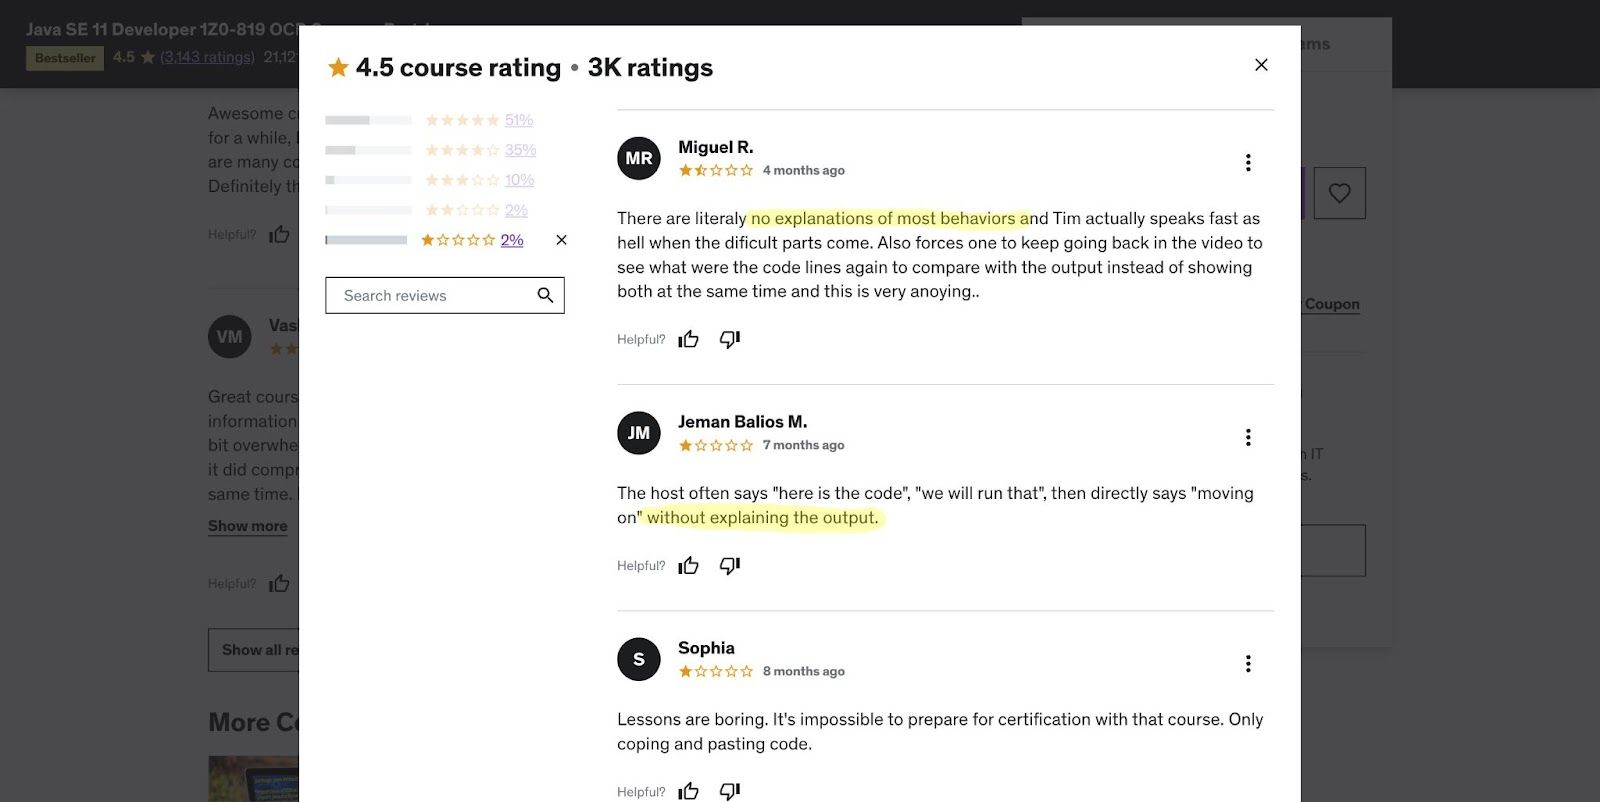
Now go through each course outline to create yours. Find the gaps these courses have. Read positive and negative reviews to find out what they did well and missed.
For example, these reviews tell us that the course is fast-paced without explaining the codes. So, you must explain all the codes you use in the course.
You can also use sites like Quora or Reddit to find out what people are talking about your topic. For example, these are people's questions about my topic, “Java SE.”
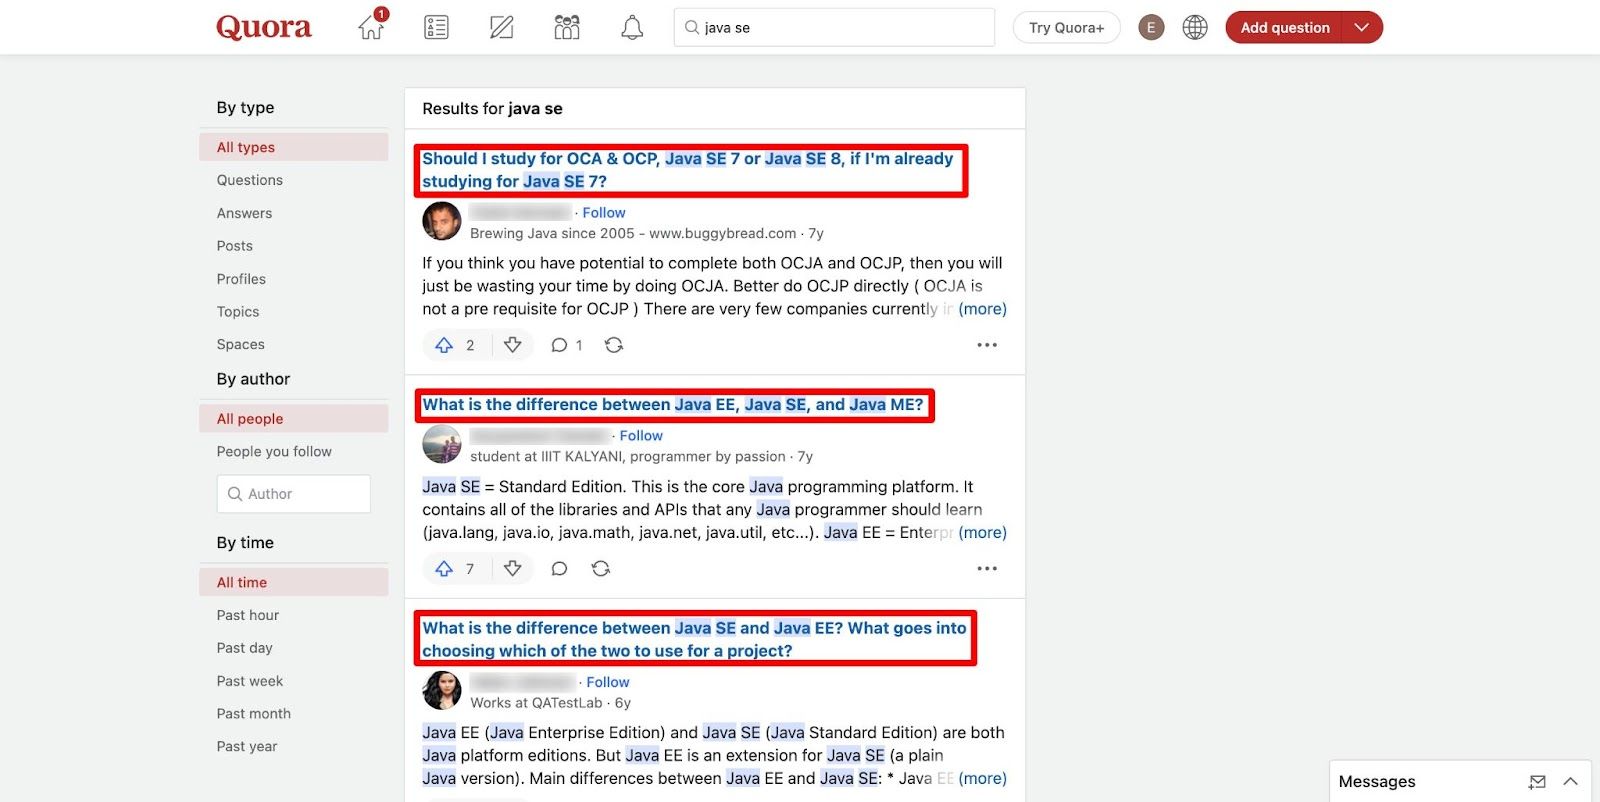
I’ll keep reading these questions and their answers to find things I can include in my course to make it better than others.
Similarly, you should create your course outline after conducting deep research and finding out your audience's questions about your topic.
After creating a detailed course outline, briefly define what you will explain in each lesson. In short, add bullet points to each section in your outline to ensure you’re staying on topic.
Now go ahead and create detailed scripts for each video lesson.
You should prepare in advance so you don’t go blank when filming. Once you’re ready with the script, it’s time to start shooting videos.
STEP 3: Record your coding tutorials
Recording your course videos is the most critical step in the course creation process. Your goal is to record high-quality, audible, visible, and engaging videos.
With many things to consider, and the fact that you can’t capture perfect videos on the first attempt, here are some essential tips to reduce both time and effort:
Record your Screen More
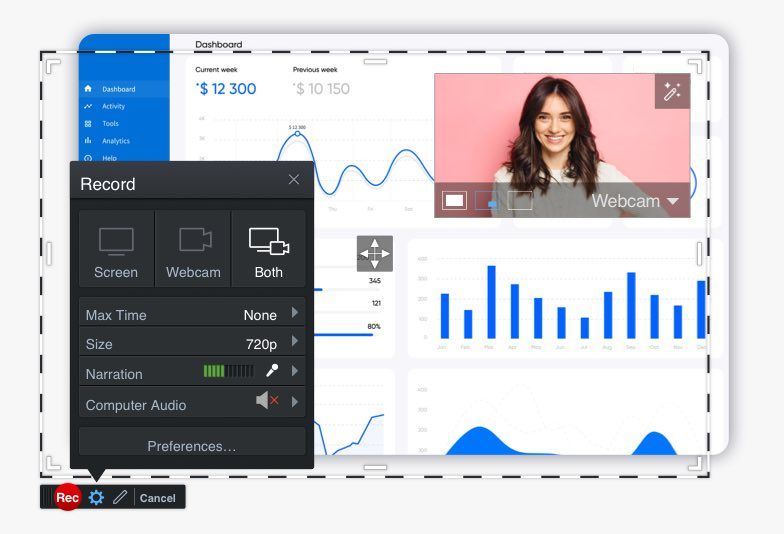
Since you’re teaching programming language, recording your screen (to show codes) makes more sense than recording yourself.
You should get reliable screen recording software like Screenomatic to record your screen.
But then the question pops up - should you not record yourself?
You should.
If you’re camera shy, do introduction and conclusion videos only. I record myself for both videos.
It helps students familiarize themselves with the face behind the voice and overall branding in the future.
If you’re a camera lover, you can also show yourself at the beginning and end of each video.
Tell them what they’ll be learning (at the beginning) and what they learned or any assignments they should do (in the end.)
That leads us to another question: what to do about the background?
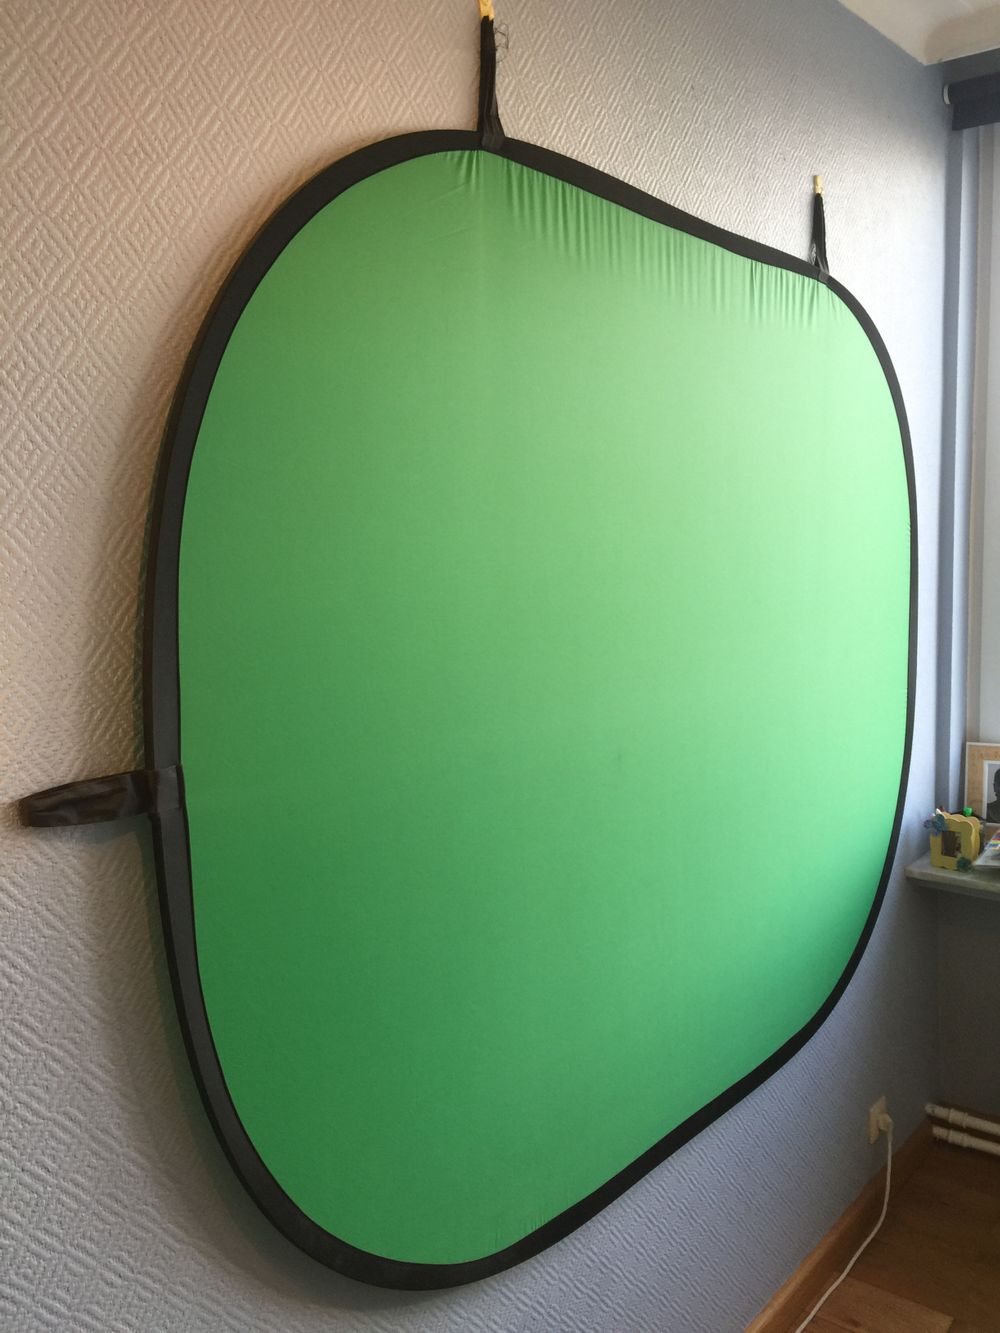
Set up a Green Screen
That’s right. We’re green screening our videos.
Since only two videos need a green screen, you might be tempted to make temporary arrangements.
But trust me, setting a green screen permanently is one of the best decisions you’d make for your online course business.
Why? Simply because you’ll need it to record more courses, promotions, trailers, and offers in the future.
So, find a place (in your apartment or office) to set up a green screen permanently like this:
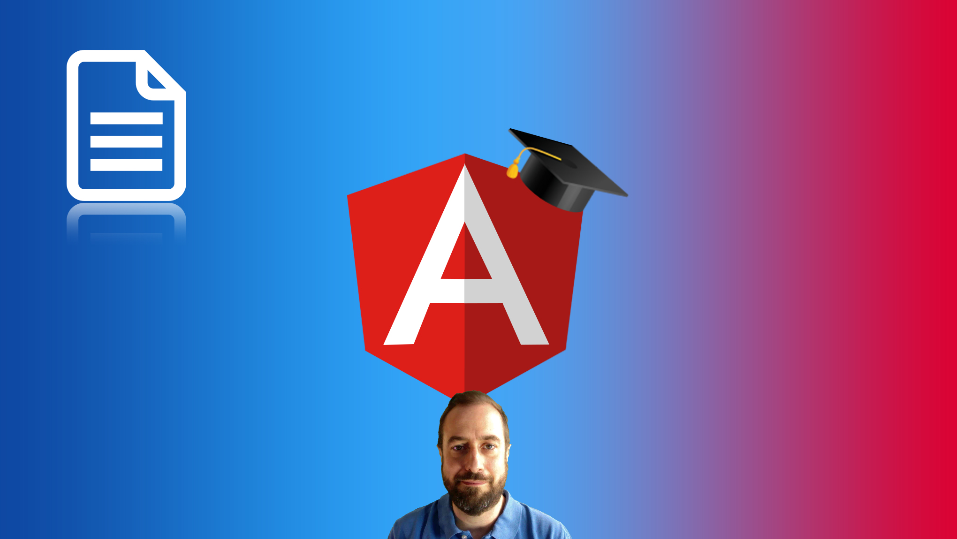
Then, you need lighting set up to ensure your videos are evenly lit. I’ve placed these lights on both sides of my green screen.

This setup helps me show my course branding in the background like this:
You can learn about my equipment in this online course equipment guide.
Here’s my green screen set-up tutorial for online course creators. Also, don’t wear green colored clothes while recording yourself on a green screen, or you’d look like this:

And here are a few more tips on recording high-quality green screen videos.
Camera Setup
Another important thing is to capture high-quality videos in which you’re clearly visible. Blur, dim light, or inappropriate angles can leave a wrong impression on your students.
You must set up a good camera at an appropriate angle with enough lighting.
The lighting is sorted with the lights you got while arranging the green screen. Just ensure you set them at the right angle. You should also record a demo video to see if they’re working.
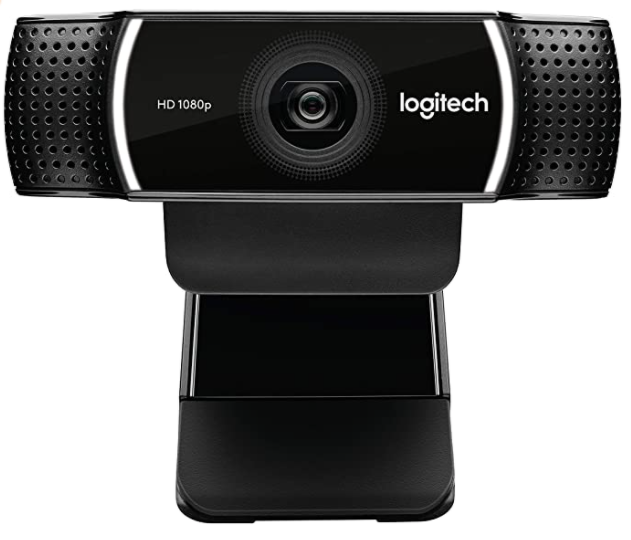
On to the camera, you can try out your computer’s built-in camera (a big advantage is that it’s already positioned well) but if you don’t like the quality, then get an affordable one like Logitech (I use this one.)
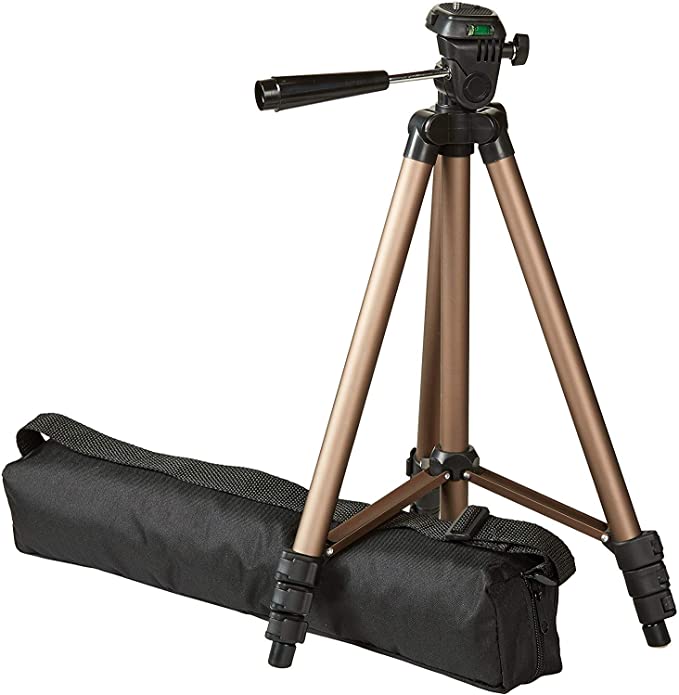
And get a tripod stand on which your camera sits. You can check out the Amazon camera tripod stand.
Or, if you’d like to learn about more options, read this post to identify the best camera for your online courses.
Microphone Setup
Lastly, you must ensure that the video is audible to the students.
For this, you can’t trust your device’s audio arrangement as it often captures low-quality audio. That’s why it's best to get a microphone.
I use an HD iRig Mic microphone and have set it up on my desk like this:

It helps me record high-quality audio, but you also need to ensure that the room is soundproof, so it doesn’t capture unwanted background noise.
Or, if you’d like to try others, here’s a guide to help you find the right microphone.
Tips for recording each class
The above tips were for the videos in which you’ll be recording yourself. Here are tips for recording your screen:
- Use dark mode in your IDE (integrated development environment). Students prefer dark theme courses as it’s not sore to the eye.
- Many students will watch on a mobile phone. Ensure the font size is big enough to be visible on a mobile screen.
- When keeping your background dark (or black), it’s best to use white as the font color.
- Make sure your main content takes a big portion of the screen (if you’re going to appear.) The code you’ll teach is the most important part of your course, so make it visible.
- Explain every step in detail, including why you used a query, what went wrong, what you did right, etc.
- Prepare the code you’ll be teaching in advance. Choose the easiest, most creative, and most memorable example to give.
- Include the correct code on the end window so students can easily view it.
- You can also create starter codes for students to download. The perfect platform to upload them is GitHub.
- And keep your desktop uncluttered. The lesser icons, the better.
- Remove the cursor from the window while recording - it can hide the code.
Overall, you should make it as simple as possible for students to learn.
They should not feel overwhelmed or bored but excited and motivated. And give assignments for them to try on their own.
Once you’re done recording all the videos, edit them to remove any bad parts.
Video editing is a tiring process and one you can outsource. Go to Fiverr and find a professional video editor if needed.
STEP 4: Host your course on a reliable hosting platform
Now that you have the course material, you should find a reliable course hosting platform to upload it.
This platform is also where you will sell your course, and students will access the content.
So, look for a platform with two things in mind:
- First, it should provide students with a faster and easier experience. They can quickly access the course material (even when many are viewing it on multiple screens.)
- Second, it should be easy to use for you. It should have all the features required to sell courses, like marketing, email integration, etc. And it should offer multiple options to accept payments.
OnlineCourseHost.Com is the perfect platform that ticks both points.
It is the easiest-to-use platform with marketing features like Facebook ads and email marketing integration.
It has a high-converting fill-in-the-blank landing page template you can use to sell courses.
And it has PayPal, Stripe, and other options to accept payments.
It offers a free-forever domain provider if you don’t have a website.
Above all, it runs super fast to ensure a high-quality learning experience for students.
Overall, if you’re a beginner course creator, OnlineCourseHost.Com is the best course hosting platform for you.
So, let me walk you step-by-step through the process of hosting your course on OnlineCourseHost.com and using the other features to set up your course for launch.
1. Create an account on OnlineCourseHost.Com
Click here to land on the homepage.
Then click on the “Try For Free” button. You can either sign up with an email or use your Google account.
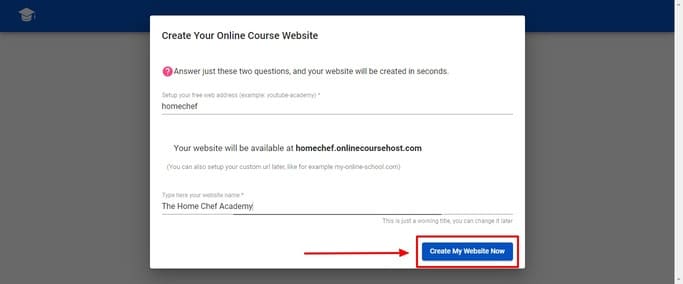
After creating an account, you will be asked to create a website domain name. Enter the desired domain in the first option and your website title in the second option. Then, click on the “Create my website now” button.
Congrats! You just created your account. The screen you see is your dashboard.
Note that the domain name you get is free, but if you already have a website and want to use that domain, you can change it.
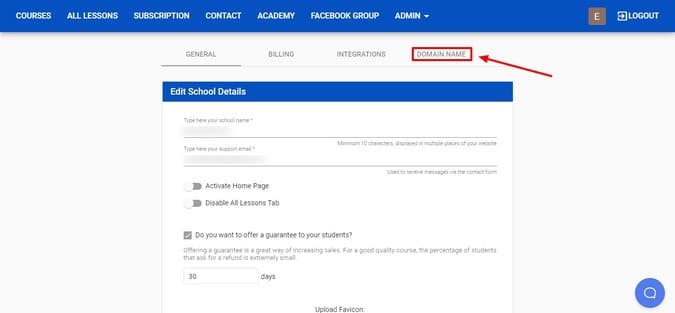
To add your custom domain, click “Admin” and “Admin Settings” on the top bar. Now choose the “Domain name” tab.
Then, click on the “Request Domain Name” button to see this screen.
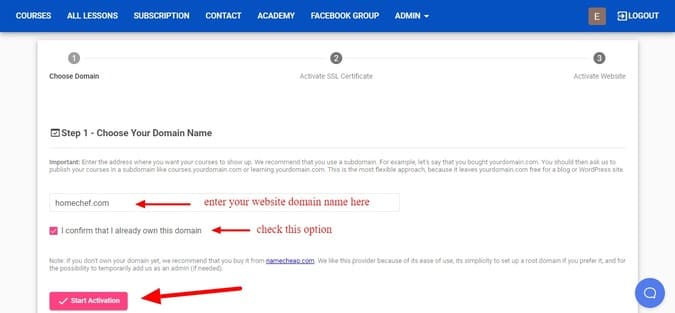
Add the record and value to your website's DNS records to activate the SSL certificate. You must add it to the DNS provider (where you manage your domain).
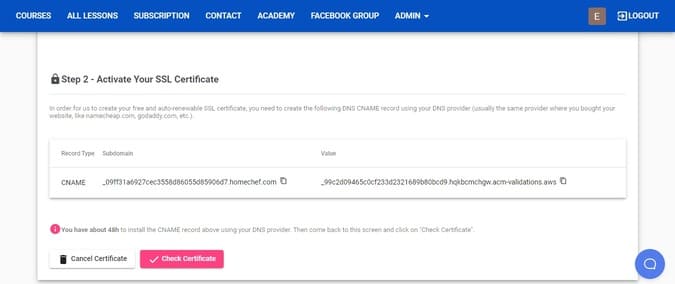
Once done, move on to the third step, activating your website. And that’s it! You can now use your custom domain name.
But if you want to keep using the free subdomain, you can do it as long as you want.
Now, let’s create your first course.
2. Upload your course content
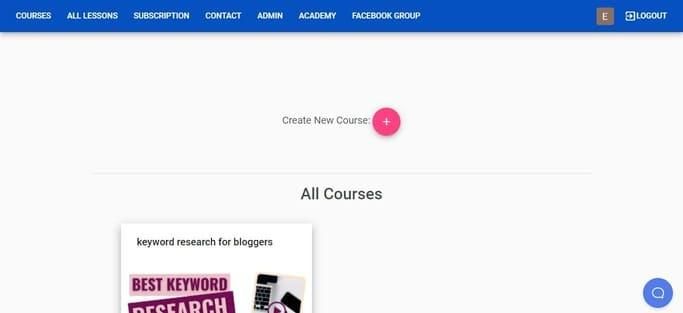
To upload your course on OnlineCourseHost.Com, click on the “Create New Course” button.
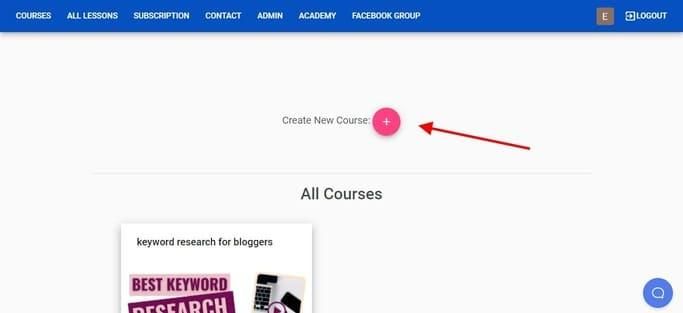
The next step is to add a course title and a short description. After filling in the fields, click the “Create Course” button.
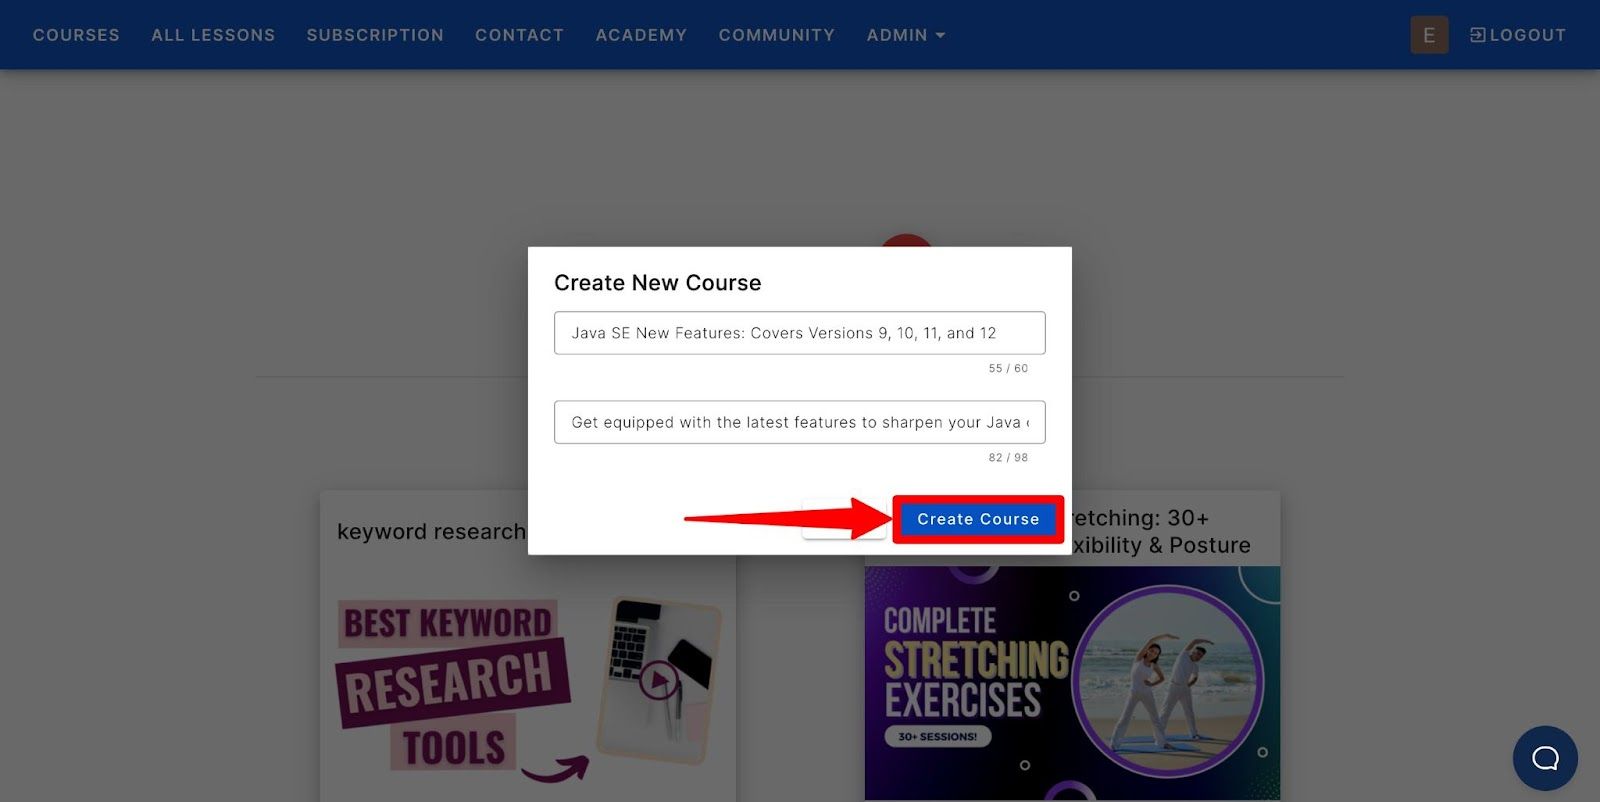
This screen is your course dashboard. You’ll complete these steps, from uploading the course material to publishing it here.
To start uploading the course content, click on the big plus “+” button.
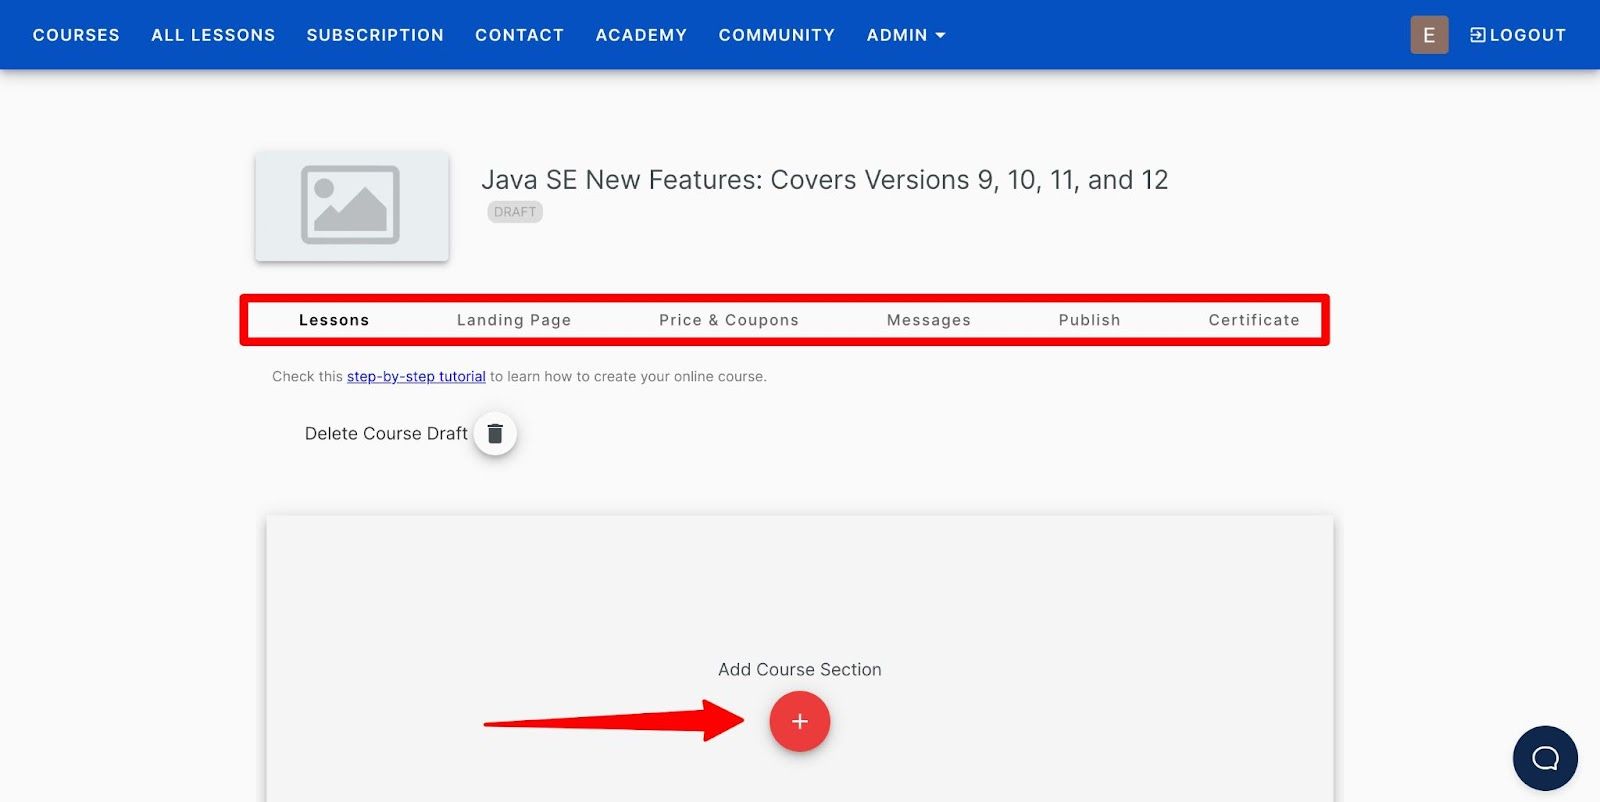
You must upload the course material in the same sequence as the outline you created in the second step.
OnlineCourseHost.Com provides various content formats like video, audio, downloadables, etc. I’ll show you how to upload each content type.
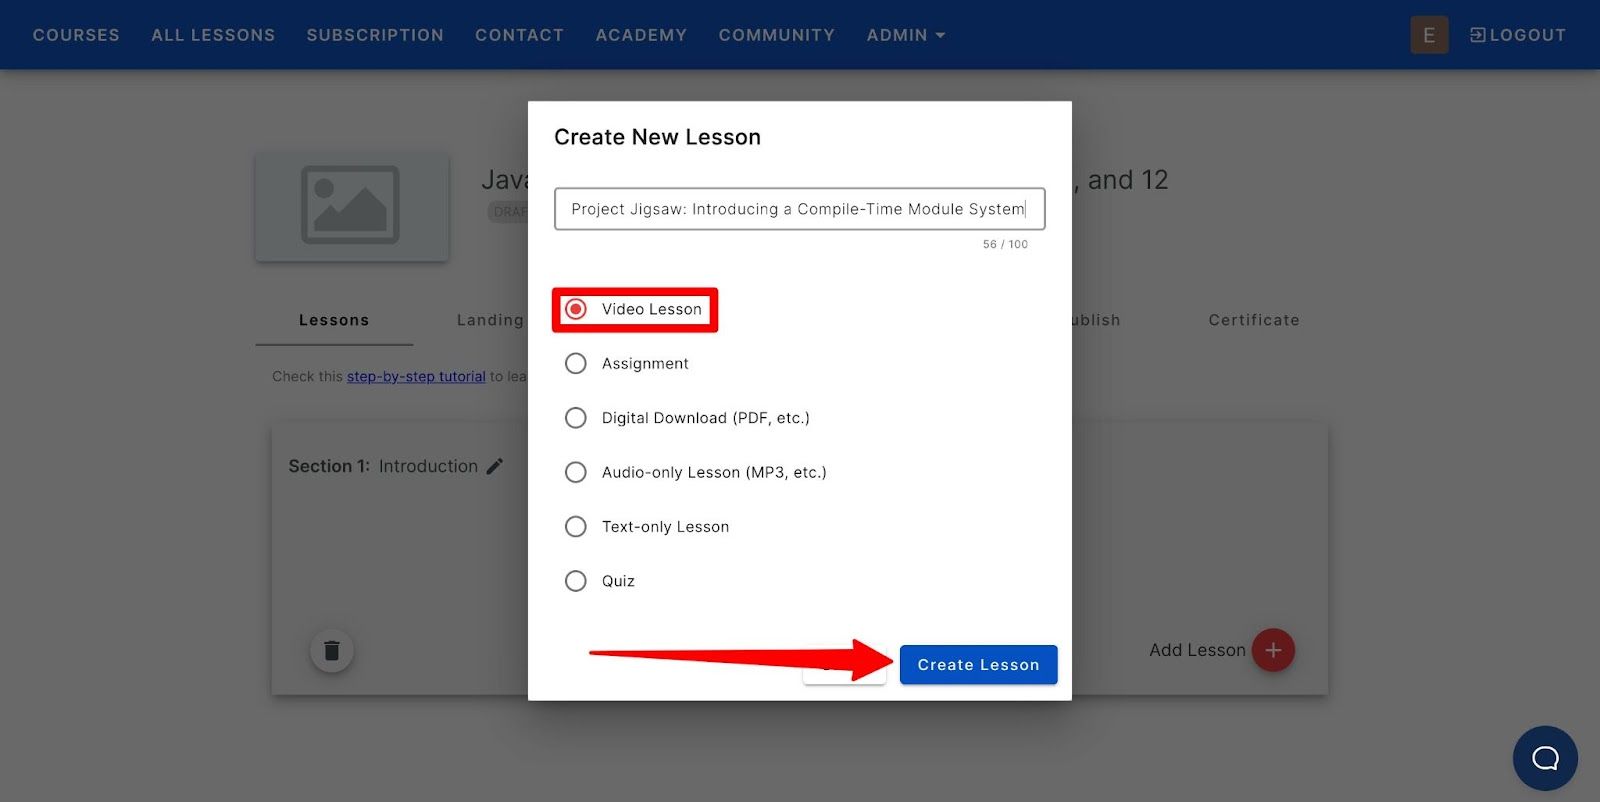
To upload a video lesson, click on “Create a new lesson,” give a name to your lesson, choose the “video lesson” option, and click on the “create lesson” button.
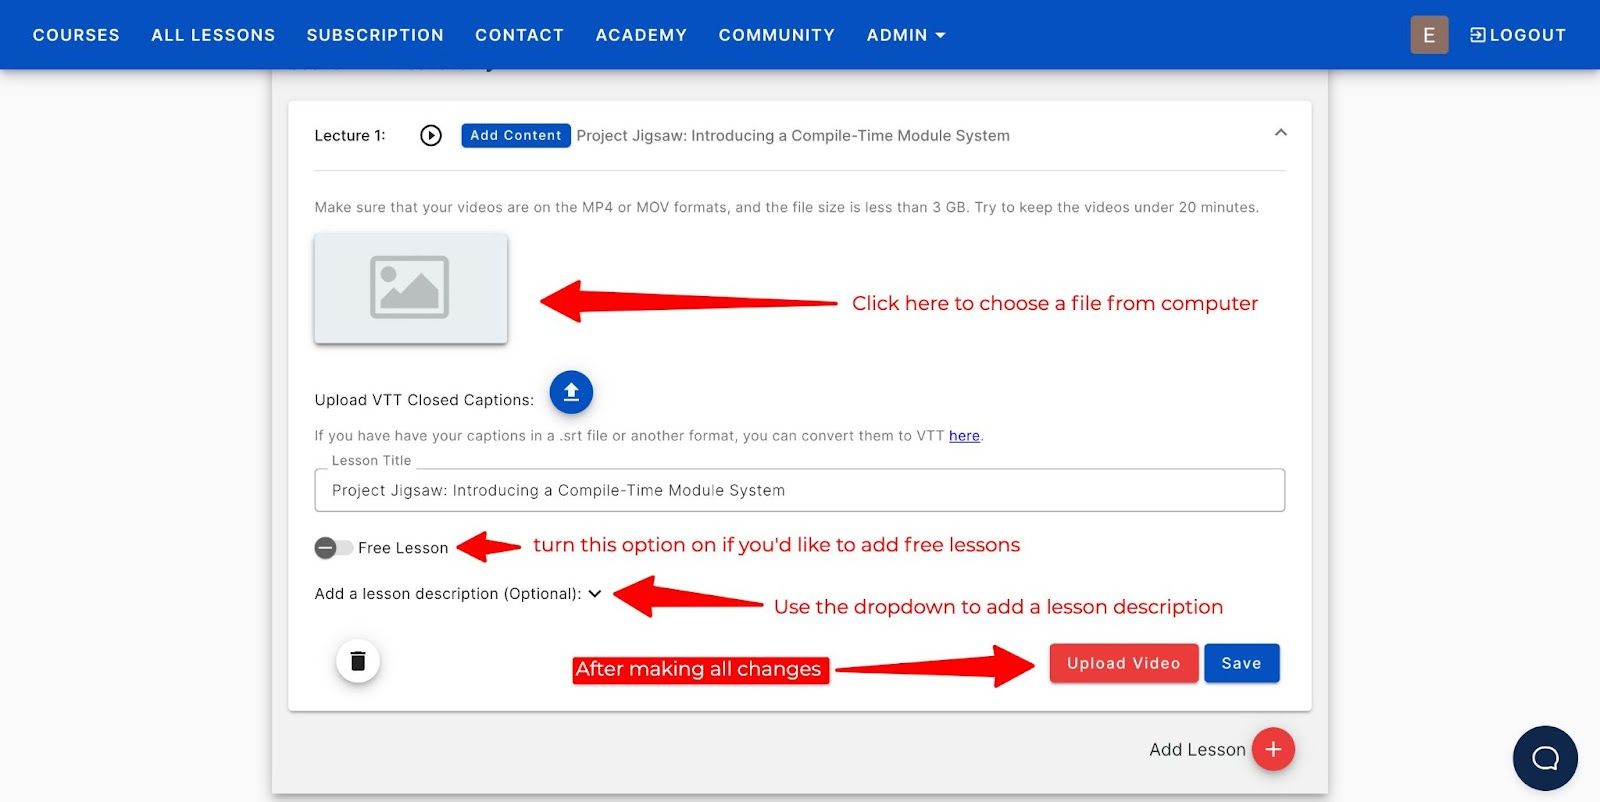
Then, click on “Add Content” to upload your lesson. You’ll see the dropdown expand.
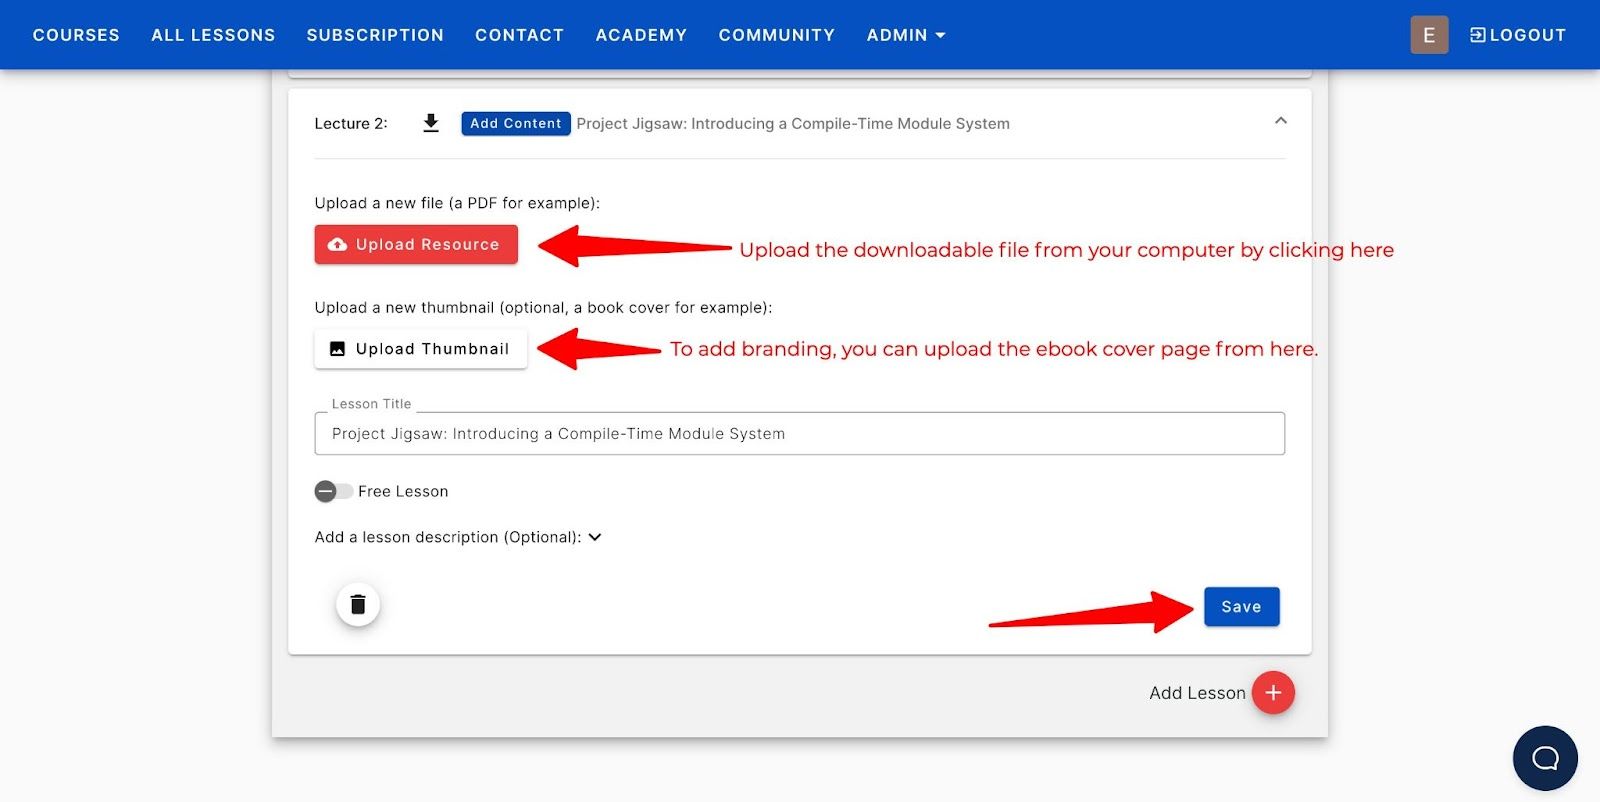
Similarly, you can choose the “Digital Download” option to upload a PDF to your course.
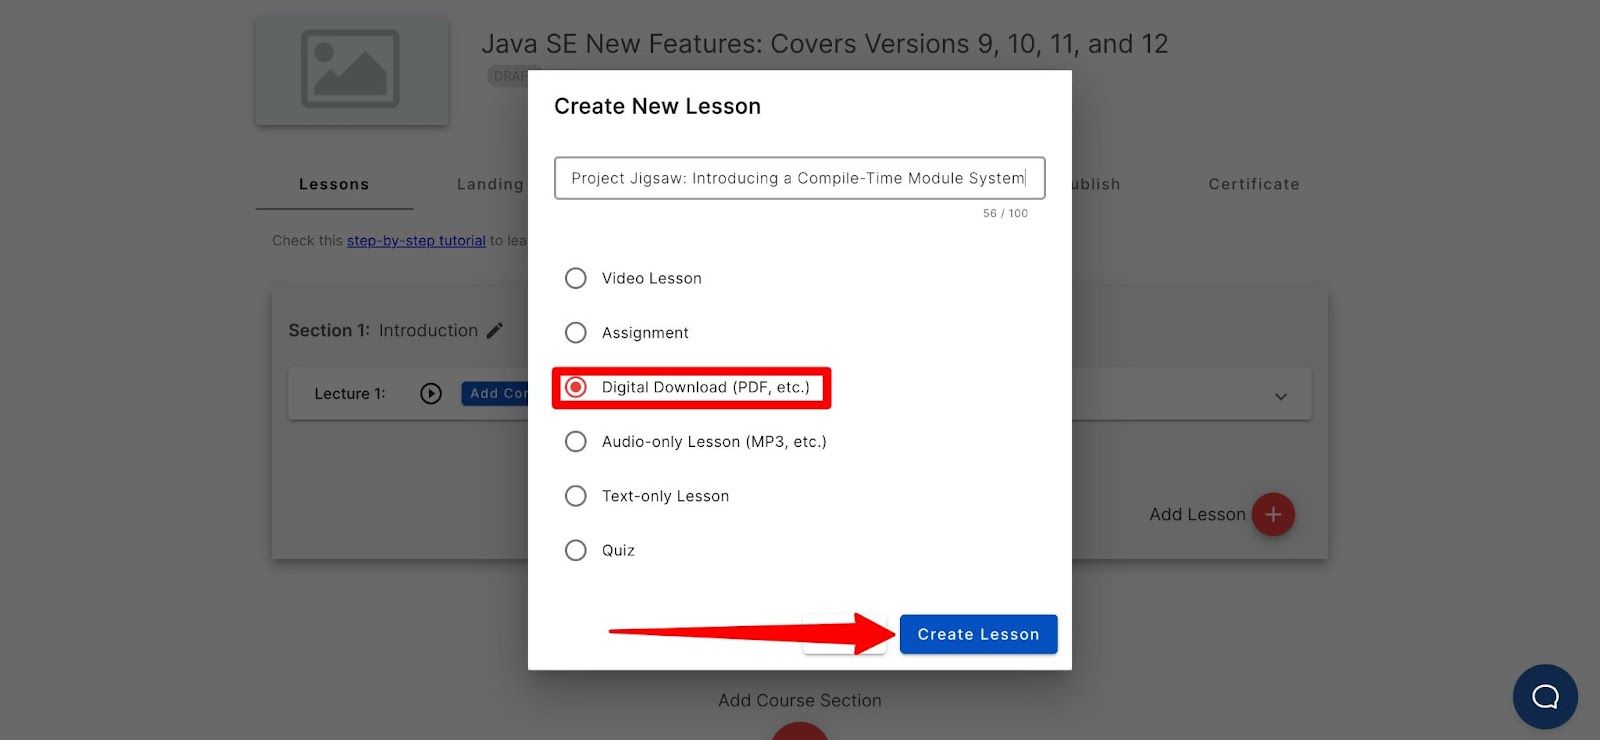
After clicking “Add Content,” you can upload the document from your computer.
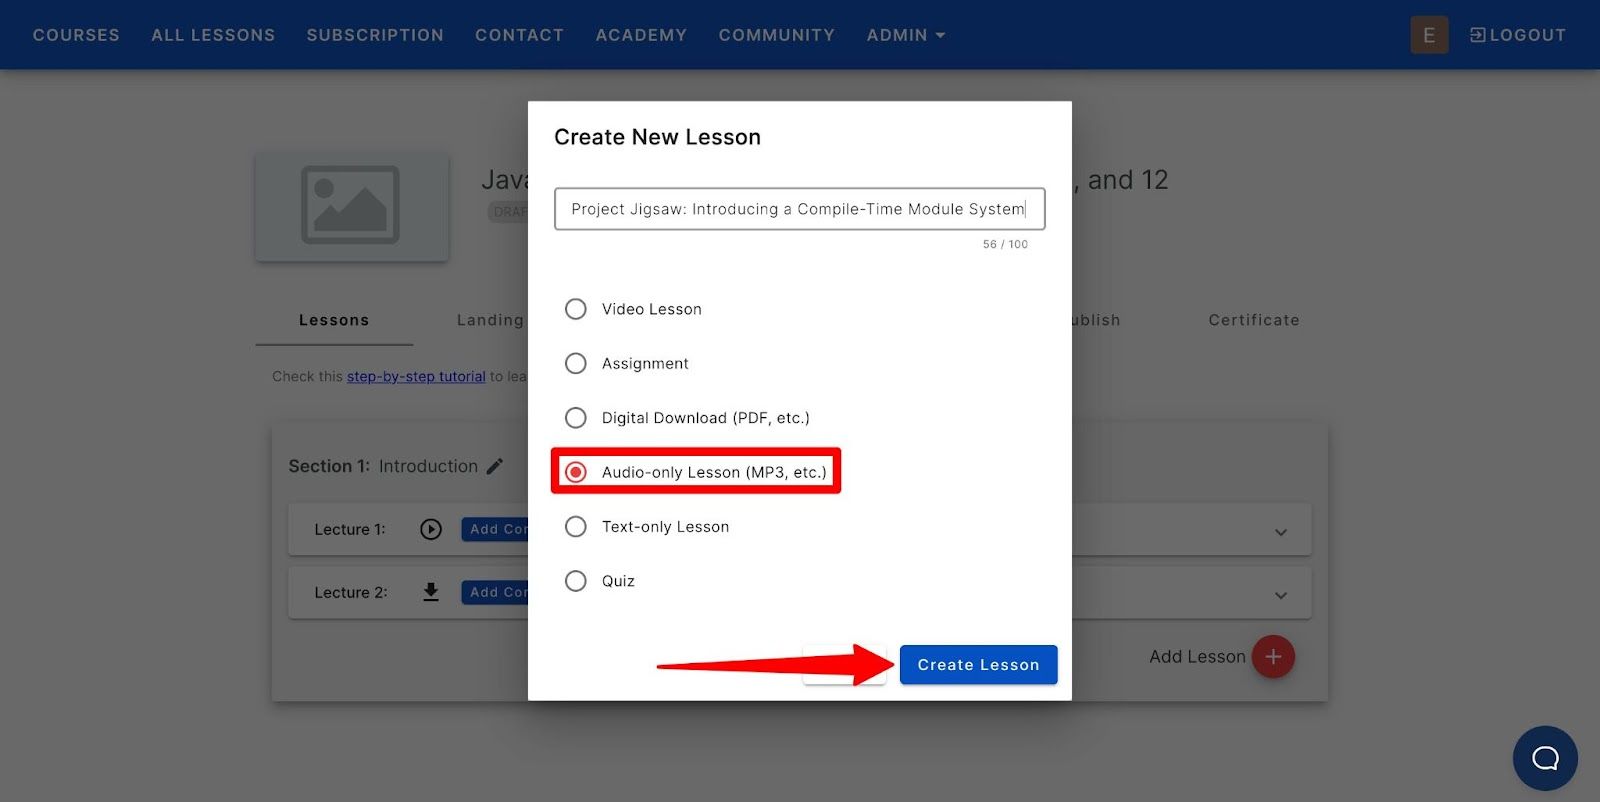
To upload an audio file, choose the “Audio-only Lesson.” Here you can upload MP3 files.
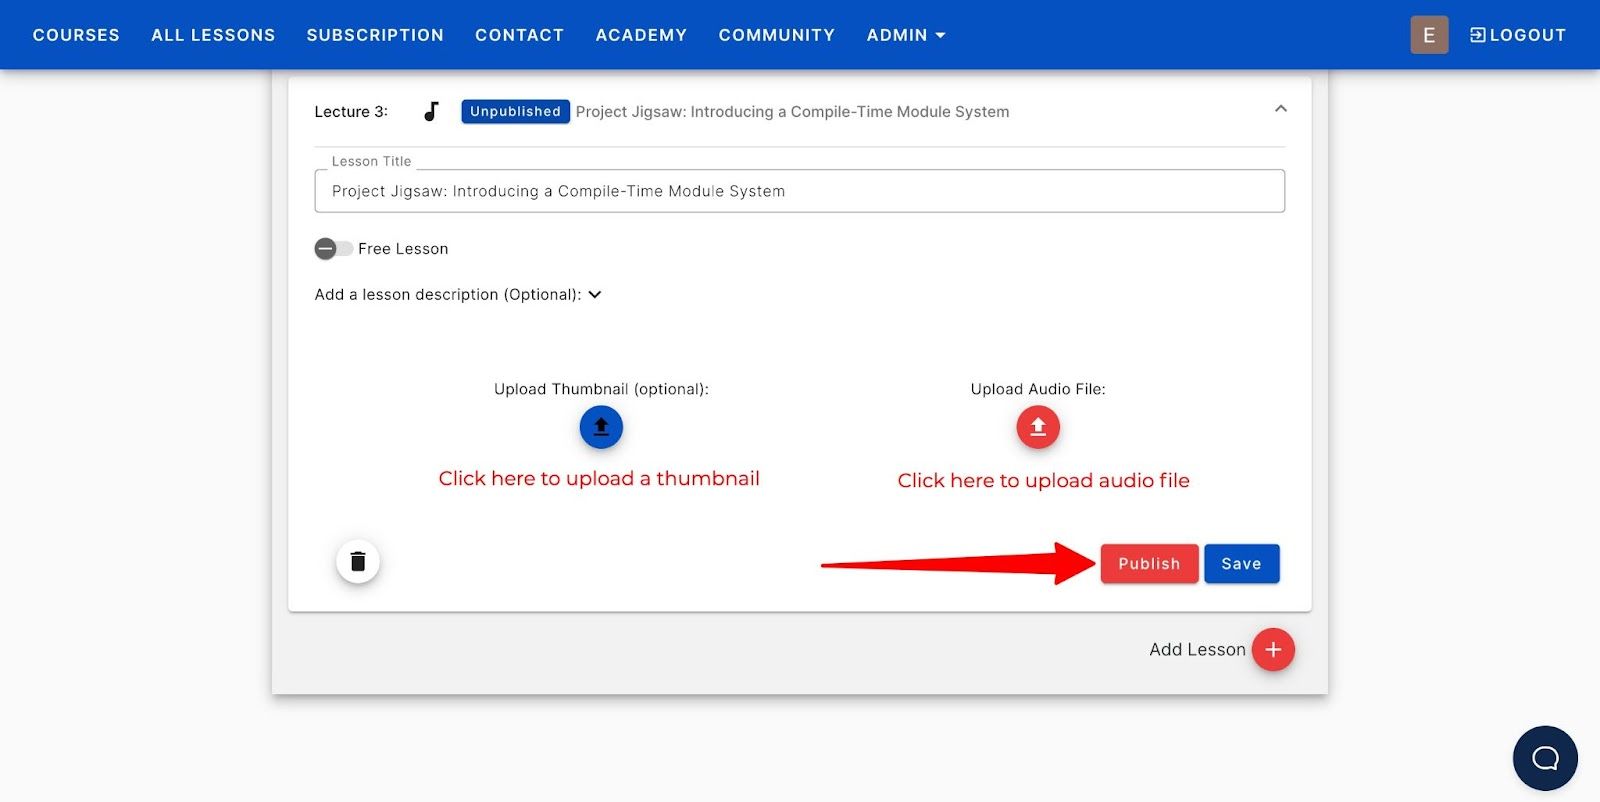
Again, you can upload the files from your computer and add a cover image for branding.
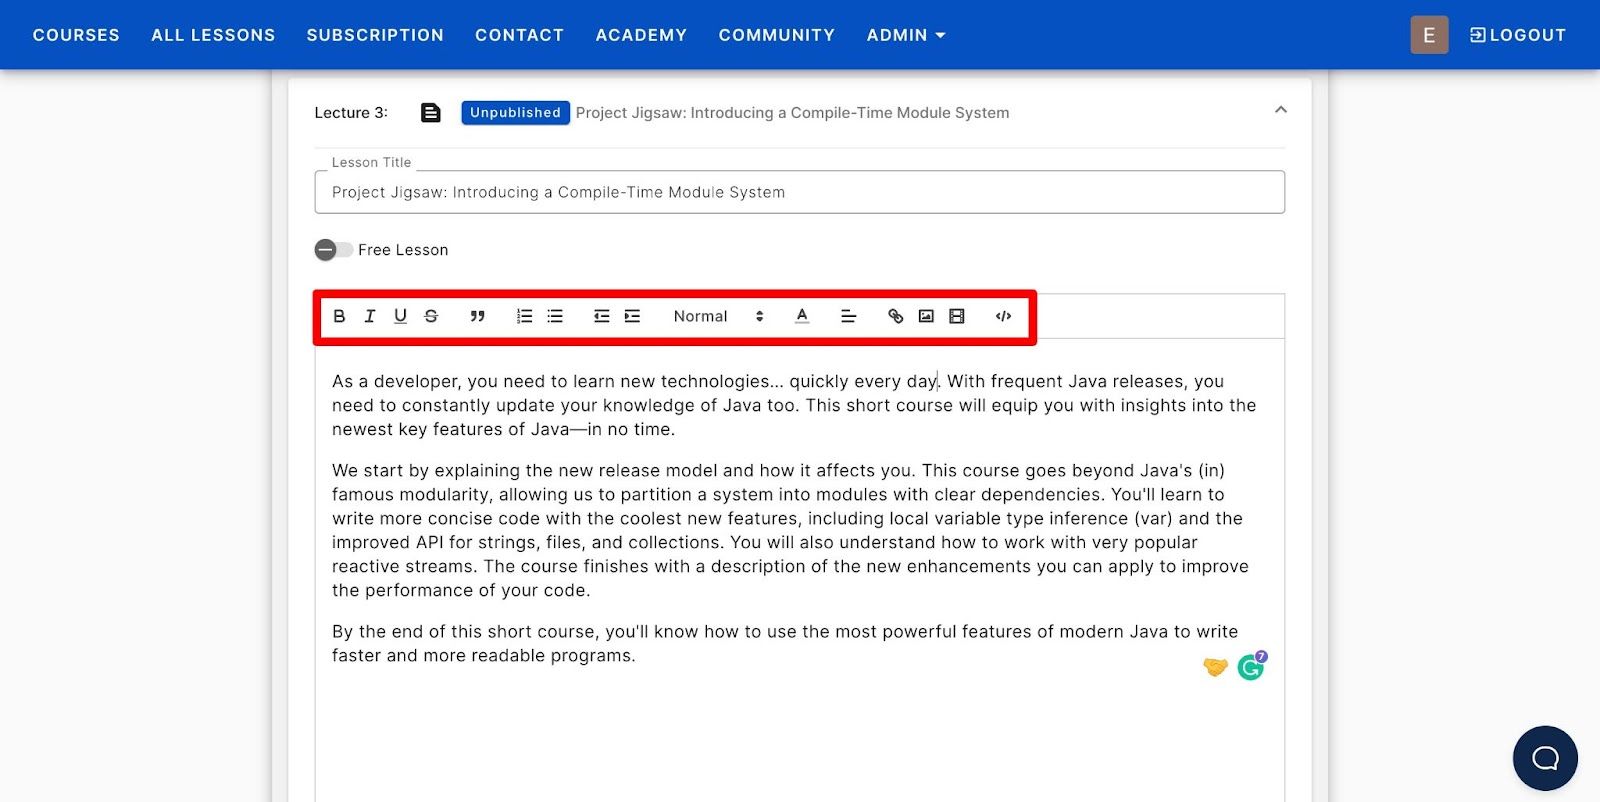
To create a text-only lesson, choose “Text-only lesson” and “Create Lesson.”
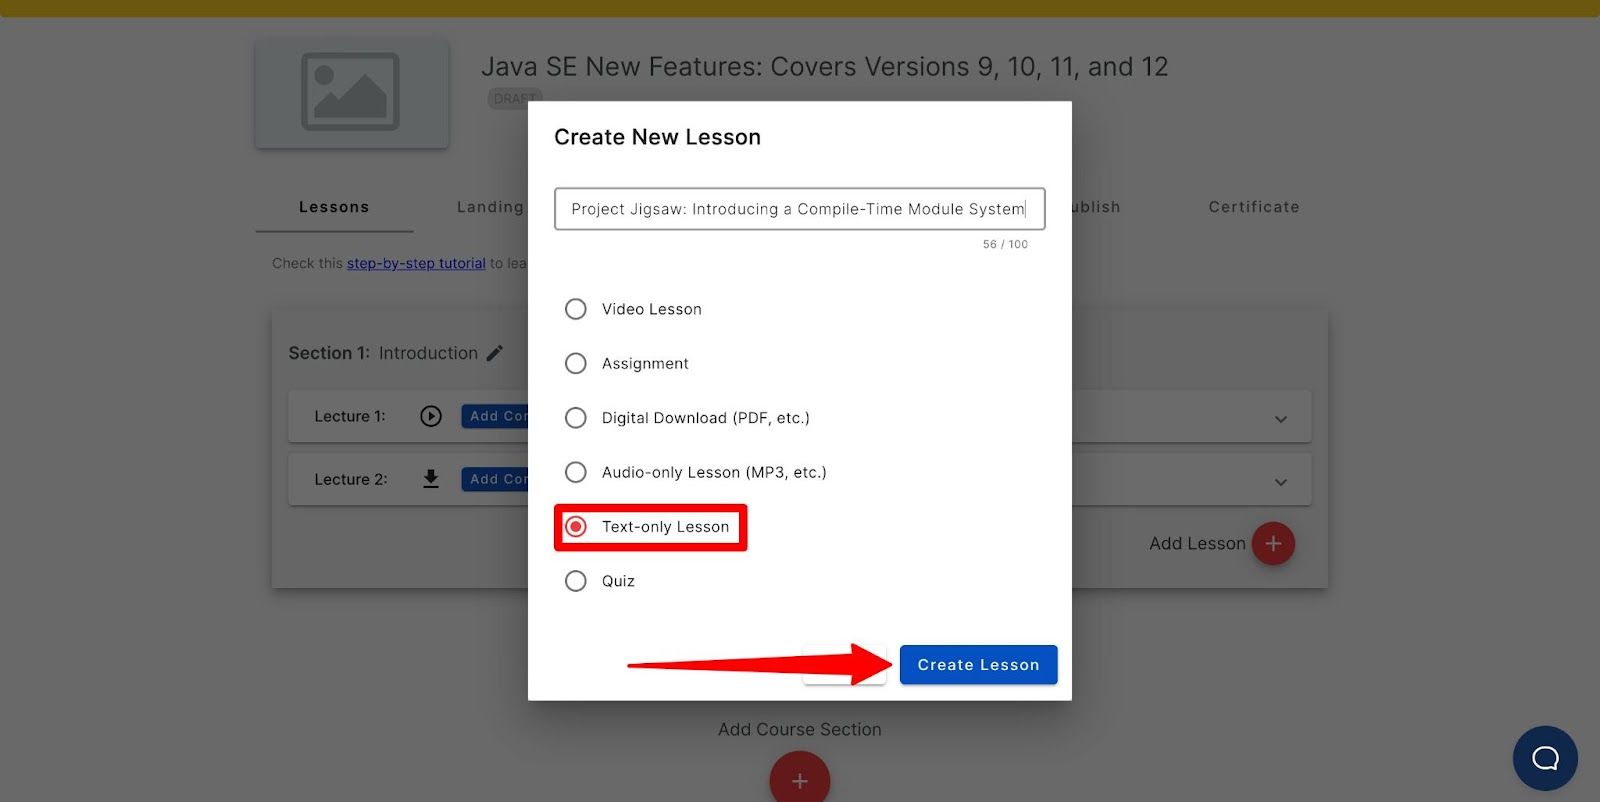
Use the tools on the top bar to make your text richer. To add code, you can use the last code icon (</>) if you want to give sample codes to your students. Once done, scroll down and click on the “Save” button.
Similarly, you can add assignments and quizzes to make your course more interactive. These content formats will help you analyze whether the students engage with the course.
So, go ahead and upload the entire course material. Once done, move on to the next step.
3. Create a course landing page
As I told you above, OnlineCourseHost.Com has a pre-made landing page template. All you need to do is fill out your course details.
To access the template, navigate to the “Landing page” tab. Now go ahead and fill in all the details about your course.
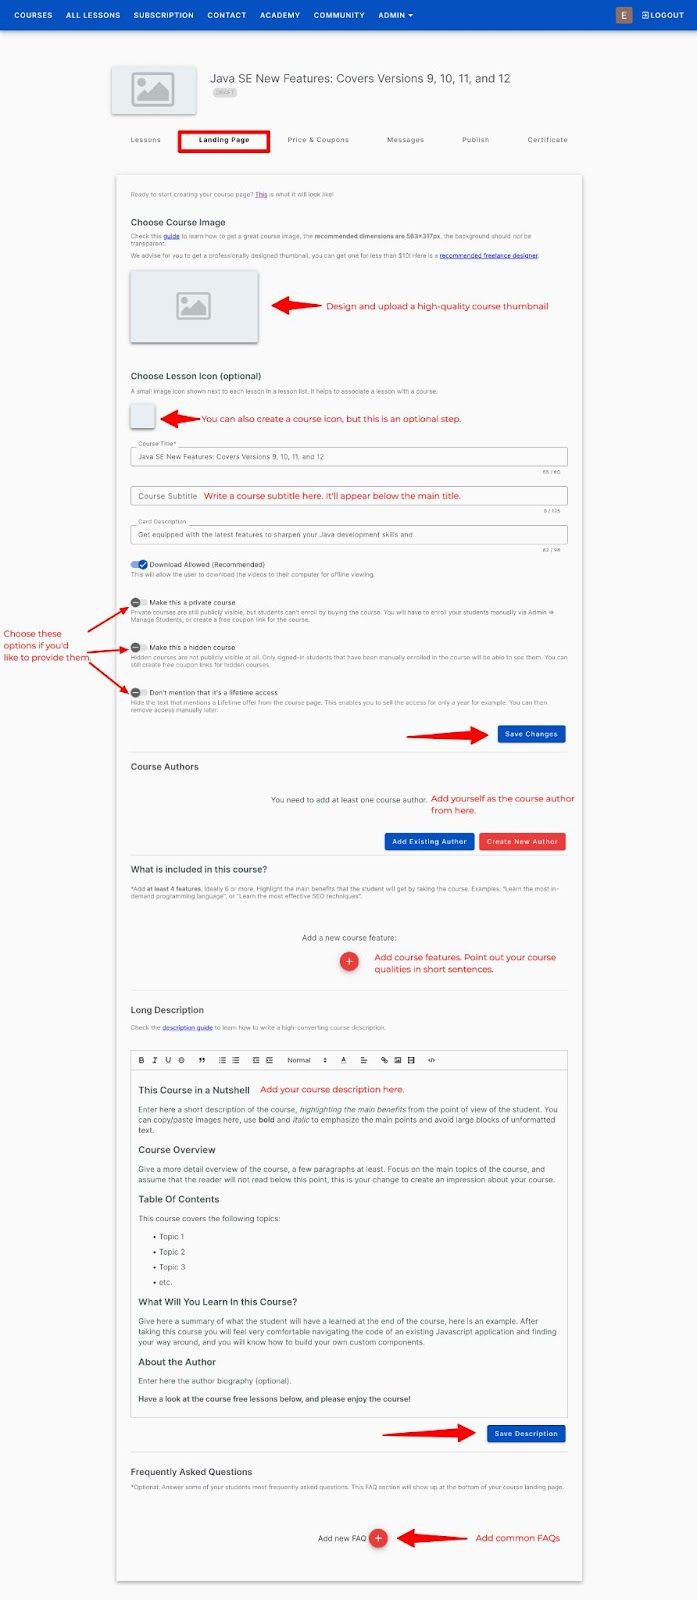
I’ll show you how it looks after publishing it.
For now, let’s move to the next step, pricing your course.
STEP 5: Price your programming course
To set your course price, navigate to the “Pricing and Coupons” tab.
You’re asked to integrate Stripe or Paypal as your account is new. This step is essential because that’s how you will collect payments.
You can either integrate both or use one of them - it’ll hardly take 5 minutes.
PRO TIP: Provide both options to make the purchase easier for your students.
How to integrate Stripe?
To integrate Stripe, click on “Connect with Stripe.”
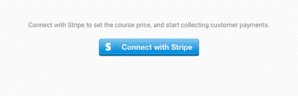
Connect your existing Stripe account, or create a new one.

Fill in details like product types and addresses; your account is ready to collect payments.
How to integrate Paypal?
To integrate PayPal, go to the "Admin Settings" and click on the "Integrations" option.
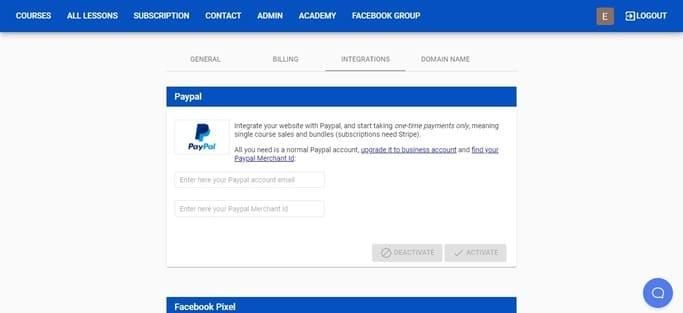
From there, you can either create a new PayPal account or connect an existing one.
To connect, get your PayPal account email and merchant id from your business account. Enter them in the appropriate blank spaces and click "Activate."
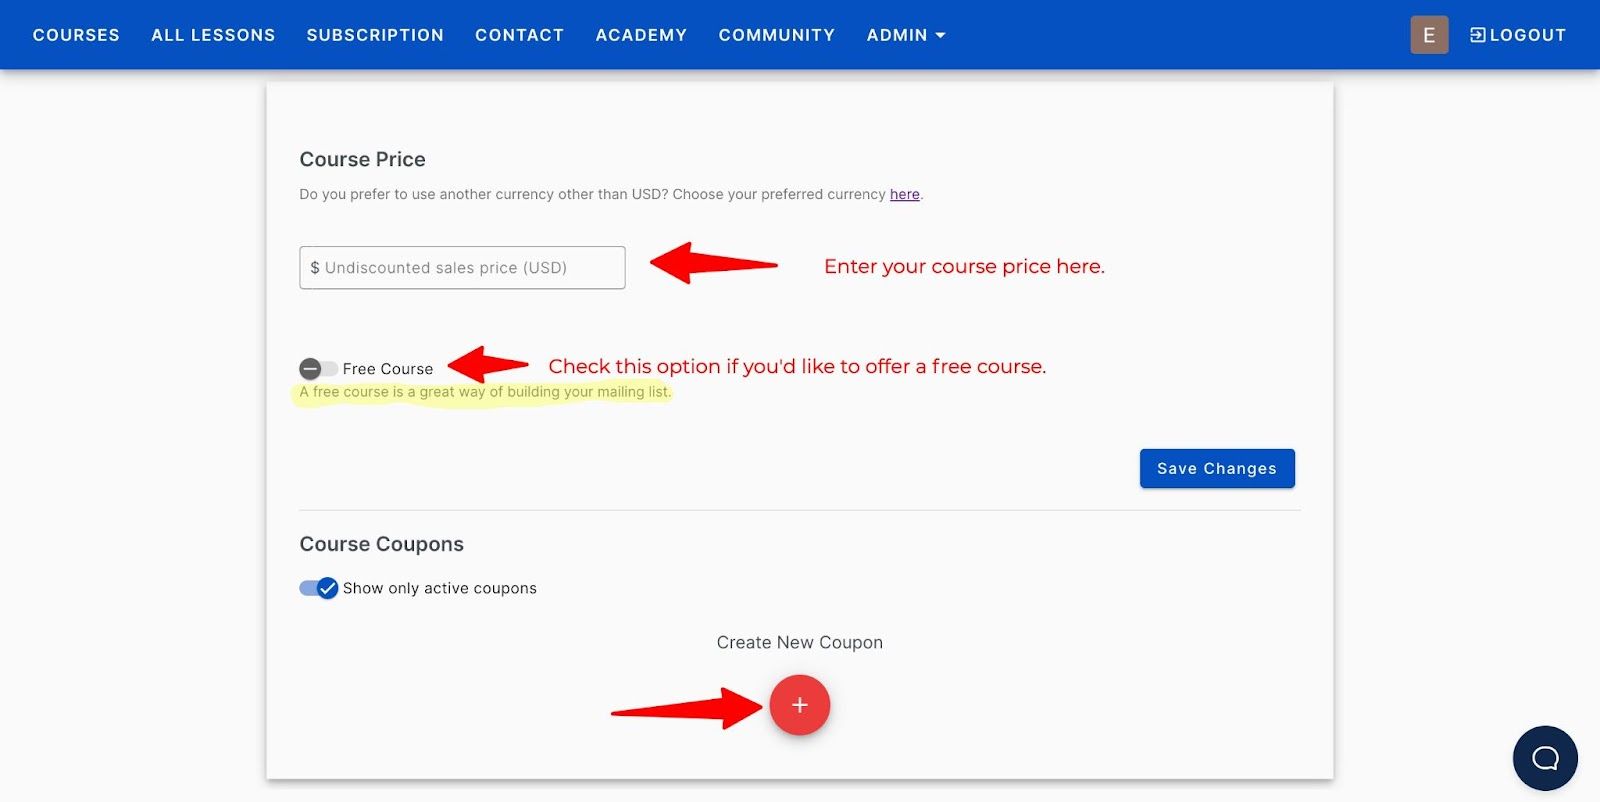
Once the integration is done, return to the “Pricing & Coupons” tab. Enter your course price. Then click on “Save Changes” to set the price.
How to create Coupons?
Now, if you want to launch a sale or give a discount, you can easily do so using coupons.
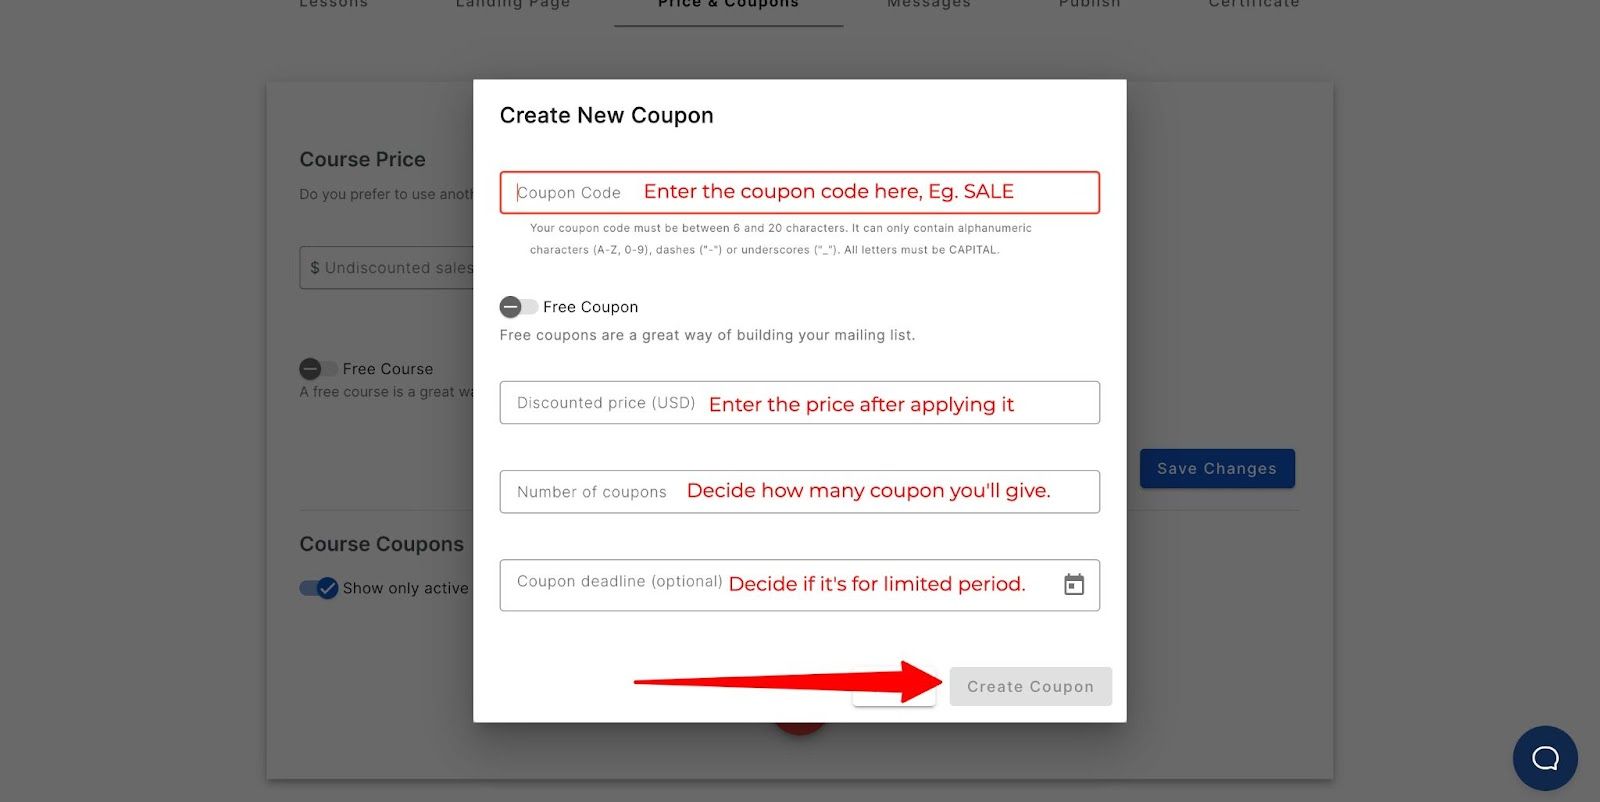
To create a coupon, click the plus button next to “Create New Coupon.”
Then, enter the coupon code, discounted price, and the number of coupons available. Click on “Create Coupon.”
STEP 6: Publish your programming course
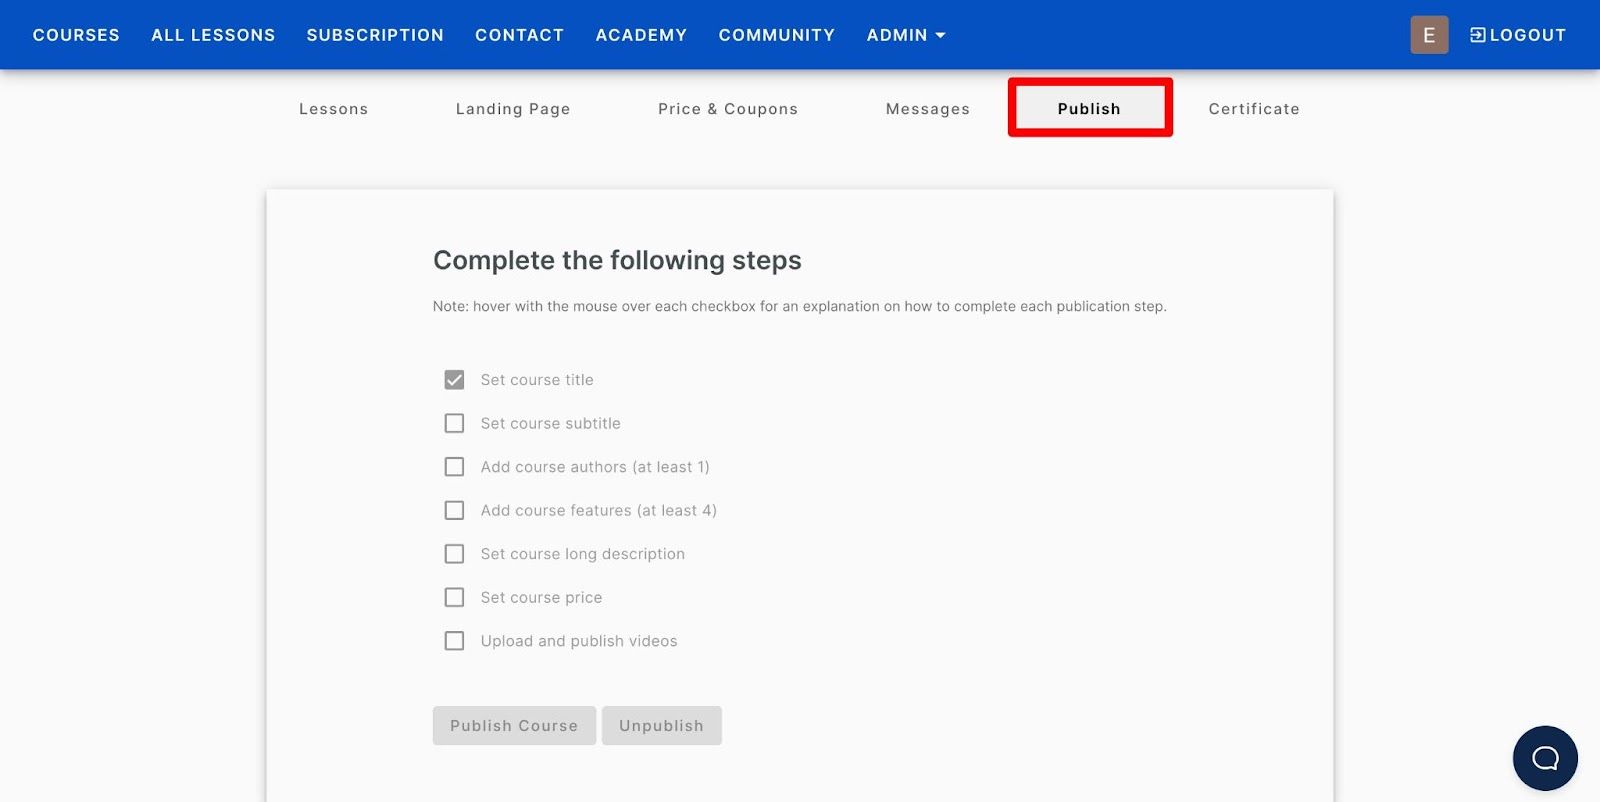
To publish your course, navigate to the “Publish” tab.
Make sure all of the items in this list are checked. If not, then go back to complete it. After done, click on the “Publish course” button.
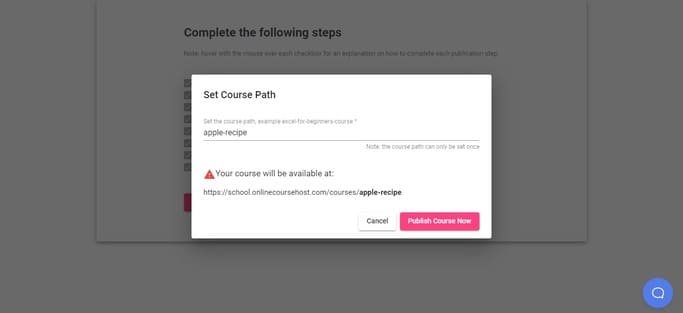
You will be asked to set a URL for this course. Give your course a destination URL - the best is to use the course name. Click on “Publish course now.”
Well done! You’ve just published your first programming course.
And now is the time for what we’re waiting for - the beautiful landing page. Here’s the link to the demo website if you want to check it out.

See how easy it is to launch your course with OnlineCourseHost.Com?
But you guessed it right - launching a course isn't enough. You must market your course well to get your first few students.
STEP 7: Market your programming course
OnlineCourseHost.Com solves this one big problem of yours. It gives you the necessary tools to automate marketing and acquire students immediately.
Facebook Integration
Go to “Admin” and then “Settings” on your dashboard. Then enter your Facebook ad pixel id to integrate it with your Facebook ads account.
Now, your courses will be shown to all who visited your site in the past few days.
Email Marketing
In the beginning years, your marketing efforts will be the deciding factor. The more you market, the better your chances of succeeding.
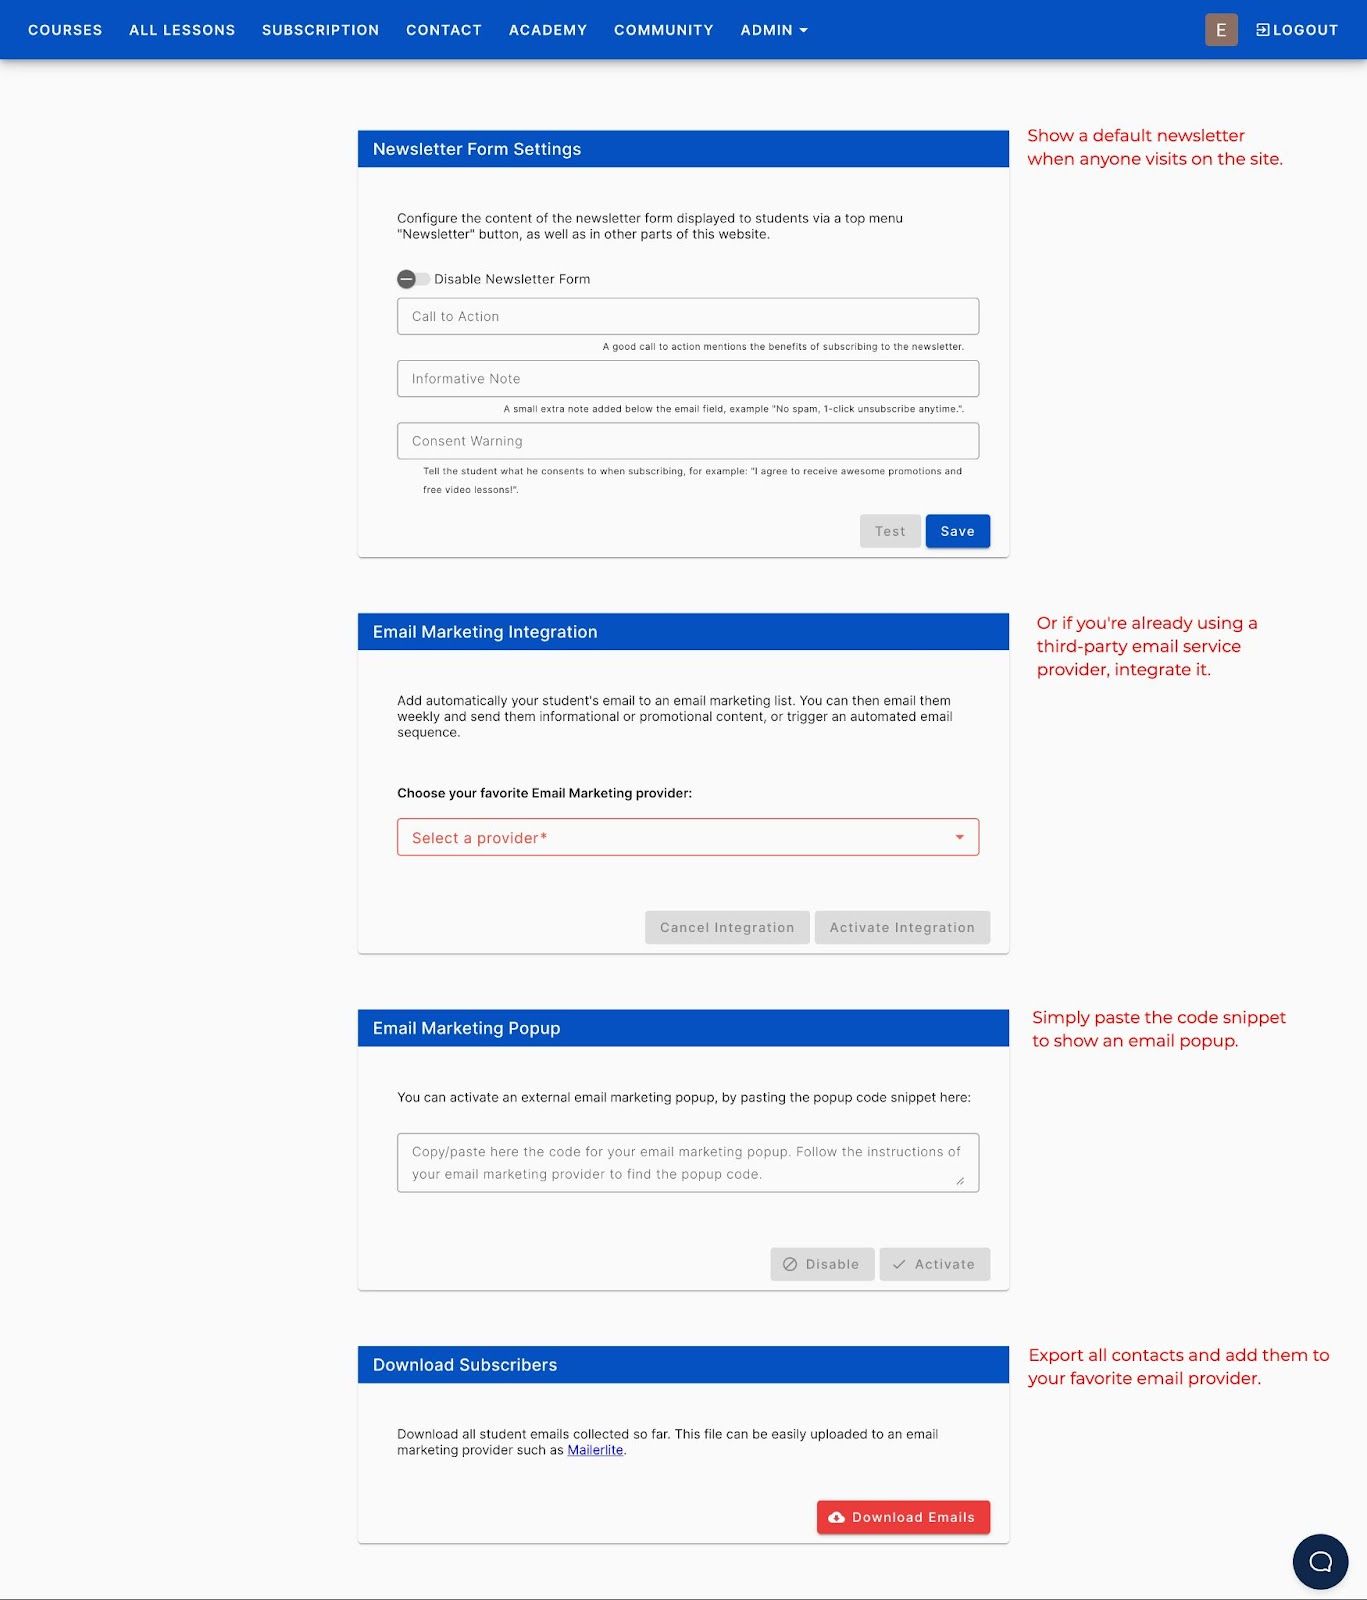
OnlineCourseHost.Com gives you many options to make email marketing work for you:
- Show a default email newsletter banner to every site visitor.
- Integrate with a third-party email service provider.
- Show a popup by simply adding the code snippet.
- Export email subscribers in clicks.
You can also steal my email marketing strategies to build a community of raving fans.
Other than this, you should be actively promoting your course using other ways like:
- Blogging to drive organic traffic
- Publish on marketplaces like Udemy
- Sharing on social media
- Using promotions, etc.
Find all marketing strategies to promote your programming course here.
Conclusion: How to Create a Programming Course?
So these are all of the steps you need to know to launch your programming course online.
You might’ve noticed there are three essential things in the entire process:
- Your initial research
- The course hosting platform
- And your marketing efforts.
Initial research will help you choose a profitable idea and create a course everyone wants to buy.
Course hosting platform will ensure you continue delivering courses to students anytime and anywhere. OnlineCourseHost.Com is the perfect platform that works, so you don’t have to.
And marketing will help you get your first few students, who will help you get more and more and more.
But since you’re a beginner, it’s natural you have questions. We publish helpful guides and tutorials on our blog to ensure we’re helping new course creators. Join us to become the first to know when a new post goes out.
If you are looking to ask any questions on online course creation, you can reach me on my Facebook group:
Join the Course Creator Academy Facebook Group
I hope you found this post helpful. Let me know in the comments below what other topics you would like me to cover.
Have any questions about how to teach online cooking classes? Leave your questions below!
Thanks for reading… and enjoy the course creation process! 😉
Vasco Cavalheiro
OnlineCourseHost.com Founder & Online Course Creator

 Start Here
 Course Creation Journey Step by Step
  Course Creation Software Reviews
 Online Course Marketing
 Course Creation Tips & Tricks
 Course Equipment
 Online Course Marketplaces
 Revenue Reports
 Best Practices
 Frequently Asked Questions
 Platform Reviews