


How To Start An Online Cooking Class (Complete Guide)
 Platform Review

A complete step-by-step guide on how to create your own online cooking course, from the point of view of an experienced course creator. I will walk you through all the steps, including recording, editing, creating a website as well as marketing your course.
Want to teach cooking online? You can create and sell online cooking courses.
Are you looking for a step-by-step guide on how to start online cooking classes? You’ve come to the right place.
I've been recording online courses since 2016, and I'm sure I can help you out.
I will walk you through all the steps from recording your first course to marketing it to getting your first student, including all the specifics like kitchen, audio, camera equipment, etc.
Creating an online cooking course can be a huge step for growing your business.
It'll help you build a student base to whom you can for example upsell in-person cooking classes, cooking recipe books, non-perishable ingredients, and other products and services.
By going online, you get access to students from all around the world. That’s why the online cooking industry is booming with lots of online cooking courses and classes.
The good news is that it's viable because food is something we all get excited about. But the bad news is that there’s already lots of competition. So you really need to try to stand out from the crowd.
So how to sell cooking classes online? By creating cooking courses and upselling individual classes.
Follow these exact steps to create a viable online cooking course:
- Choose your niche and target audience
- Choose your online cooking course idea
- Create an outline for your cooking course
- Record your cooking tutorials
- Host your course on a reliable platform
- Price your course
- Market your online cooking course
Don't worry, I'll go through each step in detail and provide you with a detailed strategy to follow.
Table of contents
By the end of the post, you will know exactly what to do to launch a successful online cooking course.
You can also check out all the free guides that you have available here at the Course Creator Academy by clicking on the Academy link on the top menu bar.
This guide is specific to cooking courses. But if you want to launch a course on any other topic, then you can follow the steps mentioned in this guide - How to create an online course in 15 steps?
So without further ado, let's learn how to create an online cooking class from scratch.
STEP 1: Choose your niche and target audience
The most basic and important steps to launching a successful cooking masterclass online are:
- choose a niche
- determine your target audience
Yet, many beginners ignore these two fundamental steps.
Because the market is so competitive, another generic cooking course won't stand out from the crowd. That’s a great way to waste resources and get no results.
To really get some course sales going, you will have to pick a micro-niche. The more specific the better, but it shouldn't be so narrow that it doesn't any significant audience.
How to find a micro-niche in the cooking industry?
Obviously, you don’t want to create another “Cooking for Beginners” course, because you know that it doesn’t stand a chance when the competitors have already established their expertise.
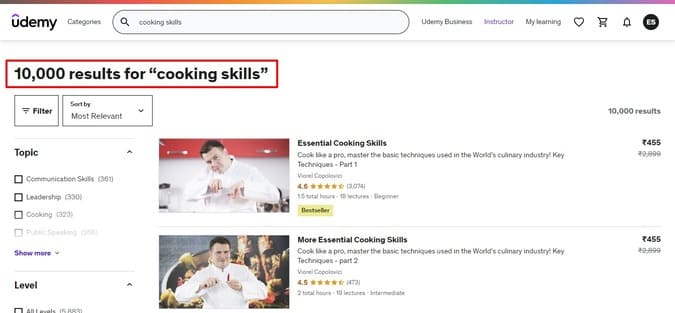
So, how will you establish yourself as an expert? By picking a smaller topic that isn’t crowded yet. For example, check out how for the general term “cooking skills”.
The popular course marketplace Udemy has 10,000 courses on this term alone:
But for the area-specific term “Thai cooking recipes” Udemy has less than 3000 courses.
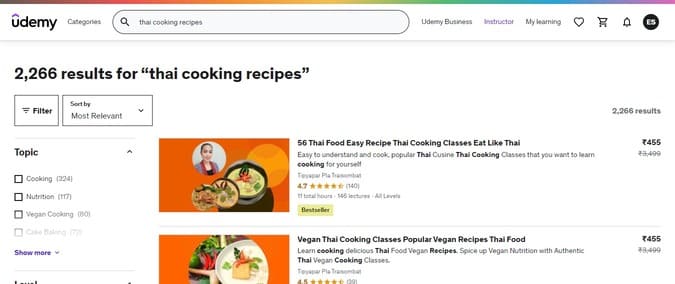
This means that this is a better niche to target because it does not have a lot of competition, so if you teach Thai recipes you will have a much better chance of growing.
You can also use the Udemy search bar to determine if your niche is highly competitive and find a better, less competitive micro-niche.
After you have picked a micro-niche you should figure out the right group of students who will be interested in taking your online cooking course.
How to find your target audience?
A meatball lover will never be interested in learning your gluten-free vegan recipes. 😉
No matter how engaging your course title will be, he will take them less than one second to scroll past it.
That’s why you need to find a specific target audience that you know will buy your course as soon as you put it in front of them.
For example, if you’re teaching quick lunchbox recipes for kids then model your course around middle-aged parents, because teens or adults over 50 usually don’t have small kids.
Once you have figured out a micro-niche and found your target audience, then it’s time to move on to the next step which is to find and validate your online cooking course idea.
STEP 2: Choose your online cooking course idea
You might already have some ideas in mind, that’s why you thought of creating a course in the first place. But if you’re out of ideas then check out the cooking section of the 200+ profitable online course ideas list.
Once you have a bunch of interesting cooking course topics you need to validate one of them. You can create a poll on a food-related Facebook group and ask them which one they would be interested in signing up for.
This is just one of many ways to get feedback from your audience. You can also ask around in comments on a one-on-one basis, if polls are not allowed.
In any case, do make sure to get some direct validation that the idea is good and that several people in your target audience would be willing to purchase the course.
This way you will be sure that you’re creating a course that your target audience wants to buy.
The next step is to create an outline.
STEP 3: Create an outline for your cooking course
An outline is essential because it will help you in two ways: stay on the topic and avoid the “blank screen syndrome”, where you don't know what to record next.
So, make sure you create a course outline and then move forward to record your cooking tutorials.
How to create a cooking course outline?
The best way to not start from scratch is to get ideas from courses that are already published on your topic. So, go for example to the Udemy marketplace and enter your cooking course topic on the search bar.
Suppose I want to launch a course on “how to bake cheesecakes”.Here are the results on Udemy.
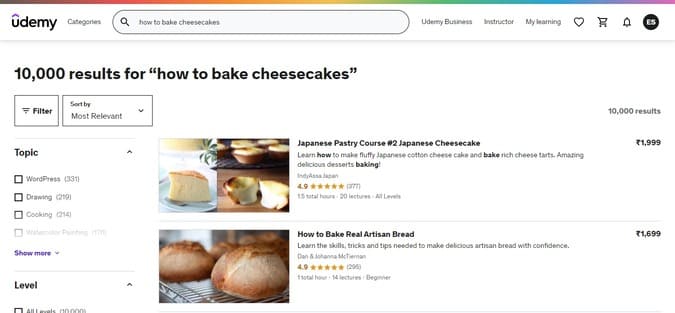
Now go through the list and click on a course title that you want to look more at. On the course landing page scroll down and expand the course “content section” to go through the entire outline. Find out what important topics the creator missed.
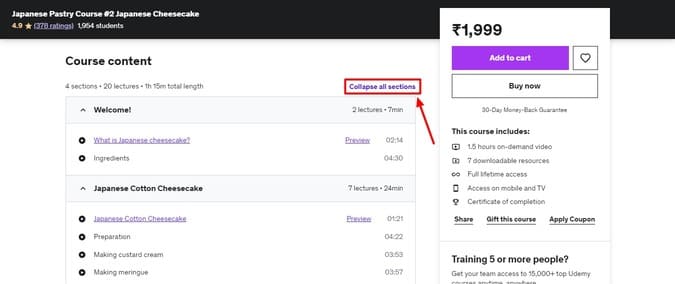
You can go through 4 to 10 courses to come up with a really strong outline.
Based on these outlines and in your own experience and knowledge of what your students are looking for, come up with an even more thorough and detailed version.
Here are some points to keep in mind before and while creating an outline for your cooking course:
- Outline goals and objectives: Set one clear goal for your cooking course, that tells students that they will be able to do “this one thing”. For example, if I launch a course on “30 easy-to-bake flavored cookie recipes” then my students know they will be able to bake cookies in 30 different ways. In fact, make sure to have one main goal for each class. You can create a 30-day course and teach them one recipe each day, which is a very popular format.
- Plan out everything: Make sure to plan everything including the written material, video subtitles, assignments, quizzes, pdf, etc.
- Include various formats: To keep your readers engaged you should use different content formats like video, audio, text, pdf, visuals, images, infographics, etc.
- Include lists of ingredients and equipment: You will be using some kitchen equipment so make sure to give your students a list with links for them to shop for what they need. Also, include a list of ingredients for each recipe.
- Give a schedule: Tell your students to set some time daily to go through the course.
Once the outline is done, we move to the most important step, which is filming your cooking tutorials.
STEP 4: Record your cooking tutorials
Recording your cooking classes is going to be the most critical part of your course creation journey. You will have to make sure to record cooking tutorials with good video and audio quality.
So, let’s quickly get the basics in place.
- Create video scripts: Prepare a video script for each lesson and practice well so you don’t make mistakes and avoid re-shooting many times.
- Collect all utensils, ingredients, and equipment in advance: Collect and arrange all the items that you’re going to use in a tutorial, so you don’t have to search for them in the middle of shooting.
- Give a quick intro: For each tutorial, give an introduction in which you will tell your students about the recipe, ingredients, and other things to use. This is also a good place to share your kitchen tips and the necessary safety precautions for using pointy or hot objects.
- Plan mini recipes: Focus on teaching one or two skills in every class so that the tutorials are short. You don’t want your students to be overwhelmed with so much information.
Okay, with the basics done right, it’s time to set up a nice place to shoot.
How to find the right place to shoot?
Since we are shooting cooking tutorials the best place is going to usually be your kitchen.
But what you need to make sure of is that your kitchen (or at least the slab on which you are going to prepare the recipes) should be appropriately lit. Your videos shouldn't be too bright or too dark.
If your kitchen lighting is not right then you can set up one of these lighting arrangements:
How to find the right camera equipment?
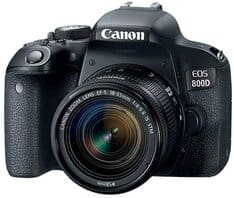
Recording high-resolution videos is the most important thing in creating a valuable online course, especially when you are showing your students step-by-step methods to cook recipes.
Therefore, you need a high-quality camera. Such as Canon EOS 800d/Rebel T7i DSLR, which works fluently and records high-resolution videos quickly.
Now, you’ll probably be recording yourself cooking so you should set up the camera in one place and leave it there. For that, Digitek DTR 550 tripod stand will work for you.
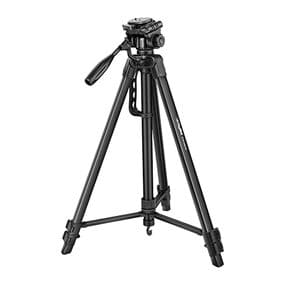
If you want to take a top view video of the recipe or ingredients then you can easily adjust the tripod stand and set it to your liking.
How to set the audio right?
You will be speaking a lot in videos so make sure your voice has a high enough recording volume. Since you have set the camera distant from you, your voice won't be properly recorded by the camera microphone.
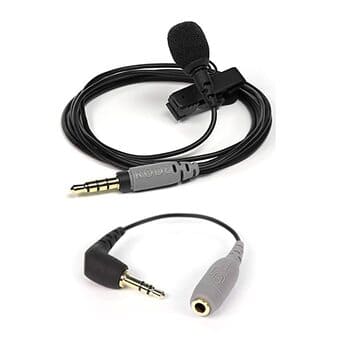
That’s why you need a microphone that can be attached to your body while you teach recipes.
For this, you can use Rode SmartLav+ Lavalier Microphone that can be easily attached to your collar so your voice sounds clear. You can connect the cable to the camera.
Now you have set everything up. The next step is to record your cooking tutorials. To do it the right way, here are some things to keep in mind:
- Give a quick intro to the recipe you’re going to teach them. You should also display all the ingredients from the top view. This will help students understand and see things better.
- Give proper instructions on how to use difficult equipment. Also, warn them about the use of sharp tools.
- Make constant eye contact with the camera.
- Smile to maintain a friendly environment.
- Practice a lot to make sure you don’t mess up.
Once you have recorded all the videos it's time to edit them. If you know video editing then only get into it, otherwise, hire a professional to do it for you. Fiverr is a great place to find professional video editors at affordable prices.
Once the videos are done, now collect all the material and arrange it according to your course outline. It’s time for the next step, which is hosting your course on a reliable platform.
STEP 5: Host your course on a reliable platform
Finding a reliable online course hosting platform is a critical step in your success. Ideally, you want a platform that is beginner-friendly and fast for both you and your students.
Something that provides:
- An easy-to-use interface so you can get things done quickly and focus on your business.
- An effortless experience for your students so they can focus on learning.
Luckily, there is such a platform.
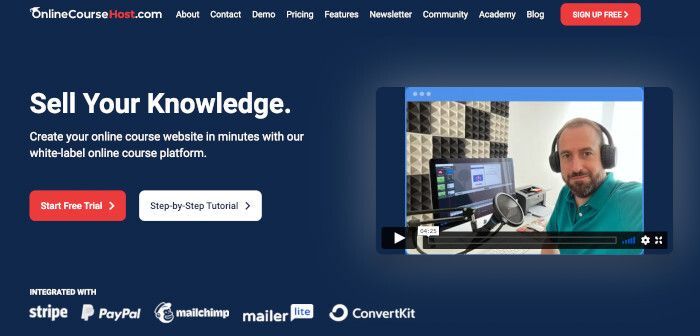
OnlineCourseHost.com is a beginner-friendly platform that makes the overall experience wonderful for both you and your students. You can easily host and promote your courses using its inbuilt marketing tools.
You can do many other things like setting discount coupons, collecting payments through multiple methods like Paypal and Stripe, creating a stunning landing page, creating quizzes, assignments, and so much more.
Plus, it has a beautiful learning dashboard to make it easy for students to focus on learning.
So, let me walk you step-by-step through the process of hosting your course on OnlineCourseHost.com to using the other features to set up your course ready for launch.
1. Create an account on OnlineCourseHost.Com
First, you will need an account on OnlineCourseHost.Com. So, click here to reach this screen.
Then click on the “Sign Up Free” button. You can either sign up with an email or use your Google account.
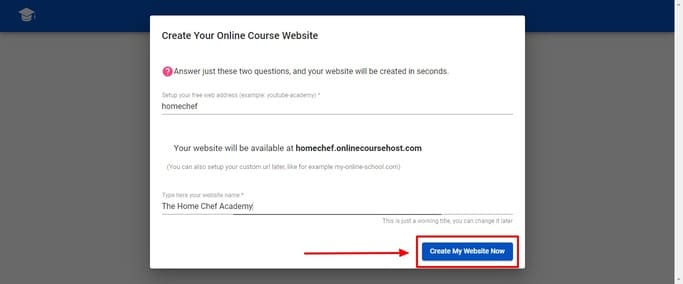
After creating an account, you will be asked to create a website domain name. Enter the desired domain in the first option and your website title in the second option. Then, click on the “Create my website now” button.
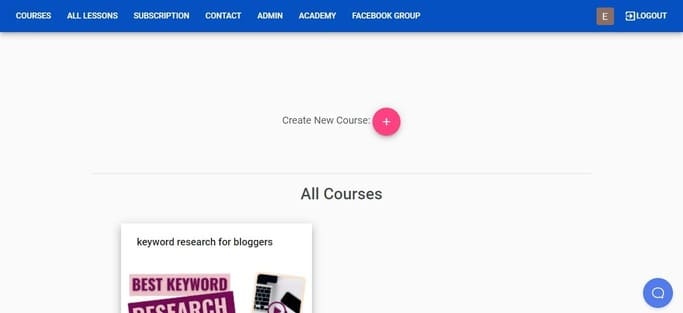
Congrats! You just created your account. The screen you see is your dashboard.
Note that the domain name you get is absolutely free, but if you already have a website and want to use that domain, then you can change it.
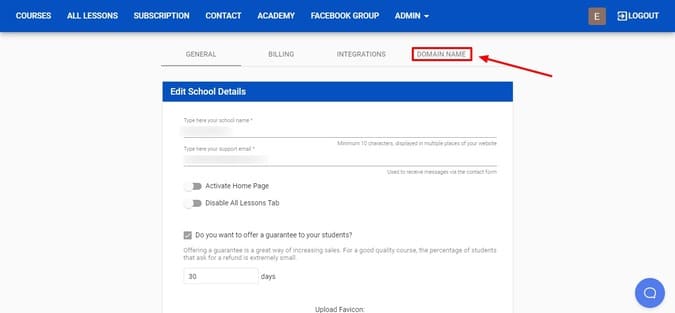
To add your custom domain, click on “Admin” and then “Admin Settings” on the top bar. Now choose the “Domain name” tab.
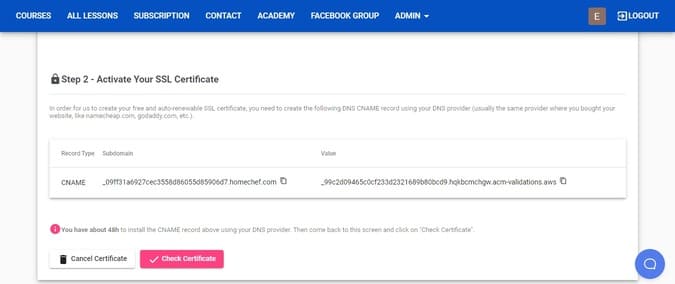
Then, click on the “Request Domain Name” button to see this screen.
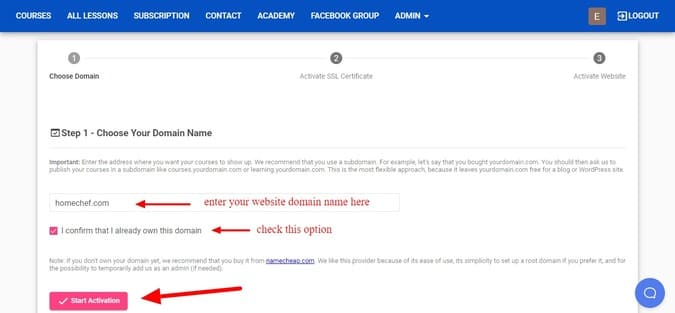
To activate the SSL certificate, you need to add the record and its value to your website's DNS records. You will have to add it to the DNS provider (where you are managing your domain).
Once done, you can move on to the third step which is to activate your website. And that’s it!
You can now use your custom domain name. But if you want to keep using the free subdomain, you can do it as long as you want.
Now, let’s create your first course.
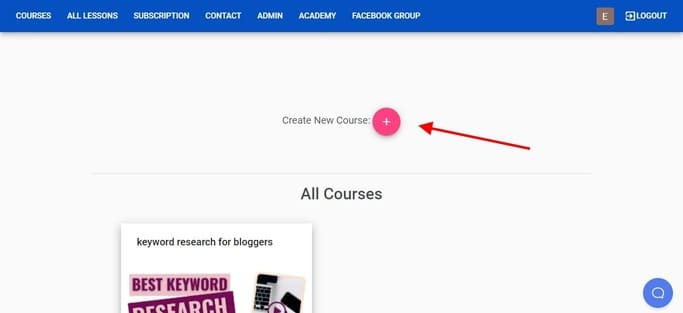
2. Upload your course content
To upload your course on OnlineCourseHost.Com click on the “Create New Course” button.
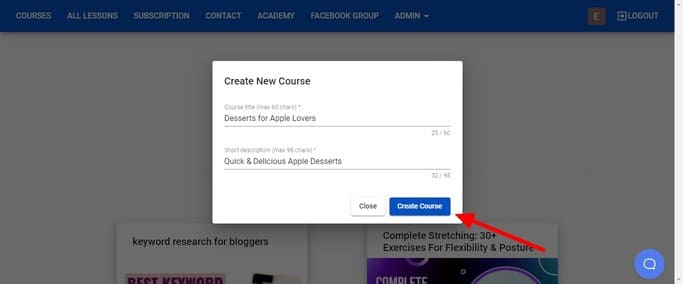
The next step is to add a course title and a short description. After filling the fields, click on the “Create Course” button.
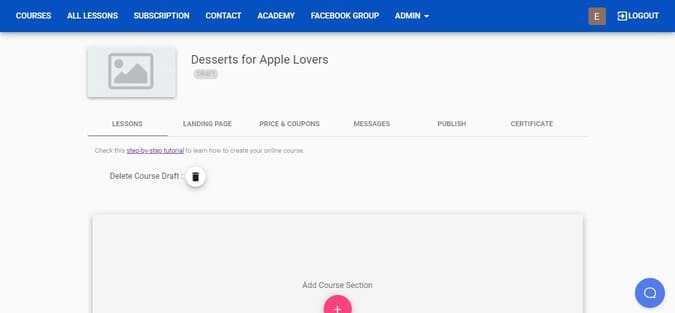
This is your course creation window. To add sections, click on the “Add course section” button.
OnlineCourseHost.Com allows you to use various content formats like video, audio, digital downloads, text, etc.
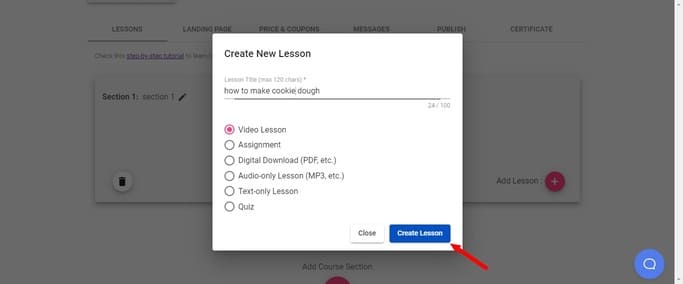
To upload a video lesson, choose the video option and then click on “Create lesson”.
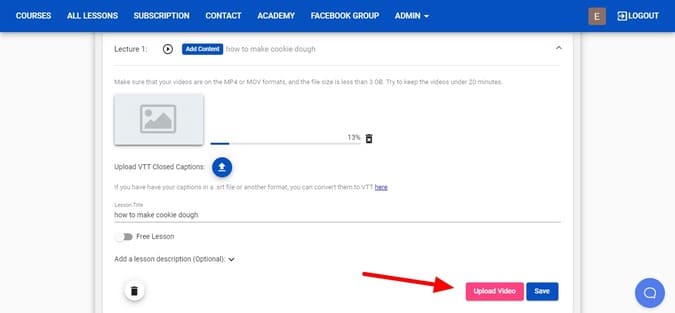
Then, upload the video directly from your computer and click on “Upload Video”.
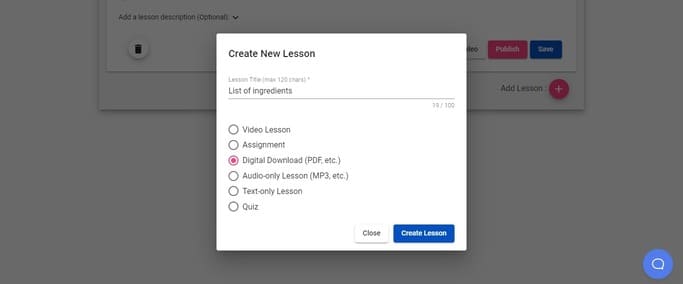
To upload a digital download, like PDF, choose the digital download option.
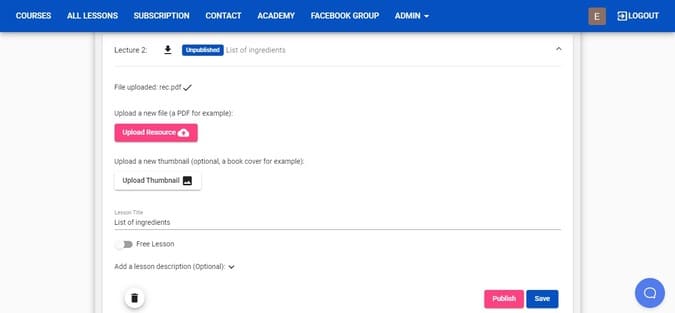
Then, choose the resource file from your computer to upload resources. If you want to add a cover to your ebook then you can do so by using the “upload thumbnail” option.
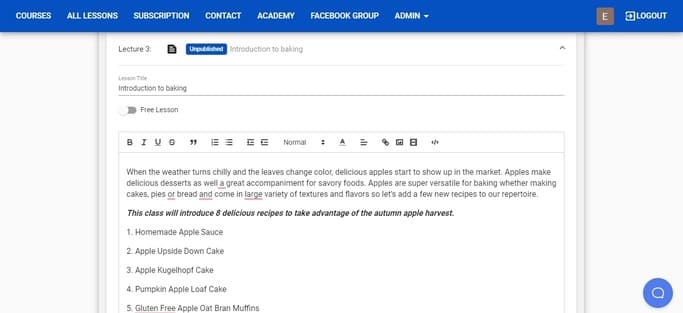
To add a text lesson, choose the text-only lesson option.
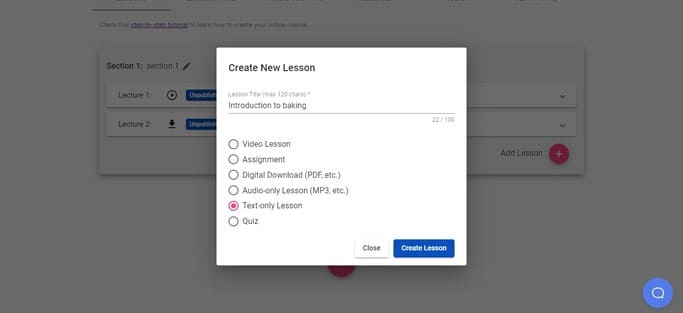
Then, copy and paste your text into the space. Once done, scroll down to click on “Upload lesson”.
Similarly, you can use the audio, assignment, and quiz formats to create your course. Now, use all the formats and upload all of the course content by following the course outline.
3. Create a landing page for your cooking course
Your next step is to create a high-converting landing page for your course. It’s easy with OnlineCourseHost.Com.
Because you will get a fill-in-the-blank landing page template. You will literally be entering some text and your cooking course landing page will be ready.
To customize the pre-made landing page template navigate to the “Landing page” option on your course creator window.

Now, scroll down and fill out all the details. Such as adding the course thumbnail, adding your details as the course author, entering a concise description, adding some FAQs, etc. Here’s how it looks after filling in all the details.
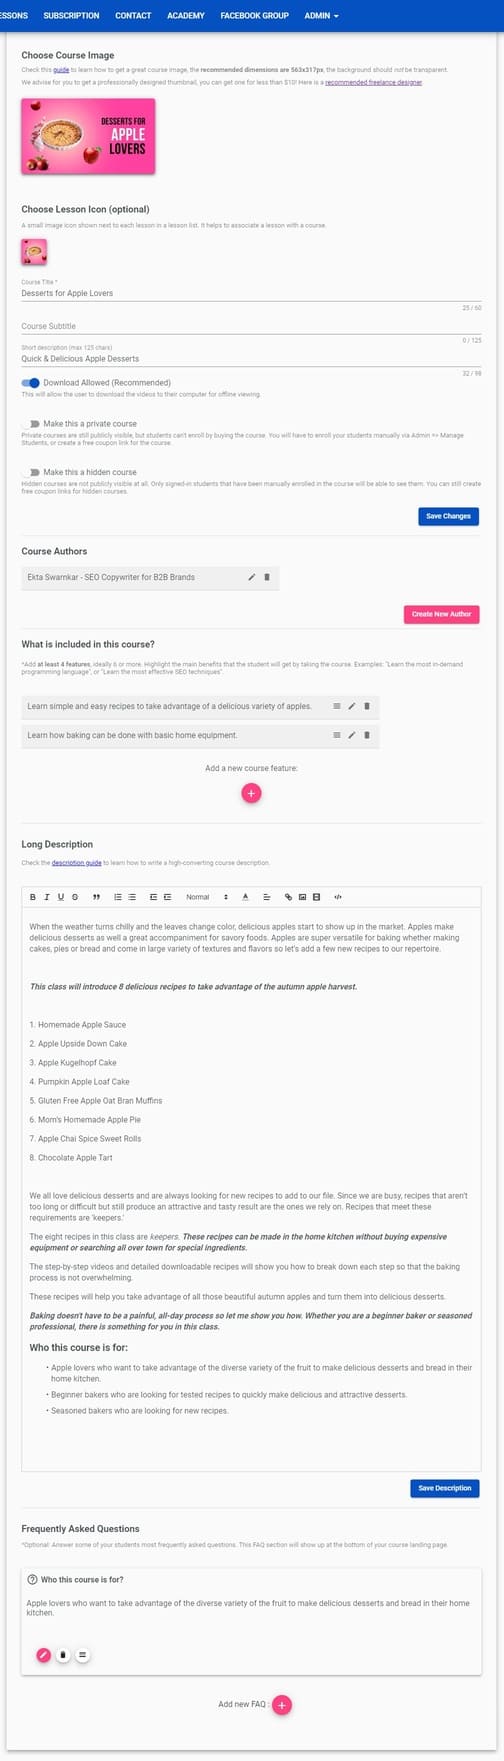
I’ll show you how beautiful it looks once we set a price for your course.
STEP 6: Price your course
To set your course price, navigate to the “Pricing and Coupons” option on the course creator window.
Since your account is new, you will be asked to integrate Stripe or Paypal. This step is important because that’s how you will collect payments.
Both the processes are easy and will hardly take 5 minutes. You can either integrate both or just use one of them. But it’s always better to provide both options for your students to make the purchase easier.
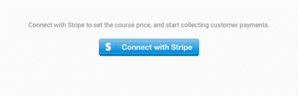
How to integrate Stripe?
To integrate Stripe, click on “Connect with Stripe”.
Now the screen will ask you to connect your existing Stripe account. Or you can create a new account.
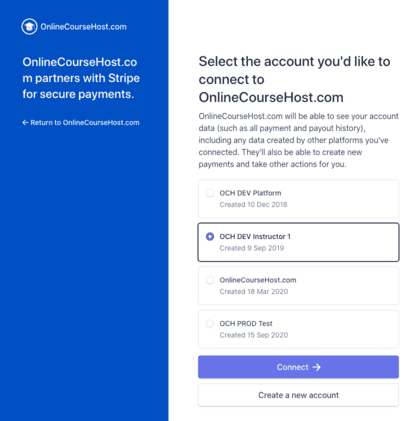
Fill in your details like product types and address and your account is ready to collect payments.
How to integrate Paypal?
To integrate PayPal, go to the "Admin Settings" and click on the "Integrations" option.
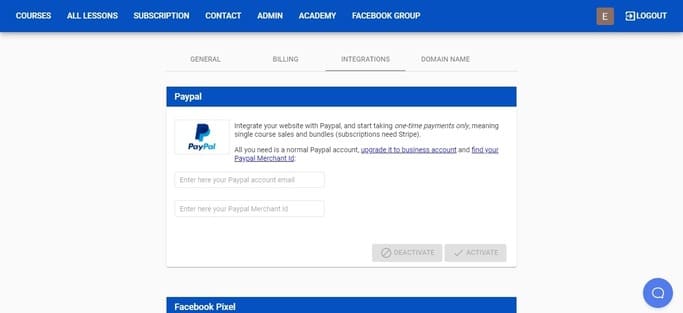
From there, you can either create a new PayPal account or connect an existing one.
From your business PayPal account, get your PayPal account email and merchant id, just enter them in the space and click on "Activate."
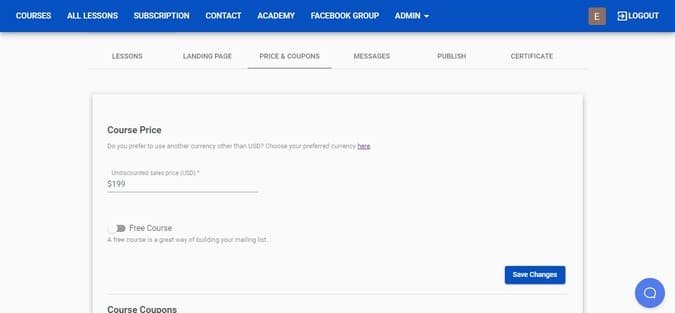
Once the integration is done, return to the “Pricing & Coupons” tab. Enter your course price. Then click on the “Save Changes” to set the price.
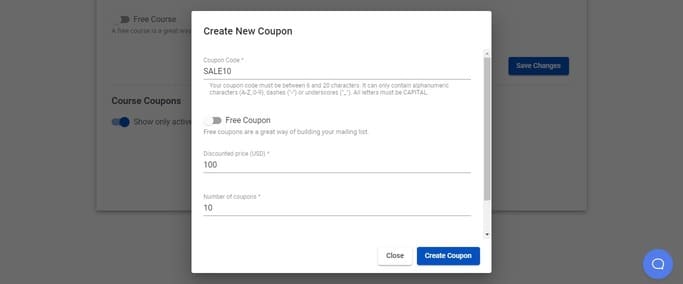
How to create Coupons?
Now, if you want to launch a sale or just want to give a discount then you can easily do so using coupons. To create a coupon scroll down and click on the plus button next to “Create New Coupon”.
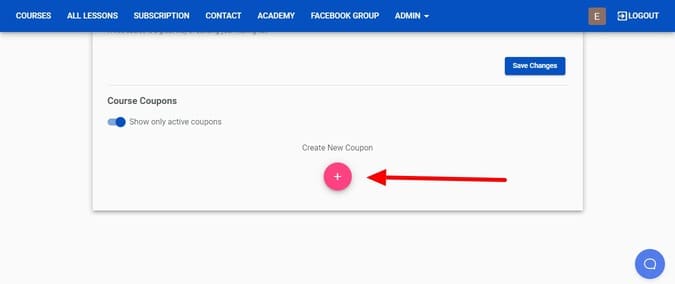
Then, enter the coupon code, discounted price, and the number of coupons available. Click on “Create Coupon”.
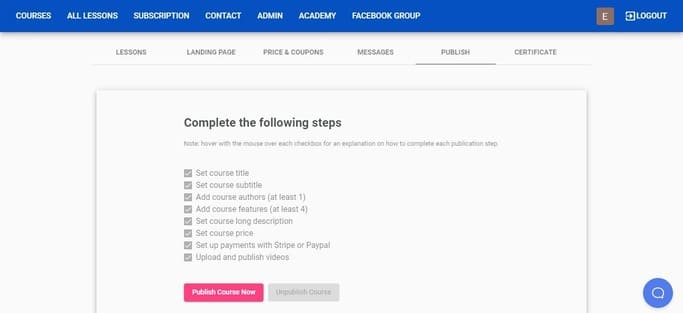
How to publish your course?
To publish your course, navigate to the “Publish” tab. Make sure all of the items in this list are checked. If not, then go back to complete it. After done, click on the “Publish course now” button.
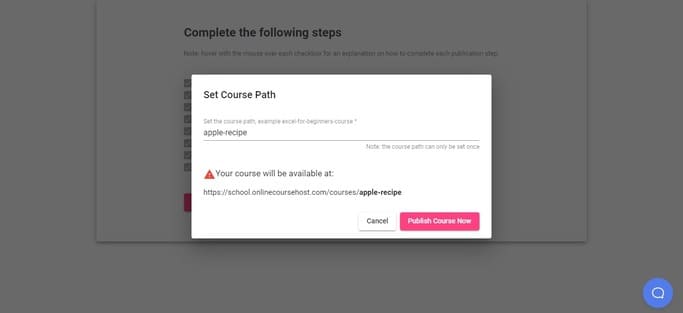
You will be asked to set a URL for this course. Type whatever you want the path to be. Click on “Publish course now”.
Well done! You’ve just published your first cooking course. Here’s how your course landing page will look live.
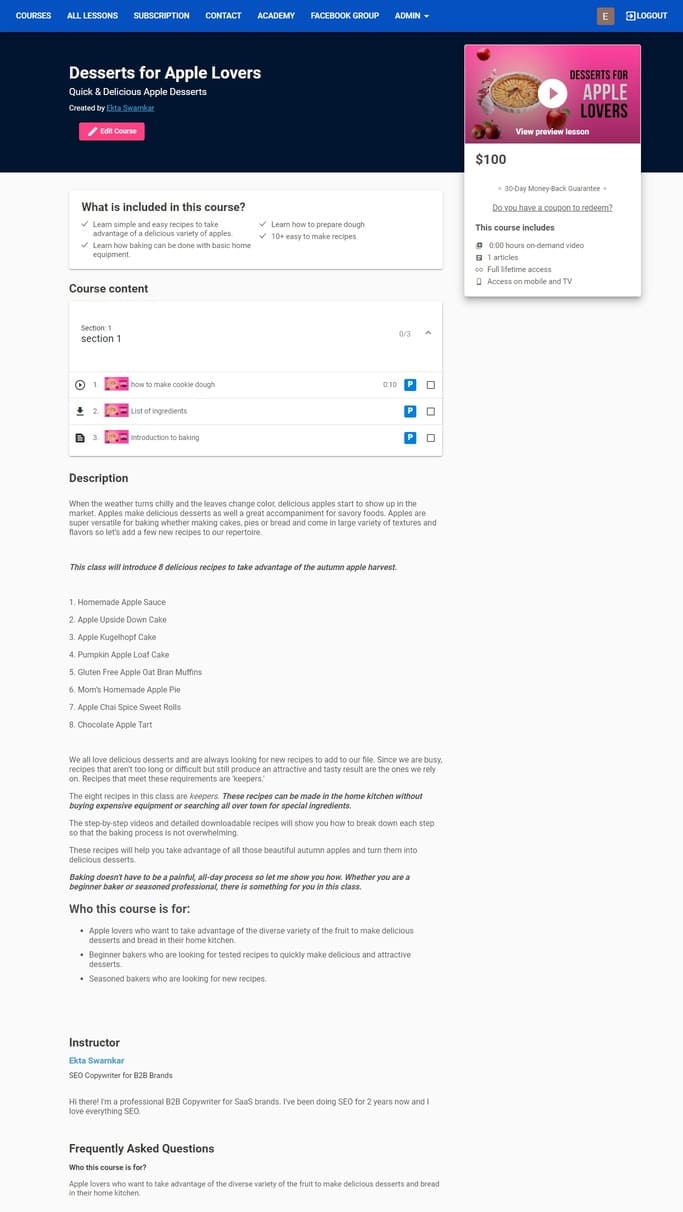
See how easy it is to launch your cooking course?
But launching a course isn't enough, you will have to market your course well to get your first few students.
STEP 7: Market your cooking course
As you already know, cooking is a competitive niche so you will not start getting student enrollments without marketing it.
Therefore, you must create a marketing plan that includes SEO, paid ads, social media, influencer collaborations, etc to promote your course to your target audience. This way, you will drive traffic to your course landing page and it will convert.
OnlineCourseHost.com has in-built marketing tools like Facebook ads and email marketing - so you can use the platform to implement parts of your strategy.
Once you get some students, ask them to give their feedback. Use this feedback to improve your course and marketing.
Conclusion: How to start an online cooking class?
So these were all of the steps you need to know how to teach cooking classes online.
As you can see, the most important part for making this work is the initial research. Identifying a viable topic and an audience that is interested in your course is crucial.
If you are new to course creation, I'm sure you still have many questions.
To help you out on your course creation journey, I created the Course Creator Academy.
Here you can find the information that you need to become a successful online course creator all in one place for free.
To get notified when new content is available at the Academy, you can subscribe here to our weekly newsletter:
If you are looking to ask any questions on online course creation, you can reach me on my Facebook group:
Join the Course Creator Academy Facebook Group
From here, I want you to follow these guides to learn more about online courses.
- Best Online Course Platforms (Ultimate Guide)
- How To Create An Online Course (In 15 Super-Practical Steps)
- How To Choose An Online Course Topic That Sells
- How To Record And Edit Your First Online Course
- Affordable Online Course Equipment - Complete Practical Guide
- 16 Proven & Easy Ways To Market Your Online Course
- The Ultimate Online Course Launch Checklist
- How To Create The Perfect Online Course Sales Page
- Create A Powerful Brand For Your Online Courses (In 5 Steps)
- How To Sell Online Courses? The Ultimate Guide
- How To Promote Your Online Course - Complete Guide
I hope you found this post helpful. Let me know in the comments below what other topics you would like me to cover.
Still not sure how to teach online cooking classes? Leave your questions below!
Thanks for reading… and enjoy the course creation process! 😉
Vasco Cavalheiro
OnlineCourseHost.com Founder & Online Course Creator
LinkedIn Facebook Page Facebook Group Twitter
You are welcome to ask me any questions in the comments below: 👇👇👇👇

 Start Here
 Course Creation Journey Step by Step
  Course Creation Software Reviews
 Online Course Marketing
 Course Creation Tips & Tricks
 Course Equipment
 Online Course Marketplaces
 Revenue Reports
 Best Practices
 Frequently Asked Questions
 Platform Reviews