


How To Create an Online Course Thumbnail with Canva (For Free)
 Platform Review

Learn how to create an online course thumbnail with Canva and other free tools. Learn some simple tips for non-designers to help you design a great-looking course thumbnail.
If you’re like many course creators I speak to, you didn’t sign up for all the marketing, sales, editing, and everything else that comes with it.
And you certainly didn’t expect so much design work.
And you never feel like you’re doing it “right”.
It’s the sort of thing you want to outsource, but maybe that’s not possible right now…
Don’t worry. I have good news for you.
I'm going to show you how to create a course thumbnail for free, using a combination of free tools, and some simple design techniques. 😉
Besides a full tutorial on how to use Canva, I will also give 6 tips for non-designers on how to create an attention-grabbing course thumbnail.
Table of contents
How To Create an Online Course Thumbnail with Canva
This magical free tool I keep talking about… Canva!
What is Canva? It’s a free online design tool that makes it super-breezy to create eye-catching designs for your website, social media, sales pages, content, marketing materials, and much more.
It gives you access to the tools and features you need (without all the overwhelming ones you don’t).
It provides you with stacks of templates, stock images, and animations to make your life easier.
It’s a great tool for designers, but more importantly… it’s designed for novices and non-designers like you and me. 😏
So assuming you are not a designer, in this post you will learn how to quickly put together a simple thumbnail using Canva, using some simple design techniques.
Step-By-Step Guide To Using Canva
What follows is a guide on how to sign up and use Canva to create an eye-catching thumbnail.
This is the guide you need to get started the “right” way 😎
Step 1: Go To Canva.com & Create a New Account
Your first step is to visit canva.com and sign up for a new account.
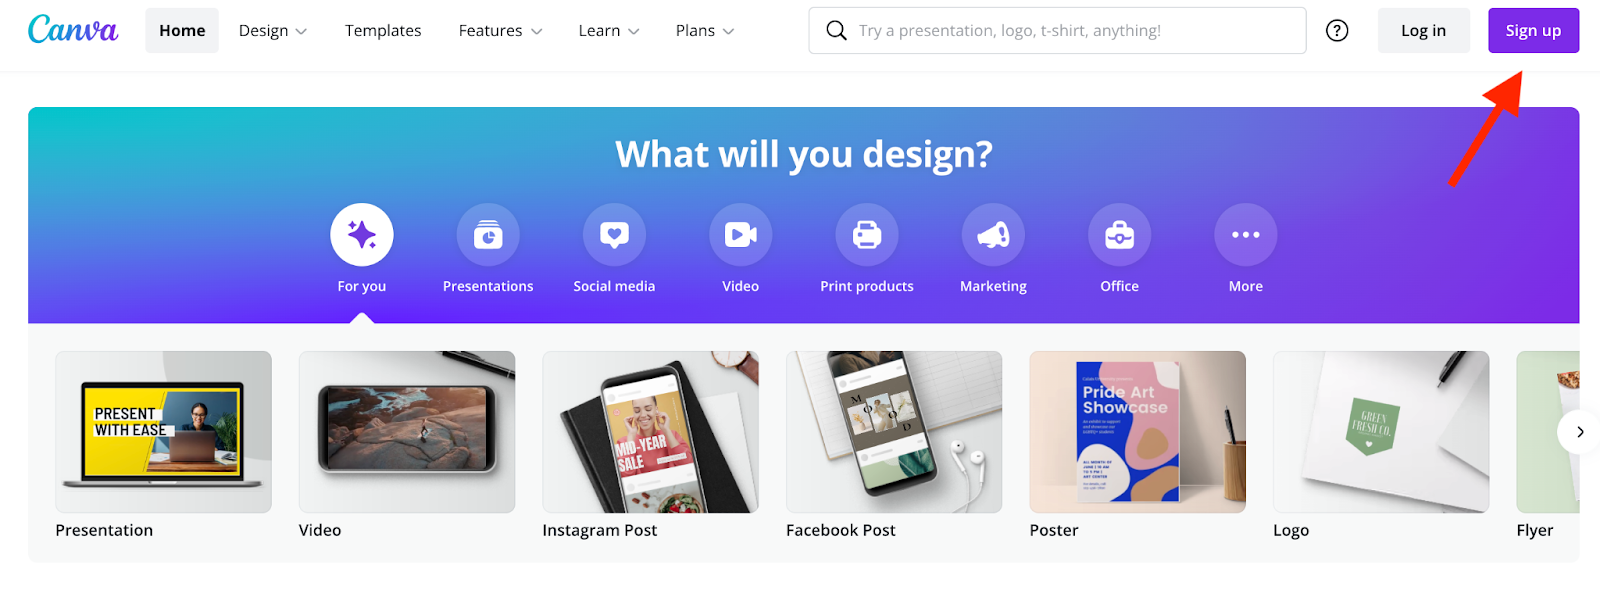
You can do so using your Google account, Facebook, or by simply adding your email.
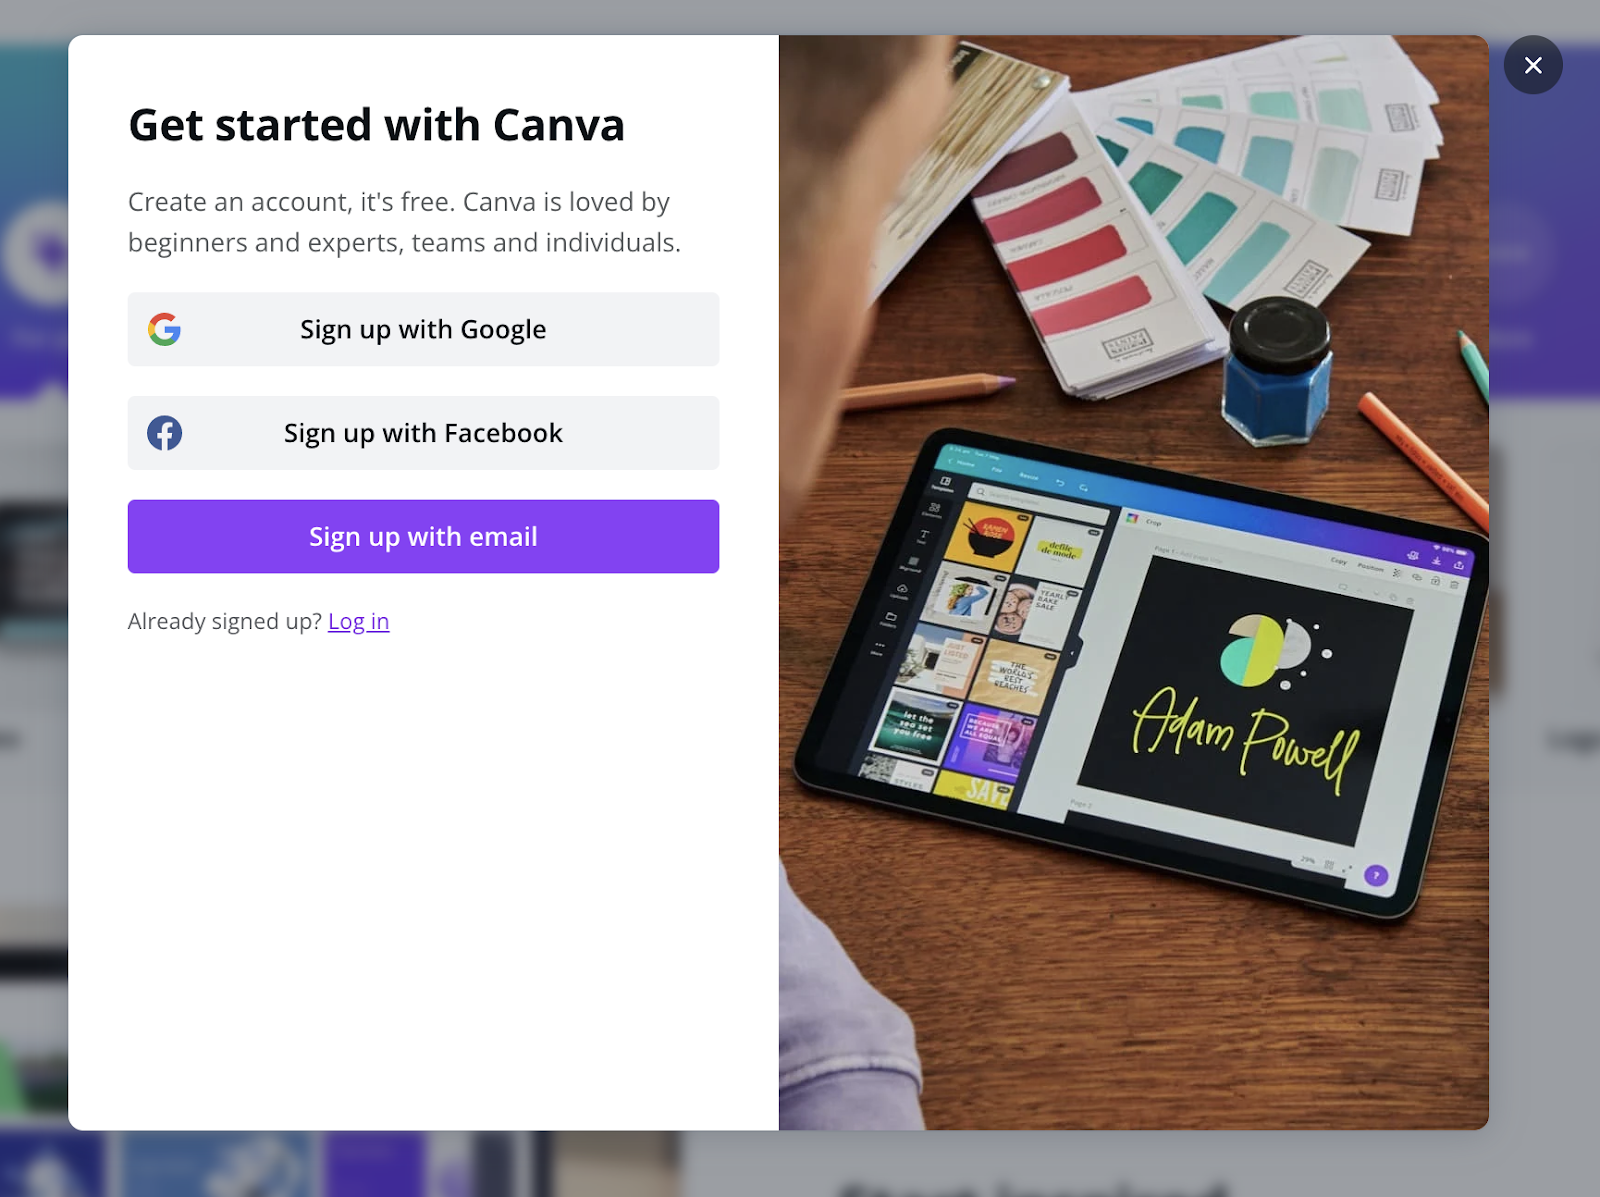
Within a few minutes, you’re sorted. Canva shares a few additional messages (and tutorials).
You can follow these if you like or skip everything until you land on your new account homepage 👇👇
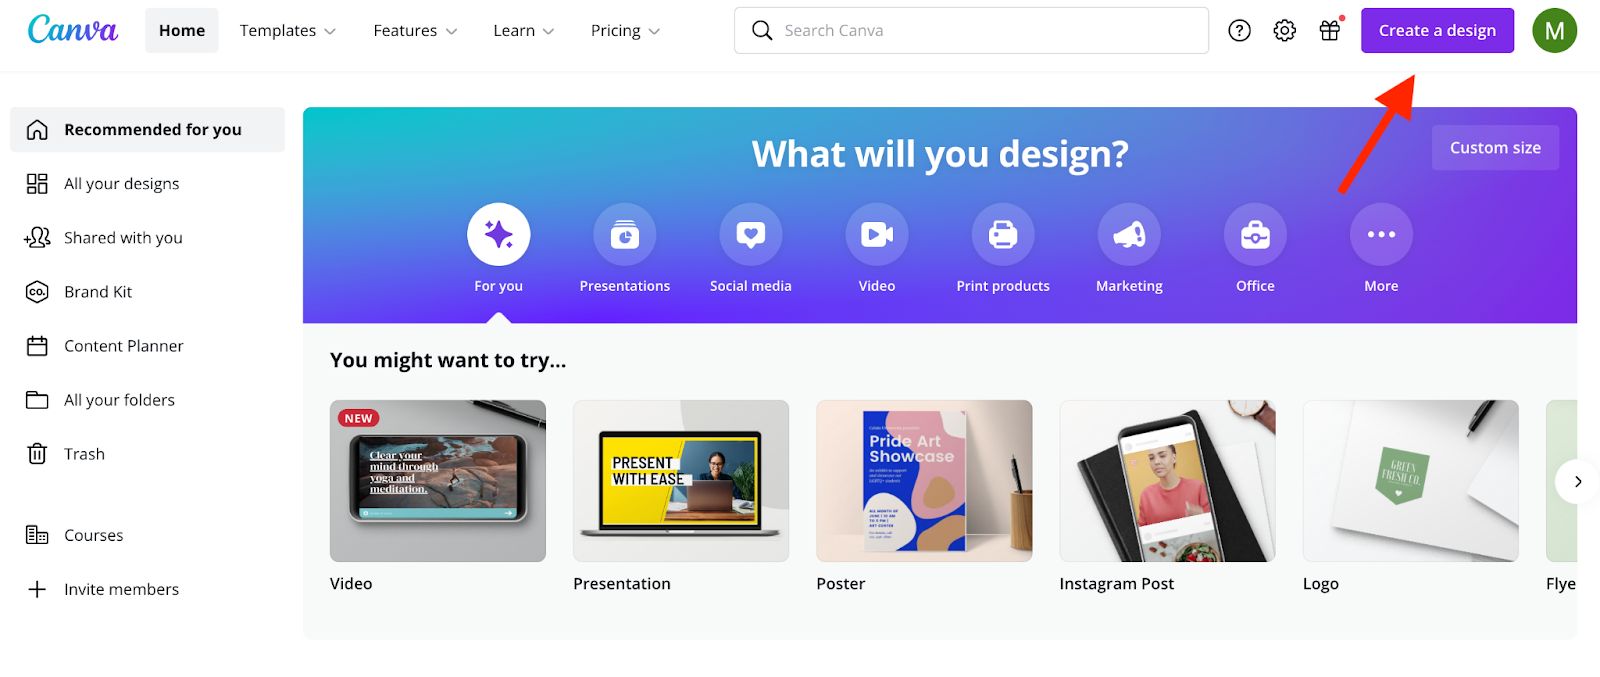
Step 2: Create Your New Banner File
Once inside, you need to create your blank canvas - situated in the top right-hand corner.
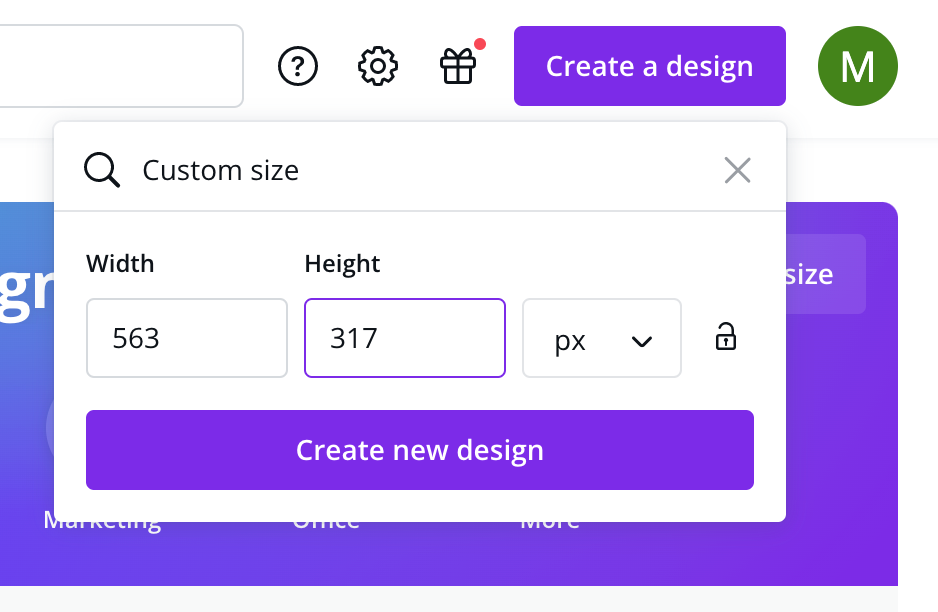
There are many existing dimensions and templates you can choose from, but the ideal size for a thumbnail (especially if you use a platform like OnlineCourseHost.com) is 563x317 px.
As such, choose the “Custom Size” option from the dropdown menu:
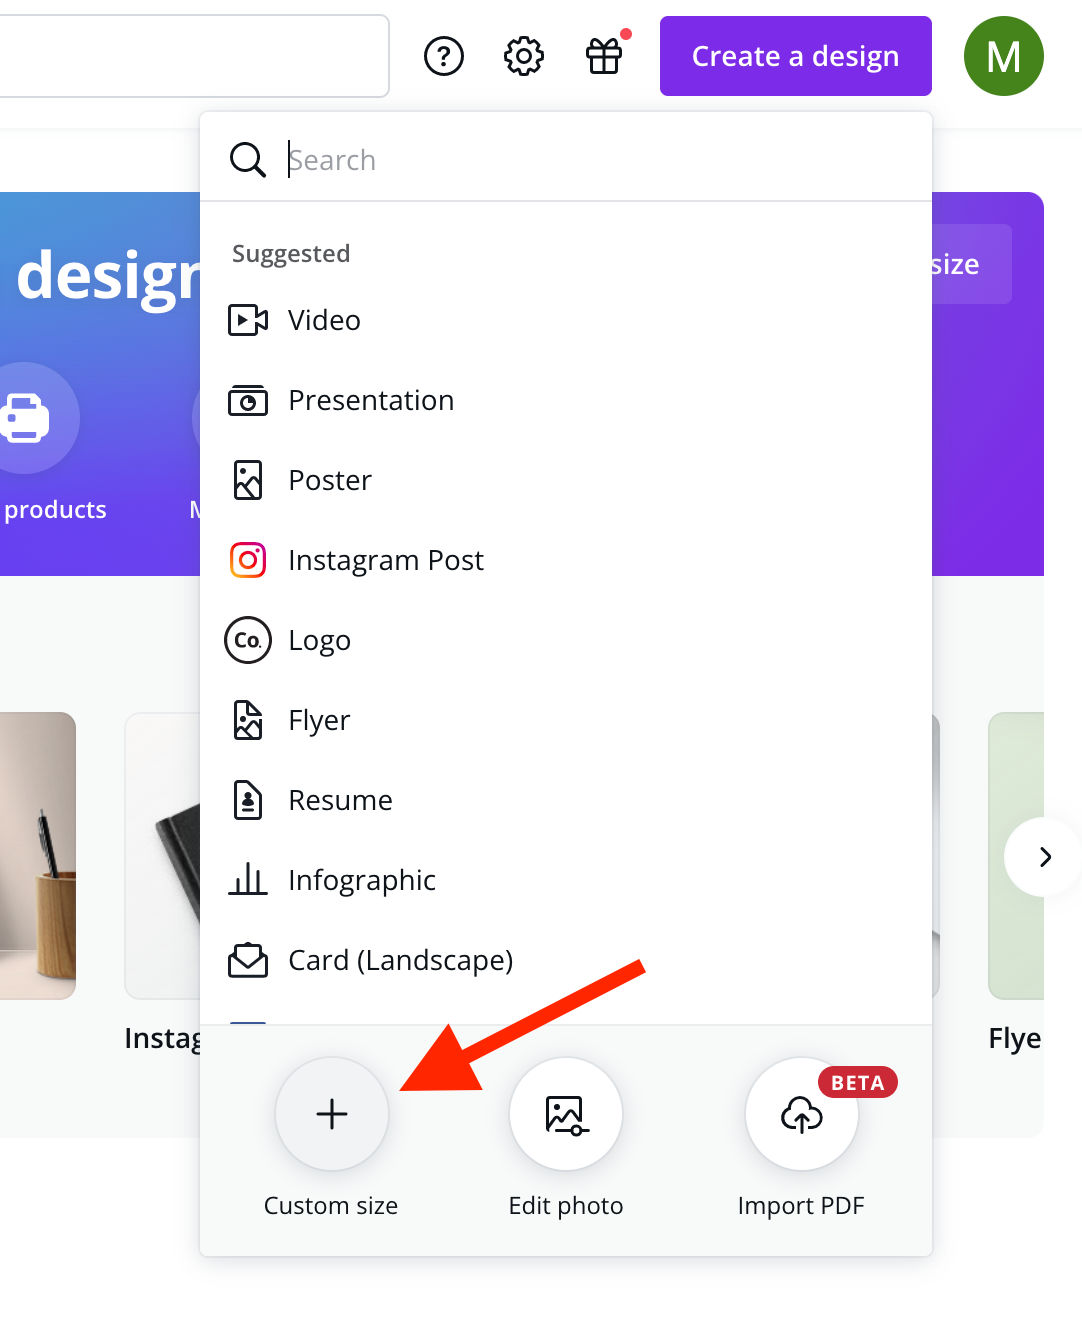
I use a custom size 563x317 px for course thumbnails. You can enter the same size and then press “create a new design”...
You’re now ready to explore Canva’s array of features and bring your design to life 🚀
Step 3: Explore The Platform
Although Canva is easy to use, I recommend you spend a few minutes exploring the platform.
The aim here isn’t to become an expert.
All you need to do is get familiar with the core features/options.
The first tab you land on is the “Templates” section...
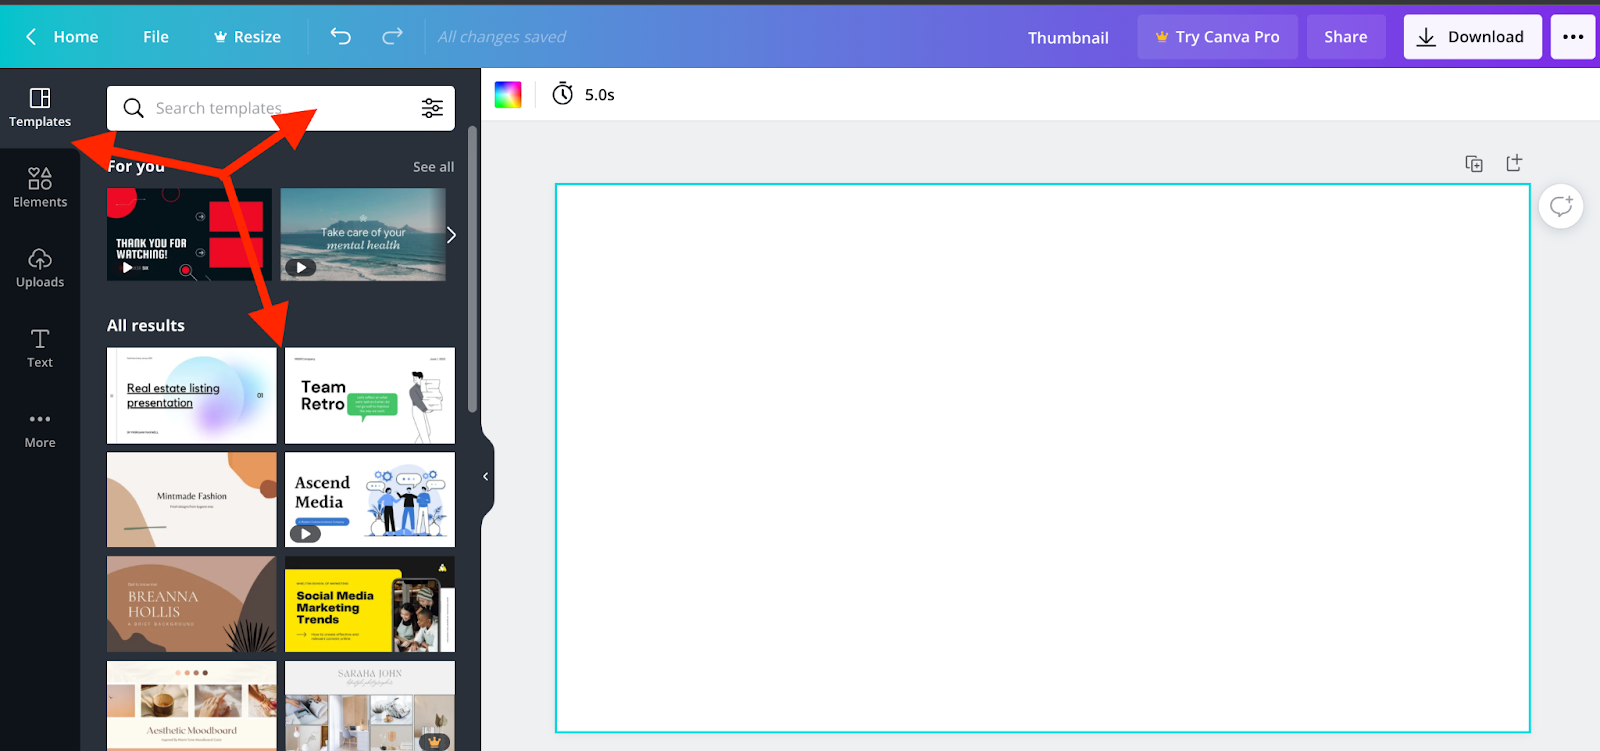
For a course creator like yourself, this page is worth your time.
There are literally hundreds of existing templates you can choose from (some paid, many free). You may or may not find a template that suits you.
Either way, it’s worth exploring.
There’s also a “Search Bar” so you can hone in on a specific idea you may have...
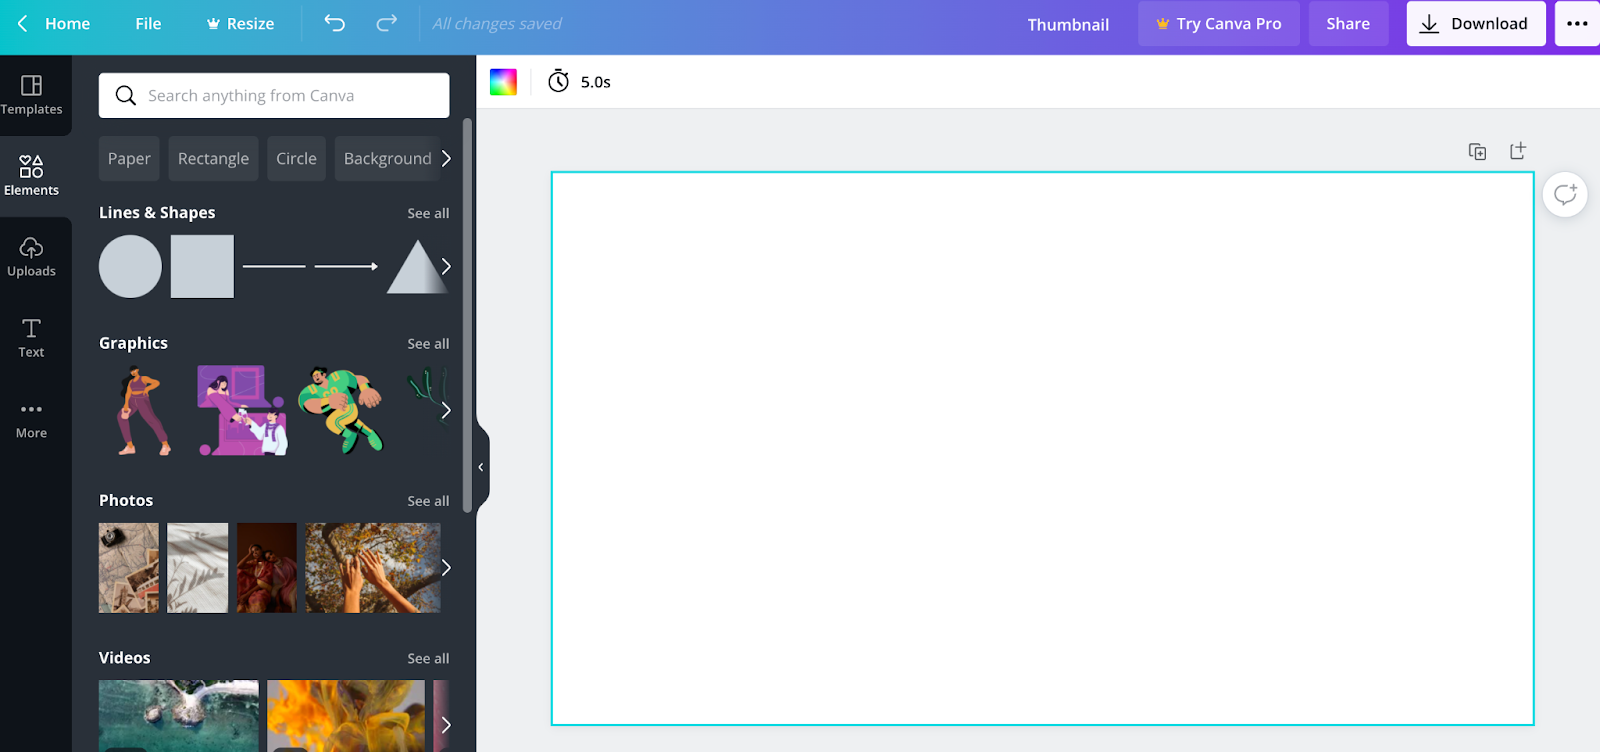
Just below the “Templates” tab is the “Elements” area… this is another page worth exploring.
Here, you’ll find shapes, icons, graphics, photos, videos, animations, and much more. Again, some of these cost money but many are free.
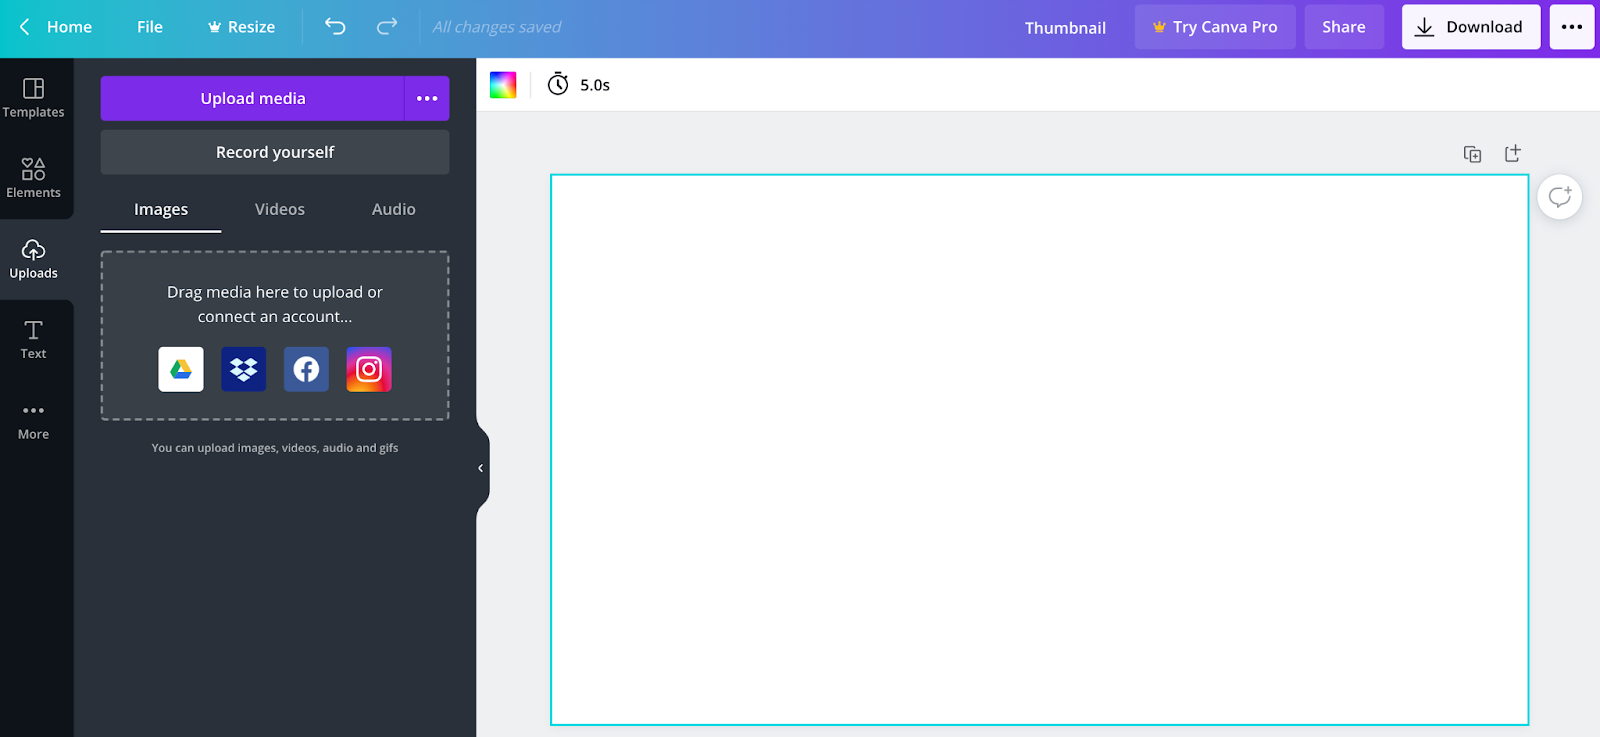
The next tab is the “Upload” one, which allows you to add any images, logos, or branding from your computer (or directly from platforms like Google Drive, Facebook, and Instagram).
Chances are you have an existing logo you’d like to add to your thumbnail or a headshot of some kind.
This is where you can upload your files, not only giving you access to them for this design but any future creation.
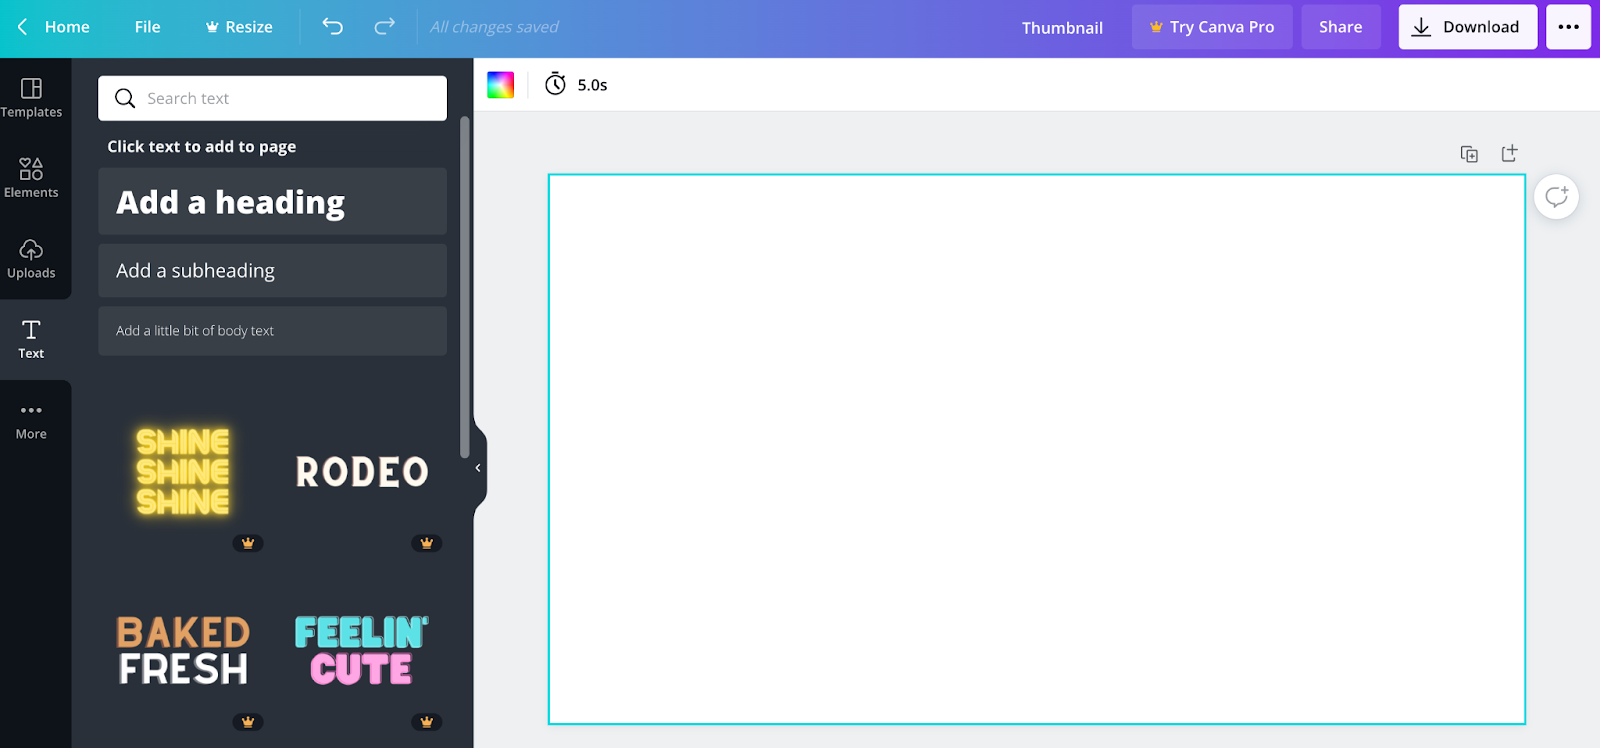
Below that is the “Text” tab, which gives you access to dozens of fonts and styles.
Step 4: Choose Your Thumbnail Background
After you’ve spent a little time getting used to the platform, you’re ready to dive in and create your thumbnail.
This starts with your background. If you find an existing template you like, much of this is taken care of.
Yet even if you can’t find the “right” template, building something from scratch is easy.
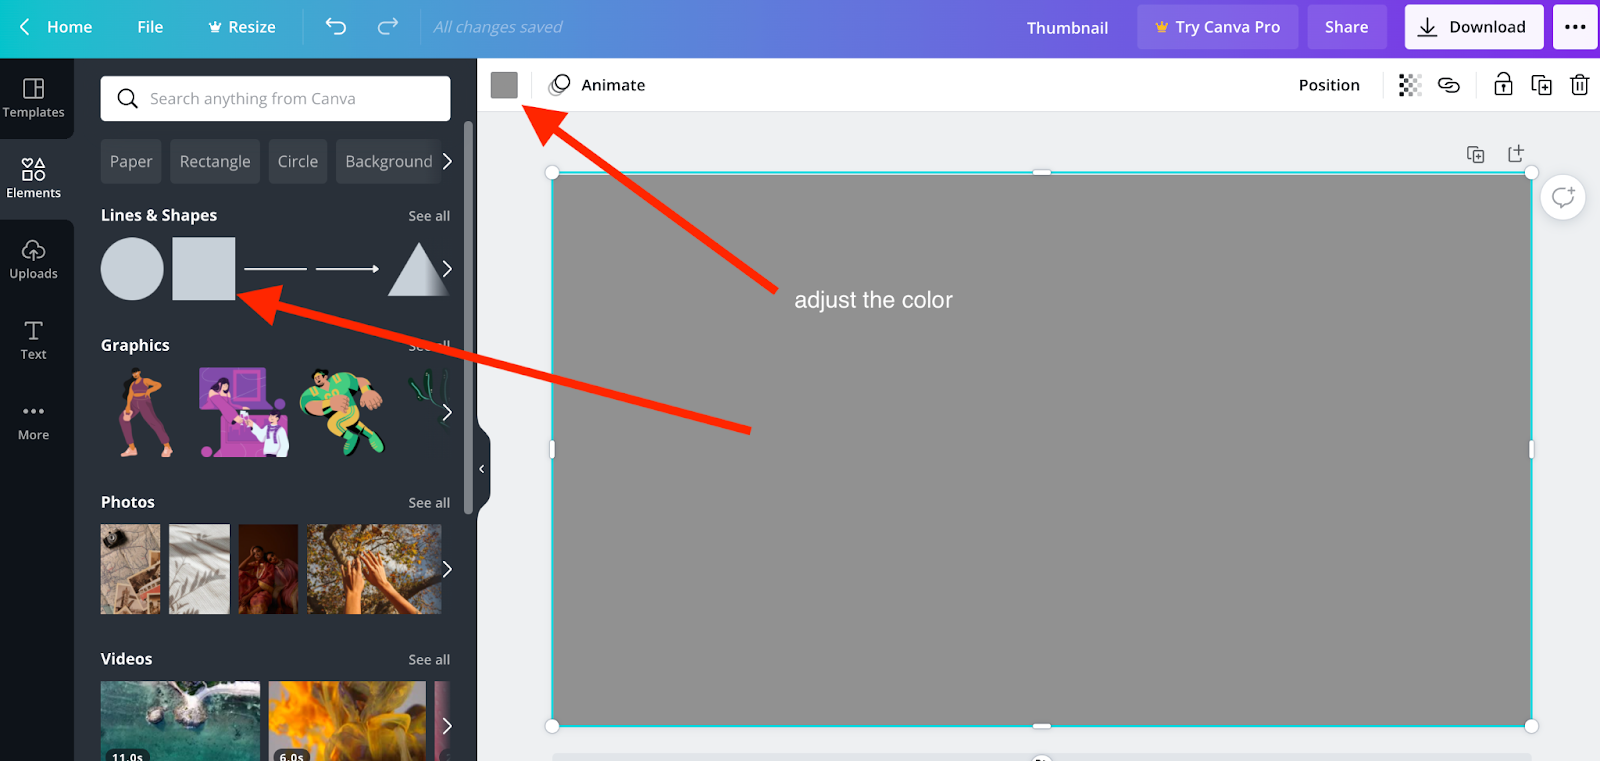
This begins by choosing a simple shape from the “Elements” tab (a square or rectangle) and then dragging it over to your canvas. From there, you can resize it and adjust the color -- even adding additional elements such as transparency or fading.
Once you hone in on the right background color, you’ll want to add a border around your thumbnail (more on this soon…).
Simply search for borders in the “Elements” tab and pick the one you like best 😎
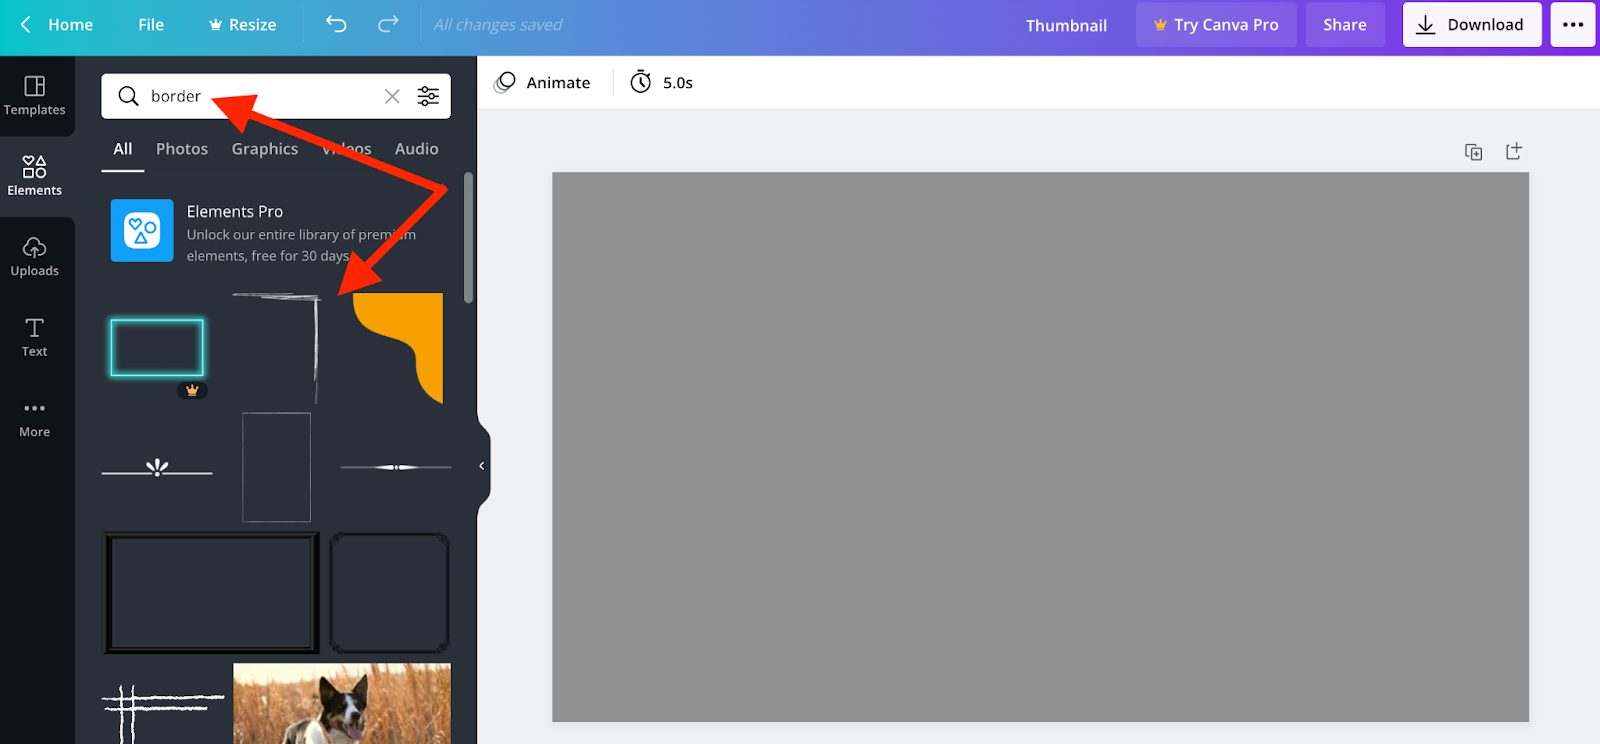
From there, you simply drag it to your canvas and resize it...

You now have a simple border that helps your thumbnail stand out and is ready for other core elements.
Step 5: Add Your Title & Sub-Title
Arguably the most important part of your thumbnail is the title (and any form of sub-title or other copy).
These words need to not only capture your audience's attention but clearly explain what your course is about, by clearly stating the major value proposition, right there on the text.
You can aid this by using a large, clear, and no-nonsense font that instantly catches their eye.
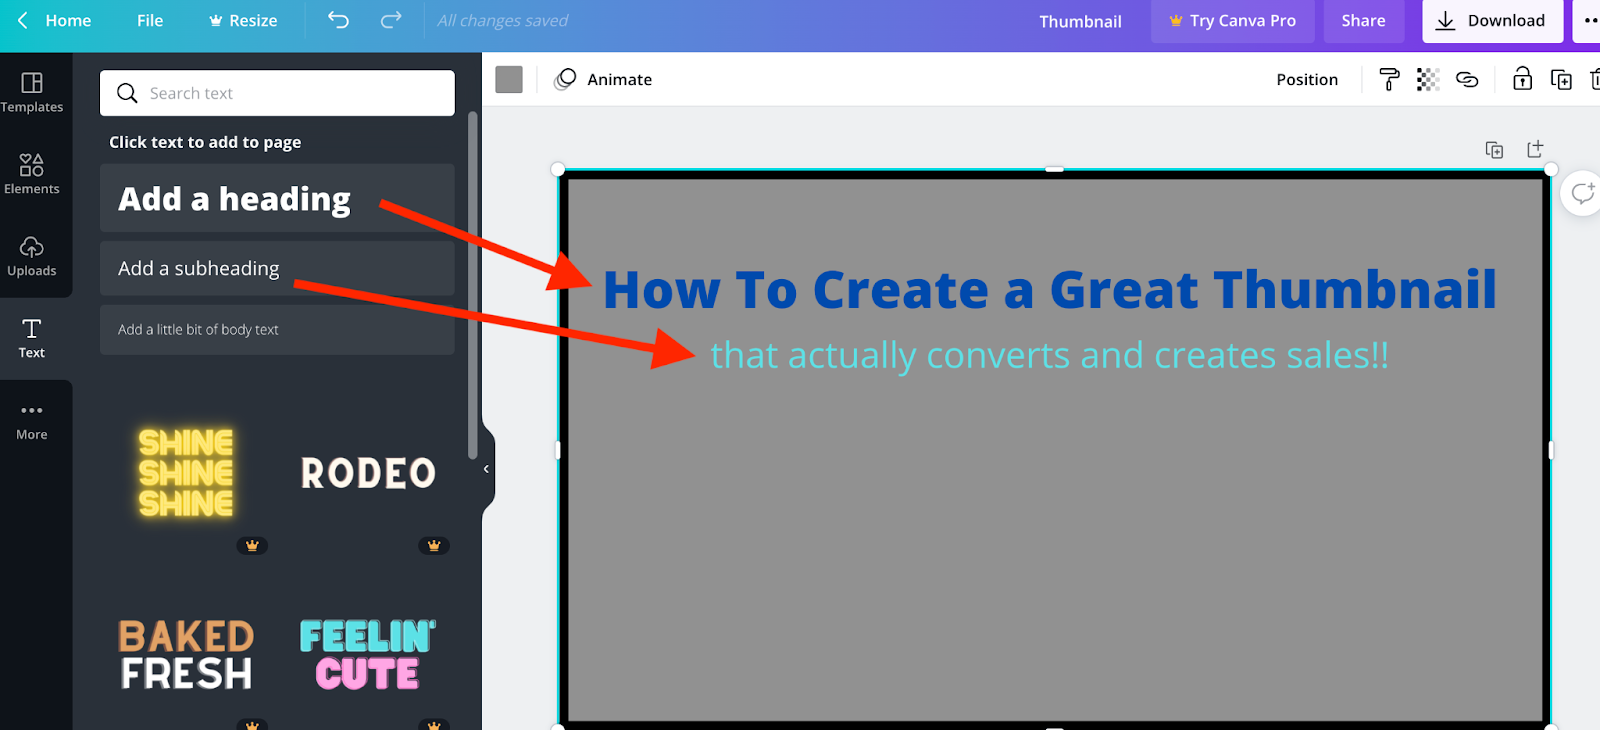
Canva makes this easy, providing a simple drag and drop Title and Sub-Title feature. You can then tweak these by adjusting aspects like:
- Font type
- Font color
- Font style (bold, italic, etc…)
- Size
- Alignment
- and much more...

And again, Canva provides countless font templates you can use that designers around the world have created from scratch.
Some paid for, many free and ready for you to use.
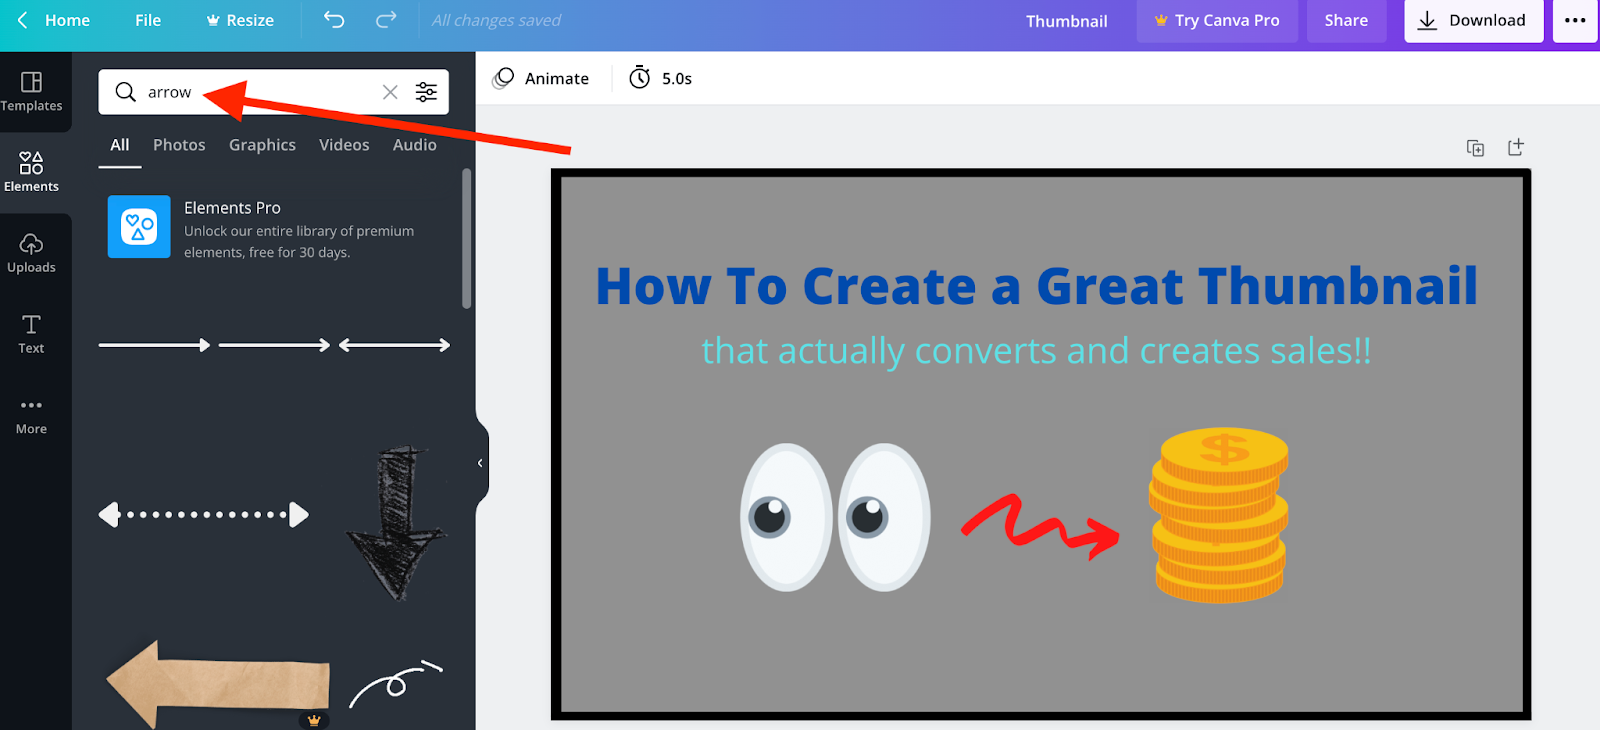
Step 6: Add Graphics, Icons & Style
Once you’ve added words, you then need to bring other eye-catching elements to the table:
- Logo
- Headshot
- Icons
- Graphics
- etc...

Your best place for this is to search the “Elements” tab for visuals that help bring your words to life. These visuals not only have to stand out and capture attention but share the same story as your words.
Attention fades quickly online.
You have seconds to capture and keep it.
Standing out is important. But sharing a clear and obvious message, more so.
Step 7: Save, Publish & Download Your Thumbnail
Once you’ve crafted your thumbnail, you’re ready to save, publish, and/or download it.
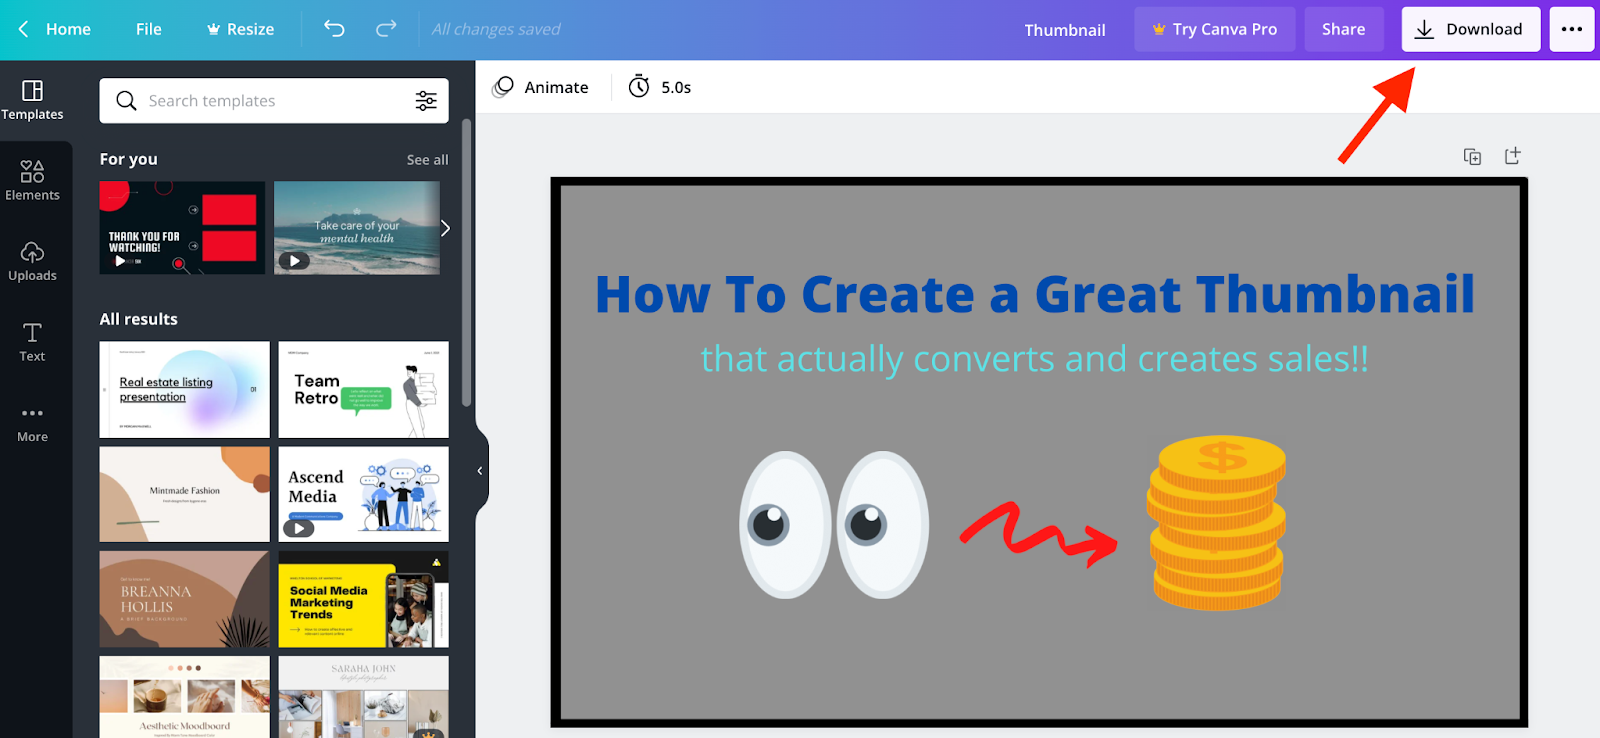
In the top right-hand corner, you’ll find the “download” button.
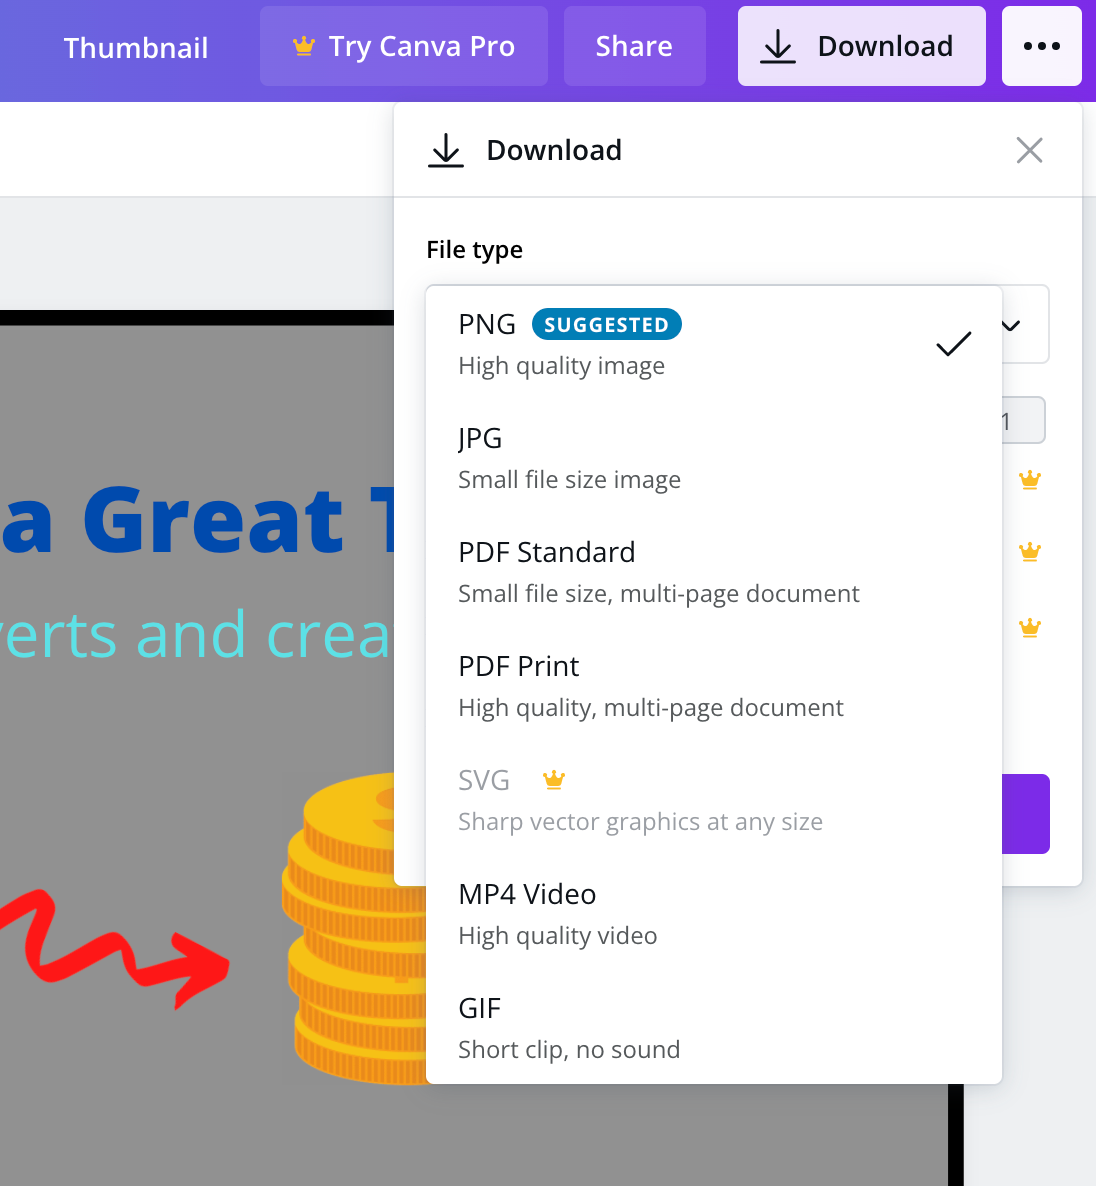
Press it and choose the type of file you need (in most cases, PNG or JPG).
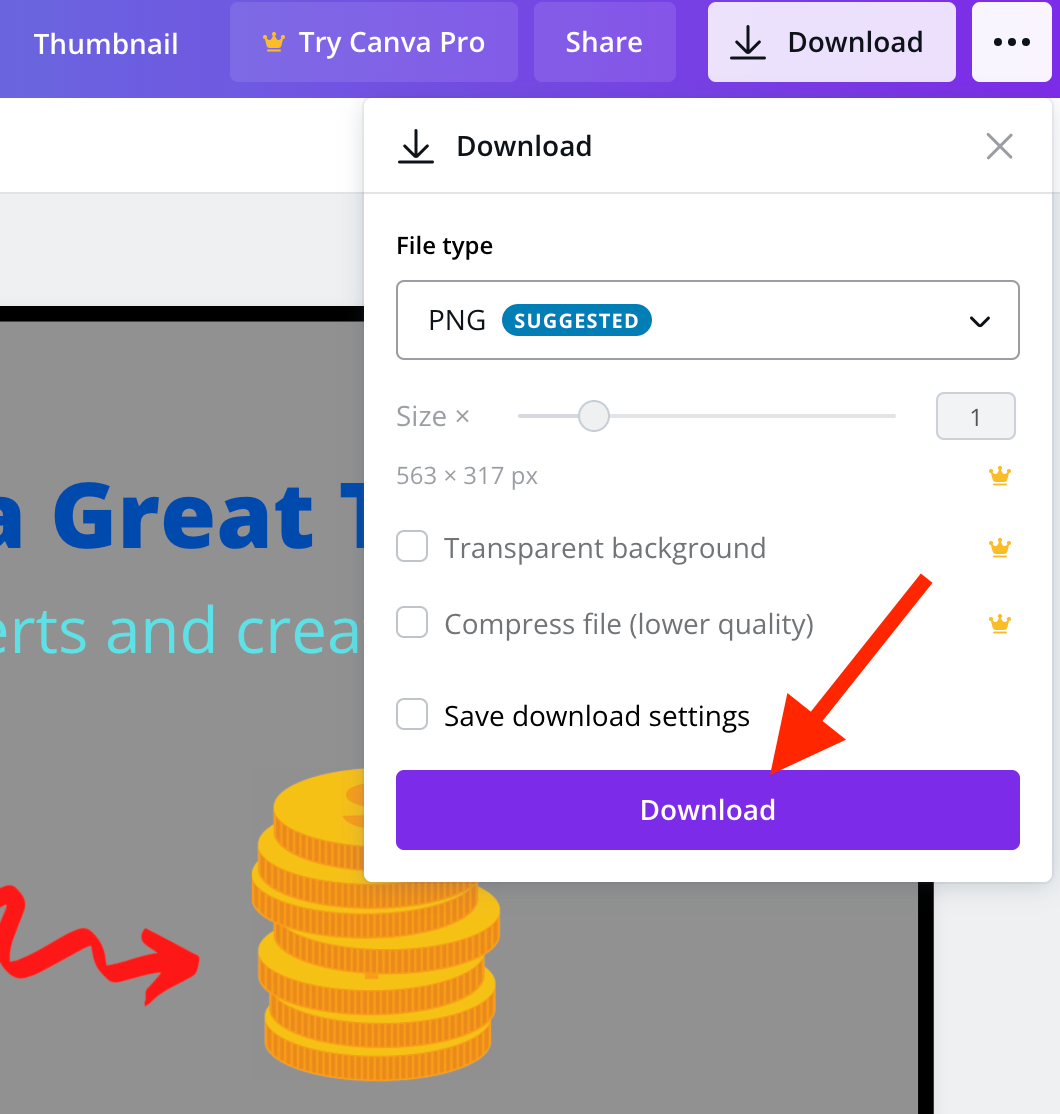
Have one final check to make sure you’re happy and then press the “Download” button.
Within a few seconds, your new thumbnail appears on your laptop 😎
In general, this is all you need to create an eye-catching thumbnail for your course.
A tool like Canva makes all this easy, and after a few iterations, you’ll know the platform like the back of your hand.
6 Tips on Creating an Attention-Grabbing Thumbnail
You now know how to use Canva to create an eye-catching thumbnail, and yet the tool only plays tells part of the story.
There are other aspects to consider, and I’ve learned some important lessons on my journey.
These include:
1: Add a Border To Your Thumbnail
A mistake I see many course creators make (and I’ve done this myself) is to create a great-looking thumbnail on a background that matches the same one as your sales page (white on white, for instance).
This ruins all your hard work.
A simple way around this is to place a border around your thumbnail.
Stick with a strong color like black, dark blue, or rich red.
Of course, this does depend on your page’s background color...
2: Use Contrasting Colors
Although it’s important to utilize colors that align with your brand, it’s also vital to think about how your thumbnail appears on the screen.
Too much of one color prevents it from standing out. Too many similar shades stop your design from “popping”.
Use colors that contrast one another.
- Bright blue and dark red…
- Dark blue and light yellow…
- Vibrant green and a deep purple…
Experiment with different colors. Study other course creators (and designers).
3: Add an Image of YOU
This tip comes with a giant “it depends”...
If you are the face of your brand and your audience associates you with your work, it makes sense to add your image to your course’s thumbnail.
If not, this tip may not be for you.
However… if that’s the case, you need to ask why!
If you want to build a career out of this, you need to get yourself front and center.
Your headshot can play a vital role in trust and rapport. Your students buy into you and what you share.
As such, place your face on their screen. 😎
4: Use Large, Clear Fonts
The larger your font (within reason), the better. Sometimes you need to add smaller text (such as a sub-title). Yet we often use this as an excuse to put too much on the page.
Less is more.
Keep your text large and clear.
Speaking of clear… the font you use matters!
You can ruin all your hard work with a “pretty” font that’s hard to read. I’m talking about Comic Sans, Copperplate Gothic, Trajan Pro, Jokerman, and anything with too many swirls or curls.
Keep it simple. Stick with proven, clear fonts like:
- Didot
- Bodoni
- Clarendon
- Gill Sans
- Garamond
- Futura
- Helvetica
- Baskerville
- Clarendon
- Gill Sans
- Verdana
- Uni Sans
Using a fancy font may seem like a unique and clever thing to do. It’s not 😏
5: Keep It Simple
Following on from above… simple is key when designing an eye-catching thumbnail.
You’re not a designer. Keep this in mind. A simple, clear design is the one you need. Trying to do too much is a dangerous path to venture down. If you want that, hire someone that knows what they’re doing.
When creating your own designs… keep it simple!
6: If In Doubt, Outsource
Finally, consider outsourcing (especially important tasks like your thumbnail). It often forms your audiences’ first impression.
As such, you may not be the person to create your thumbnail.
If you have the resources to do so, outsource, outsource, outsource. 😉
If not… well, you now know how to design a great one using Canva.
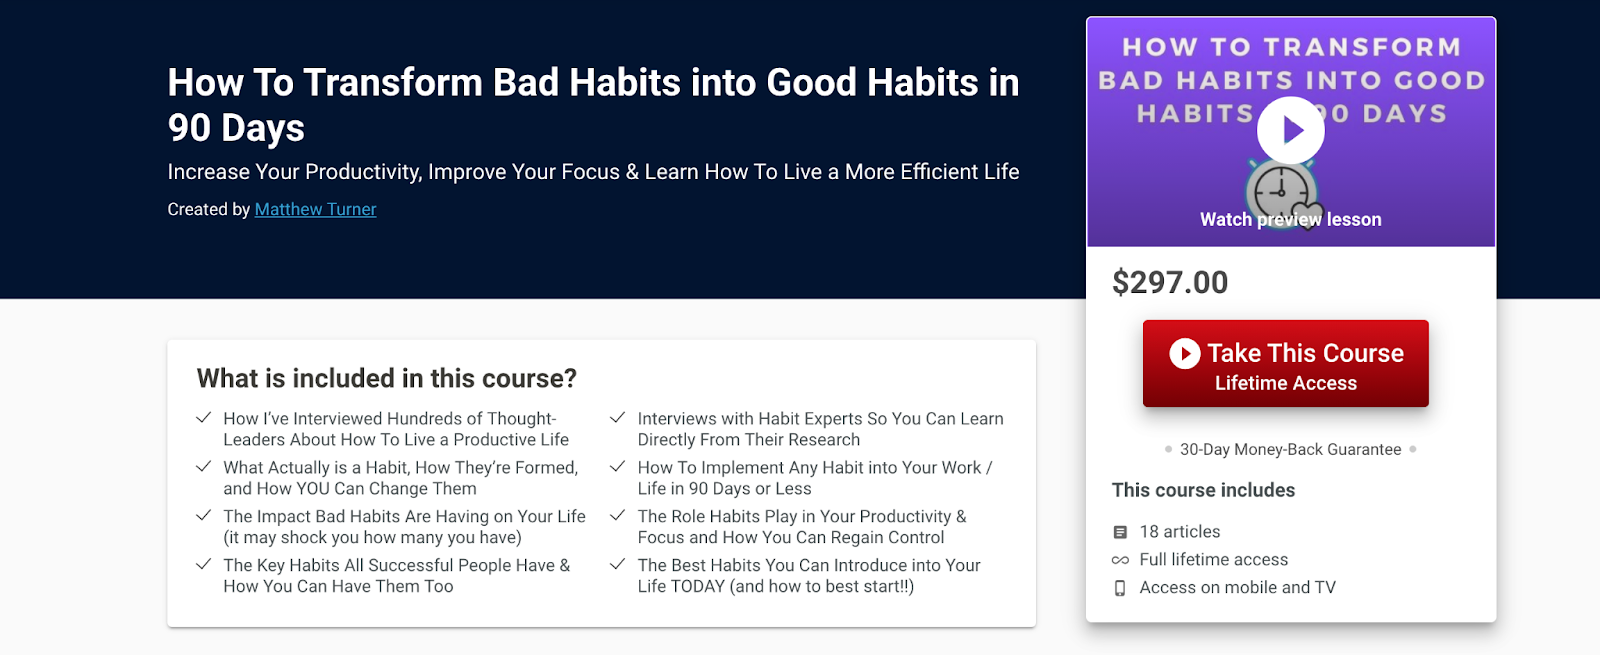
The end result can be game-changing, especially when you place it on a platform like OnlineCourseHost.com that’s designed to give your course the best possible first impression:
And here is another example:
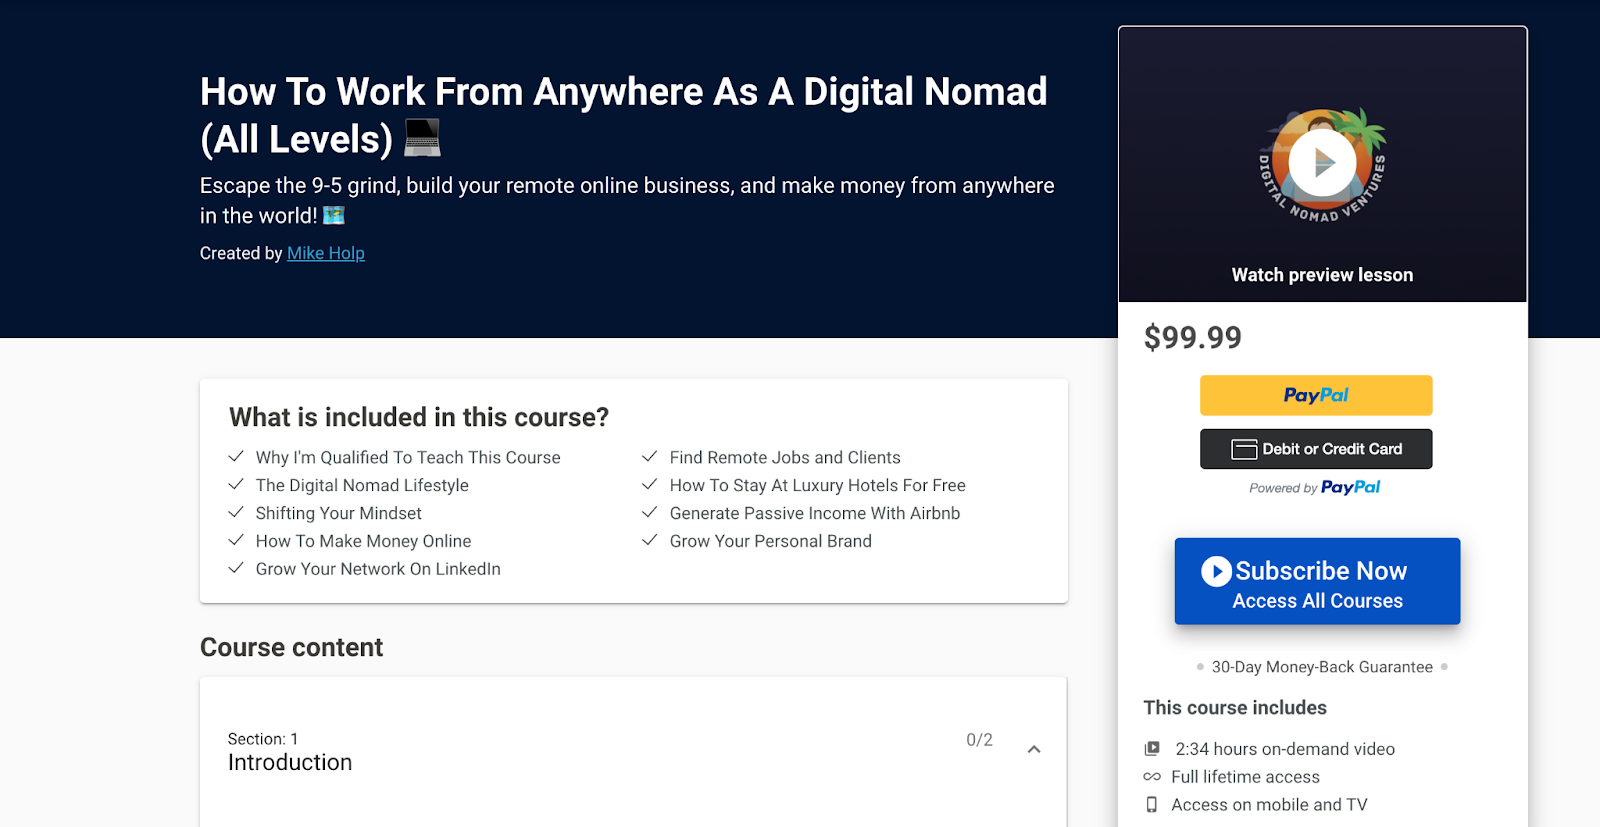
These are just a few examples of what your end result can look like.
They stand out for the right reasons and set you apart from your competition. In today’s busy and competitive world, it can make all the difference 🚀
Other Free Tools To Make You Look Like a Designer Even If You Aren’t One
Canva is what I’ve personally used over the years and continue to do so (when I don’t outsource).
It’s what I recommend to most of my students, as it provides access to almost everything you need.
However… there are a few other free tools that help take your designs from good to great.
Pixabay
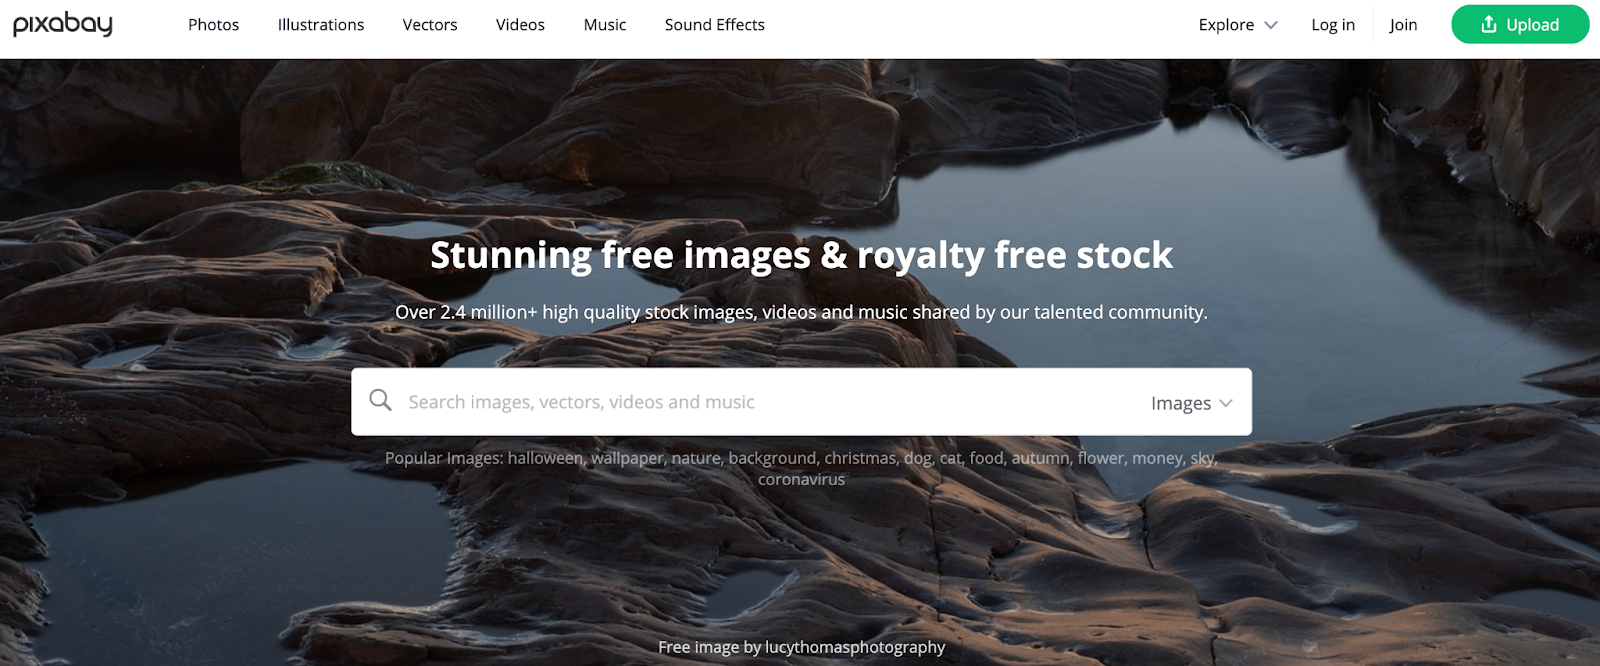
Pixabay is a site worth bookmarking as it gives you access to millions of free images, videos, and music.
Although Canva does this too, it doesn’t always have what you need.
When this is the case, Pixabay is worth visiting 😎
Unsplash
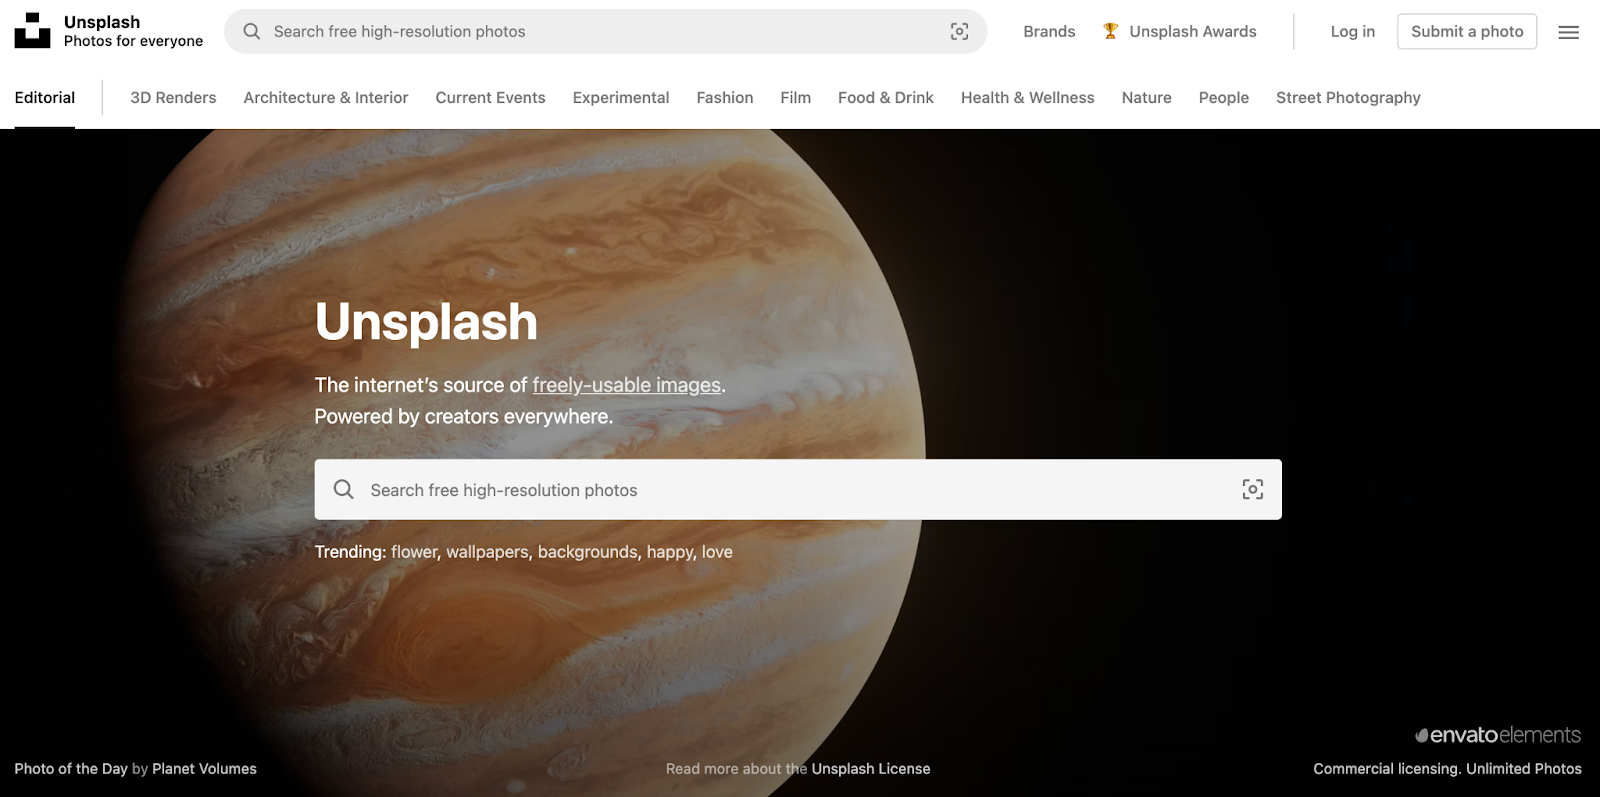
An alternative to Pixaby is Unsplash, which once more gives you access to an almost endless amount of images and videos.
Between these two tools, you’re covered!
Fiverr
Fiverr isn’t a free tool, but rather a platform that gives you access to thousands of affordable, up-and-coming, talented designers - covering every niche and industry you can imagine.
To learn more about how to affordably outsource (and which tasks you should), read these guides:
- Best Online Course Platforms (Ultimate Guide)
- How to Hire an Online Course Team (Video Editor, Assistant, Designer)
- Affordable Online Course Equipment - Complete Guide
- How Long Does It Really Take To Create an Online Course?
- How Much Does It Really Cost To Create an Online Course?
Conclusions and Next Steps
As you can see, it's possible to create a simple thumbnail even if you are not a designer, if you use Canva and combine it with some simple design techniques.
Using some text in the thumbnail makes the design process a bit more approachable to non-designers, and helps convey the course value proposition right there on the thumbnail.
But if you are not a designer, the result will always be less appealing than if you hire a professional, and you can get a thumbnail done for $10 to $20 on Fiverr, so I think it's well worth it.
Personally, I outsource all the design of my thumbnails, and only use Canva for designing my social media posts.
But if you are on a budget and you need to do the thumbnail yourself, now you know how. 😉
If you enjoyed this post, and are looking to learn more about course creation, I recommend checking all the free resources that you have available at the Online Course Creator Academy, no sign-up is needed:
Welcome To The Course Creator Academy
Remember, the goal of the Creator Academy is to give you (for free) all the resources that you need to become a successful online course creator.
But more than reading the guides you need, my number one recommendation that will spare you so much wasted time and money, is to get feedback from other course creators all through your course creation journey.
For that, I invite to join our free community of like-minded course creators, and ask any questions that you need.
You can post your courses here and we will provide feedback on them, post your blog or youTube channel to get suggestions for improvements, and even ask help for creating relevant ads, etc.
So come and join us at our free private Facebook Group:
Join the Course Creator Academy Facebook Group
If you would like to get notified when other guides and useful content on online course creation is available at the Academy, then you can join us here:
I hope you found this post helpful, let me know in the comments below what other topics you would like me to cover, or any questions that you have?
Thanks for reading… and enjoy the course creation process! 😉
Vasco Cavalheiro
OnlineCourseHost.com Founder & Online Course Creator
LinkedIn Facebook Page Facebook Group Twitter
You are welcome to ask me any questions in the comments below: 👇👇👇👇

 Start Here
 Course Creation Journey Step by Step
  Course Creation Software Reviews
 Online Course Marketing
 Course Creation Tips & Tricks
 Course Equipment
 Online Course Marketplaces
 Revenue Reports
 Best Practices
 Frequently Asked Questions
 Platform Reviews